


Dome Den
WHAT WILL YOU MAKE?
Have hours of fun playing outdoors or just relax and hide away in this special dome-shaped den. Once you’ve built your den, you can be as creative as you like when you decorate it. Paint the tiles in bold colors to make striking patterns, or even turn your den into a space base, woodland hideout, or igloo!
WHAT WILL YOU LEARN?
You will learn to measure & cut angled cardboard pieces to assemble into a standing dome structure
STEPS
STEP 1
STEP 3
STEP 4
STEP 5
STEP 6
STEP 7
STEP 8
STEP 9
STEP 10
STEP 11
STEP 12
STEP 13
STEP 14
STEP 15
STEP 16
STEP 17
STEP 18
STEP 19
STEP 20
WHAT'S HAPPENING HERE?
The American Institute of Architects calls the geodesic dome “the strongest, lightest and most efficient means of enclosing space known to man.” Geodesic Domes are composed of inter-connected triangles that give them unparalleled strength.
WHAT'S NEXT?
Add fairy lights to the roof of your den to make a starry ceiling, or turn your den into a space base, tortoise, woodland hideout, or igloo!


1.) Use a sharp pencil to pierce holes through all the triangular roof tiles of your dome.
2.) Take a string of battery-powered fairy lights, and push a light through each of the holes in the roof.
3.) Turn the fairy lights on, and the roof of your dome will be filled with twinkling stars!
Space base

Paint your dome gray, then decorate the roof with futuristic designs. Add a satellite and antenna to your space base.
Tortoise

First, paint the dome brown for the shell. Then make the head and legs and tape them to the tabs.
Woodland hideout

Decorate your dome in a green and brown camouflage pattern. Add twigs and leaves for a woodland look!
Igloo
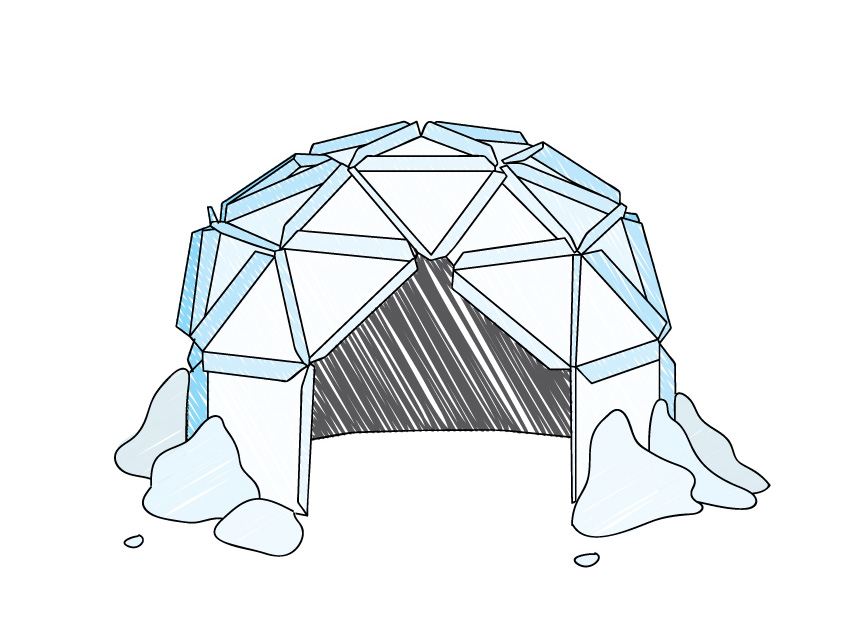
Paint the dome in icy blue and white colors. Then stick iceberg-shaped pieces of cardboard to the outside wall.
Materials:
- Cardboard sheets
- Ruler
- Scissors
- Pencil
- Strong Tape
- Paints
- Paintbrushes

Please Note
Your safety is your own responsibility, including proper use of equipment and safety gear, and determining whether you have adequate skill and experience. Power tools, electricity, and other resources used for these projects are dangerous, unless used properly and with adequate precautions, including safety gear and adult supervision. Some illustrative photos do not depict safety precautions or equipment, in order to show the project steps more clearly. Use of the instructions and suggestions found in Maker Camp is at your own risk. Make Community, LLC, disclaims all responsibility for any resulting damage, injury, or expense.
Maker Camp Project Standards
Based on NGSS (Next Generation Science Standards)
National Core Arts Standards
The National Core Arts Standards are a process that guides educators in providing a unified quality arts education for students in Pre-K through high school. These standards provide goals for Dance, Media Arts, Music, Theatre, and Visual Arts with cross-cutting anchors in Creating, Performing, Responding, and Connecting through art. The Anchor Standards include:- Generate and conceptualize artistic ideas and work.
- Organize and develop artistic ideas and work.
- Refine and complete artistic work.
- Select, analyze, and interpret artistic work for presentation.
- Develop and refine artistic techniques and work for presentation.
- Convey meaning through the presentation of artistic work.
- Perceive and analyze artistic work.
- Interpret intent and meaning in artistic work.
- Apply criteria to evaluate artistic work.
- Synthesize and relate knowledge and personal experiences to make art.
- Relate artistic ideas and works with societal, cultural, and historical context to deepen understanding.
CCSS (Common Core State Standards)
The Common Core is a set of high-quality academic standards in mathematics and English language arts/literacy (ELA).Measurement & Data
- Grades K-2
- CCSS.MATH.CONTENT.K.MD.A.1 Describe measurable attributes of objects, such as length or weight. Describe several measurable attributes of a single object.
- CCSS.MATH.CONTENT.1.MD.A.1 Order three objects by length; compare the lengths of two objects indirectly by using a third object.
- CCSS.MATH.CONTENT.1.MD.A.2 Express the length of an object as a whole number of length units, by laying multiple copies of a shorter object (the length unit) end to end; understand that the length measurement of an object is the number of same-size length units that span it with no gaps or overlaps.
- CCSS.MATH.CONTENT.2.MD.A.1 Measure the length of an object by selecting and using appropriate tools such as rulers, yardsticks, meter sticks, and measuring tapes.
- CCSS.MATH.CONTENT.2.MD.A.2 Measure the length of an object twice, using length units of different lengths for the two measurements; describe how the two measurements relate to the size of the unit chosen.
- CCSS.MATH.CONTENT.2.MD.A.3 Estimate lengths using units of inches, feet, centimeters, and meters.
- CCSS.MATH.CONTENT.2.MD.A.4 Measure to determine how much longer one object is than another, expressing the length difference in terms of a standard length unit.
- Grades 3-5
- CCSS.MATH.CONTENT.3.MD.B.3 Draw a scaled picture graph and a scaled bar graph to represent a data set with several categories. Solve one- and two-step "how many more" and "how many less" problems using information presented in scaled bar graphs.
- CCSS.MATH.CONTENT.4.MD.A.1 Know relative sizes of measurement units within one system of units including km, m, cm; kg, g; lb, oz.; l, ml; hr, min, sec. Within a single system of measurement, express measurements in a larger unit in terms of a smaller unit.
- CCSS.MATH.CONTENT.4.MD.C.5 Recognize angles as geometric shapes that are formed wherever two rays share a common endpoint, and understand concepts of angle measurement.
- CCSS.MATH.CONTENT.5.MD.A.1 Convert among different-sized standard measurement units within a given measurement system (e.g., convert 5 cm to 0.05 m), and use these conversions in solving multi-step, real world problems.
- CCSS.MATH.CONTENT.5.MD.C.3 Recognize volume as an attribute of solid figures and understand concepts of volume measurement.
Ratios & Proportional Relationships
- Middle School
- CCSS.MATH.CONTENT.6.RP.A.1 Understand the concept of a ratio and use ratio language to describe a ratio relationship between two quantities.
- CCSS.MATH.CONTENT.6.RP.A.3 Use ratio and rate reasoning to solve real-world and mathematical problems, e.g., by reasoning about tables of equivalent ratios, tape diagrams, double number line diagrams, or equations.
- CCSS.MATH.CONTENT.7.RP.A.1 Compute unit rates associated with ratios of fractions, including ratios of lengths, areas and other quantities measured in like or different units.
- CCSS.MATH.CONTENT.7.RP.A.2 Recognize and represent proportional relationships between quantities.
CCSS (Common Core State Standards)
The Common Core is a set of high-quality academic standards in mathematics and English language arts/literacy (ELA).Geometry
- Grades K-2
- CCSS.MATH.CONTENT.K.G.A.1 Describe objects in the environment using names of shapes, and describe the relative positions of these objects using terms such as above, below, beside, in front of, behind, and next to.
- CCSS.MATH.CONTENT.K.G.A.2 Correctly name shapes regardless of their orientations or overall size.
- CCSS.MATH.CONTENT.K.G.A.3 Identify shapes as two-dimensional (lying in a plane, "flat") or three-dimensional ("solid").
- CCSS.MATH.CONTENT.K.G.B.5 Model shapes in the world by building shapes from components (e.g., sticks and clay balls) and drawing shapes.
- CCSS.MATH.CONTENT.K.G.B.6 Compose simple shapes to form larger shapes.
- CCSS.MATH.CONTENT.1.G.A.1 Distinguish between defining attributes (e.g., triangles are closed and three-sided) versus non-defining attributes (e.g., color, orientation, overall size); build and draw shapes to possess defining attributes.
- CCSS.MATH.CONTENT.1.G.A.2 Compose two-dimensional shapes (rectangles, squares, trapezoids, triangles, half-circles, and quarter-circles) or three-dimensional shapes (cubes, right rectangular prisms, right circular cones, and right circular cylinders) to create a composite shape, and compose new shapes from the composite shape.
- Grades 3-5
- CCSS.MATH.CONTENT.4.G.A.3 Recognize a line of symmetry for a two-dimensional figure as a line across the figure such that the figure can be folded along the line into matching parts. Identify line-symmetric figures and draw lines of symmetry.
- Middle School
- CCSS.MATH.CONTENT.6.G.A.4 Represent three-dimensional figures using nets made up of rectangles and triangles, and use the nets to find the surface area of these figures. Apply these techniques in the context of solving real-world and mathematical problems.
- CCSS.MATH.CONTENT.7.G.A.1 Solve problems involving scale drawings of geometric figures, including computing actual lengths and areas from a scale drawing and reproducing a scale drawing at a different scale.
- CCSS.MATH.CONTENT.7.G.A.2 Draw (freehand, with ruler and protractor, and with technology) geometric shapes with given conditions. Focus on constructing triangles from three measures of angles or sides, noticing when the conditions determine a unique triangle, more than one triangle, or no triangle.
- CCSS.MATH.CONTENT.7.G.A.3 Describe the two-dimensional figures that result from slicing three-dimensional figures, as in plane sections of right rectangular prisms and right rectangular pyramids.
- CCSS.MATH.CONTENT.8.G.A.1 Verify experimentally the properties of rotations, reflections, and translations.
- CCSS.MATH.CONTENT.8.G.A.3 Describe the effect of dilations, translations, rotations, and reflections on two-dimensional figures using coordinates.
- CCSS.MATH.CONTENT.8.G.A.4 Understand that a two-dimensional figure is similar to another if the second can be obtained from the first by a sequence of rotations, reflections, translations, and dilations; given two similar two-dimensional figures, describe a sequence that exhibits the similarity between them.
National Core Arts Standards
The National Core Arts Standards are a process that guides educators in providing a unified quality arts education for students in Pre-K through high school. Also see Standards with cross-cutting anchors in Creating, Performing, Responding, and Connecting through art for Visual Arts.NGSS 3-5.Engineering Design
The Next Generation Science Standards (NGSS) are K–12 science content standards.- 3-5-ETS1-1. Define a simple design problem reflecting a need or a want that includes specified criteria for success and constraints on materials, time, or cost.
- 3-5-ETS1-2. Generate and compare multiple possible solutions to a problem based on how well each is likely to meet the criteria and constraints of the problem.
- 3-5-ETS1-3. Plan and carry out fair tests in which variables are controlled and failure points are considered to identify aspects of a model or prototype that can be improved.
NGSS MS.Engineering Design
The Next Generation Science Standards (NGSS) are K–12 science content standards.- MS-ETS1-1. Define the criteria and constraints of a design problem with sufficient precision to ensure a successful solution, taking into account relevant scientific principles and potential impacts on people and the natural environment that may limit possible solutions.
- MS-ETS1-2. Evaluate competing design solutions using a systematic process to determine how well they meet the criteria and constraints of the problem.
- MS-ETS1-3. Analyze data from tests to determine similarities and differences among several design solutions to identify the best characteristics of each that can be combined into a new solution to better meet the criteria for success.
- MS-ETS1-4. Develop a model to generate data for iterative testing and modification of a proposed object, tool, or process such that an optimal design can be achieved.
NGSS HS.Engineering Design
The Next Generation Science Standards (NGSS) are K–12 science content standards.- HS-ETS1-1. Analyze a major global challenge to specify qualitative and quantitative criteria and constraints for solutions that account for societal needs and wants.
- HS-ETS1-2. Design a solution to a complex real-world problem by breaking it down into smaller, more manageable problems that can be solved through engineering.
- HS-ETS1-3. Evaluate a solution to a complex real-world problem based on prioritized criteria and trade-offs that account for a range of constraints, including cost, safety, reliability, and aesthetics as well as possible social, cultural, and environmental impacts.
- HS-ETS1-4. Use a computer simulation to model the impact of proposed solutions to a complex real-world problem with numerous criteria and constraints on interactions within and between systems relevant to the problem.
ALL DONE? SHARE IT!
Share pictures and videos of your cool build! Be sure to use #maketogether or #makercamp
POST YOUR PROJECTS
