Marble Drop

TIME TO COMPLETE
30 min. to an hour
WHAT WILL YOU MAKE?
You will learn to measure precisely, hammer in nails, and do basic woodworking.
WHAT WILL YOU NEED?
- Cardboard
- Crafting Materials
- Other Materials
- Tape (Duct, masking, etc)
- Wood
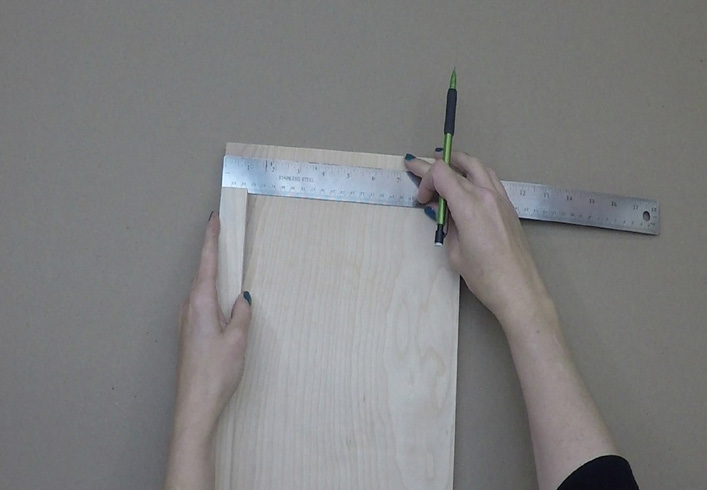
STEP 1
1
Place your two narrow pieces of wood
along the left and right sides of your board.
Mark the margin they'll cover, and then lay
them aside again.
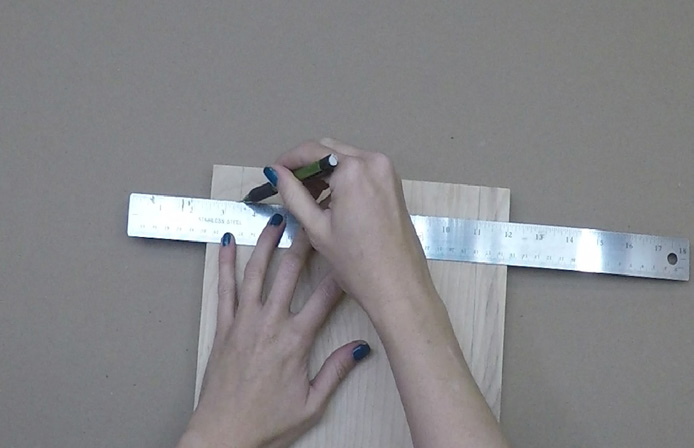
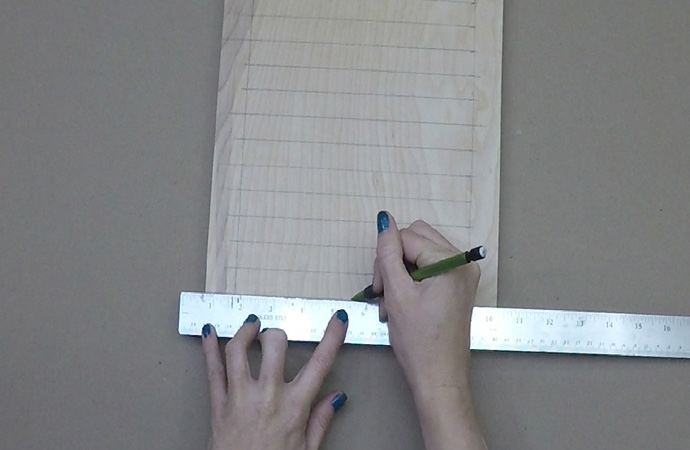
STEP 2
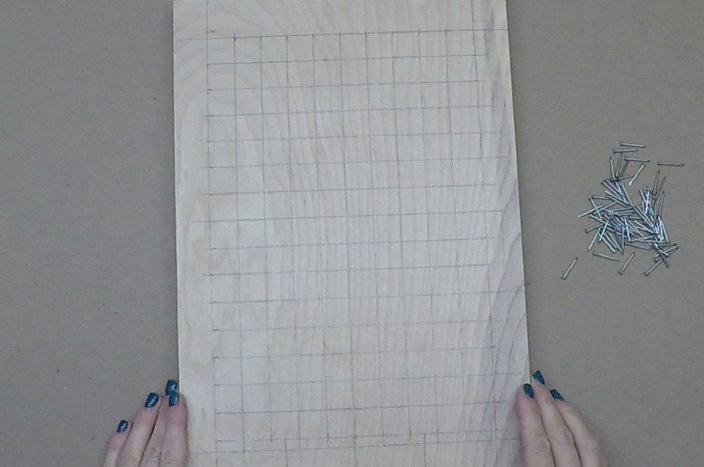
2
Make margins at the top and bottom of
your board that are about 1.5" wide.
Draw an evenly spaced grid on your
board, centered on your board. Each square
of the grid should be larger than your
marble.
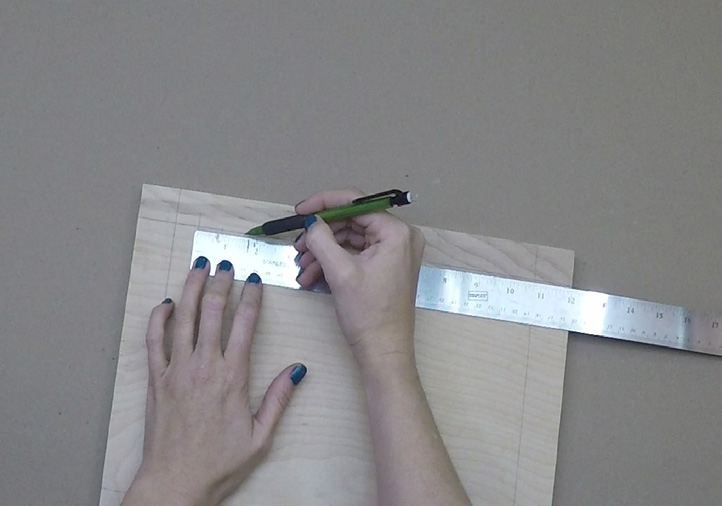
STEP 3
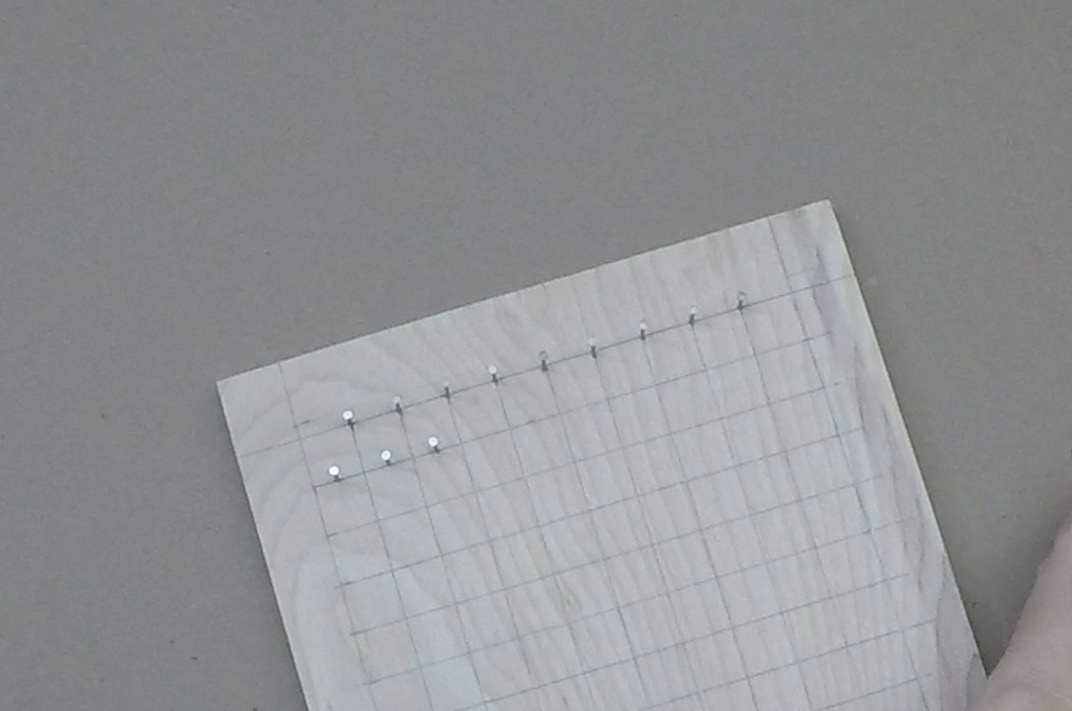
3
Measure your grid squares from the
center of your board to make sure that the
grid itself is centered.
Our marble has a 1/2" diameter, so the
cells on our grid are 3/4" x 3/4".
STEP 4
4
Hammer the first row of nails at the
corners, and then for the second row of
nails, hammer each nail halfway between
the corners.
Continue to alternate between corners
and centers in this pattern until you get to
the bottom of the grid. After you have all the
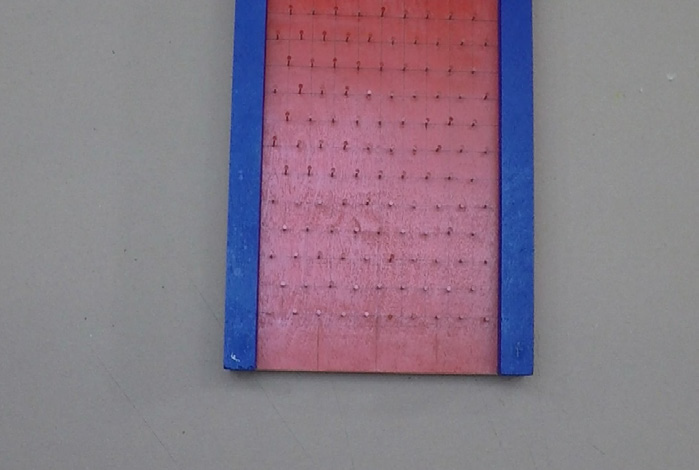
nails in, glue the bumpers to the left and
right of your board.
STEP 5
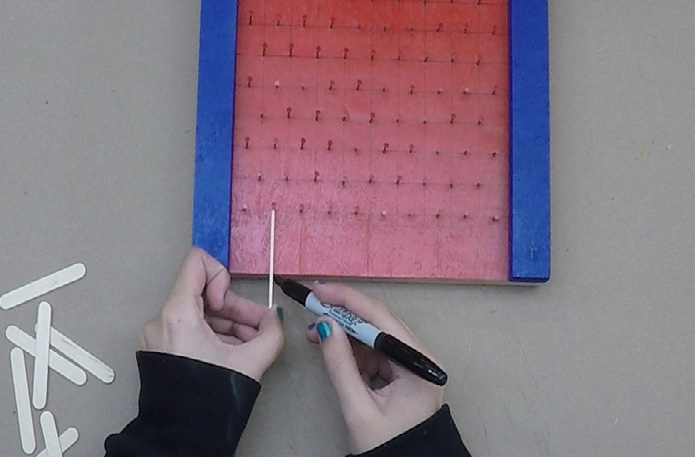
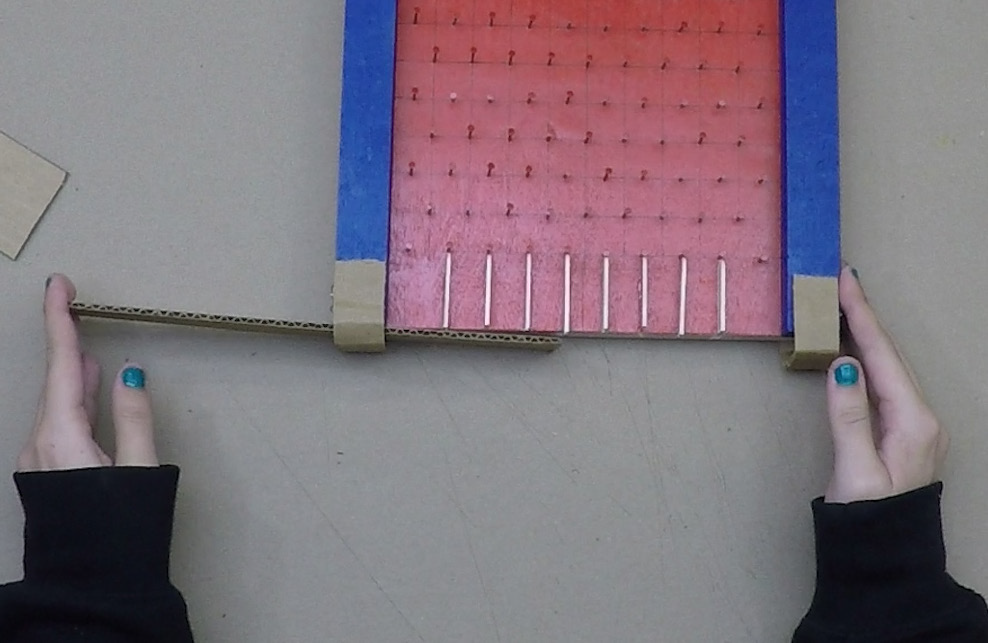
5
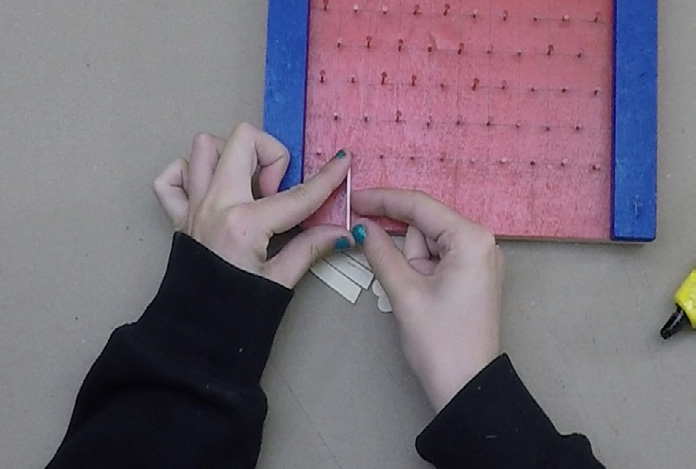
Measure and cut a piece of craft
"Popsicle" stick long enough to reach from
the last row of nails to the bottom edge of
the board. Repeat this step until you have
one cut stick per nail in the bottom row
(unless the nail is right up againt the
bumper).
Glue the popsicle stick walls below each
nail in the last row.
STEP 6
6
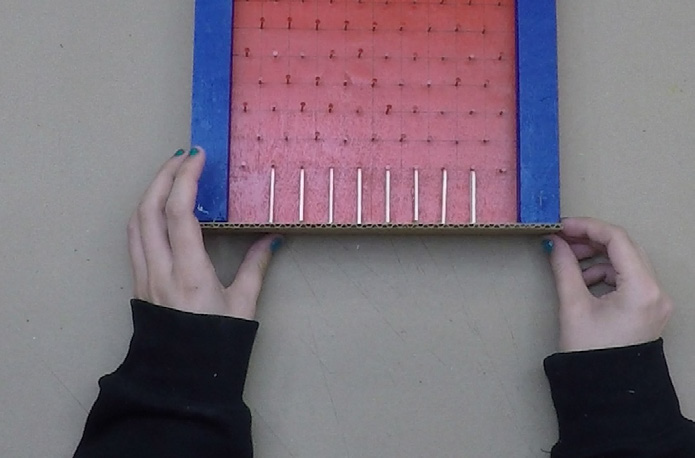
Cut a piece of cardboard so it's as long
as the bottom edge of your board and as
wide as the thickness of the bumper and
board added together.
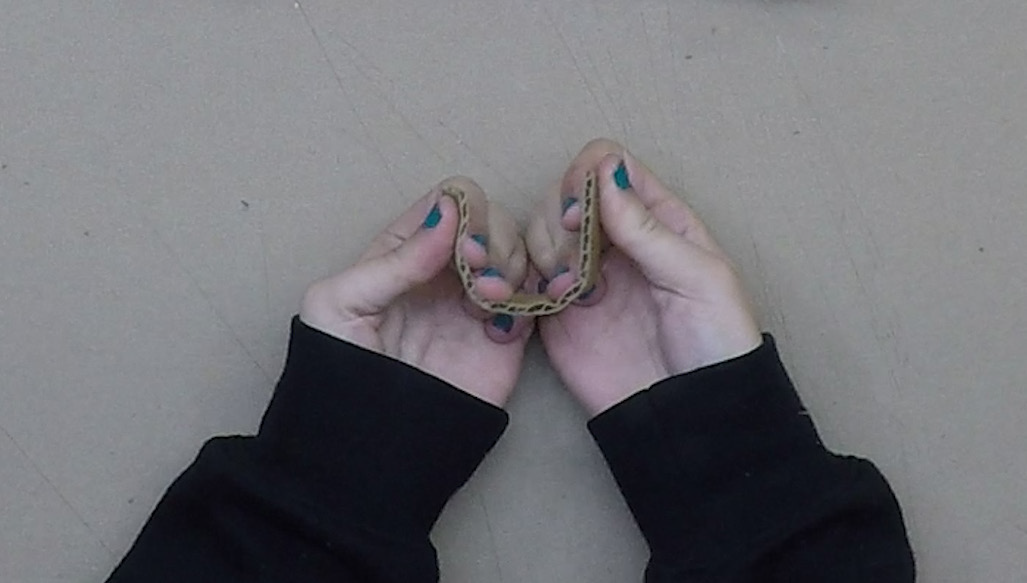
Cut two thin pieces of cardboard that
are long enough to reach from the front of
the board to the back. Bend them into U-shapes.
STEP 7
7
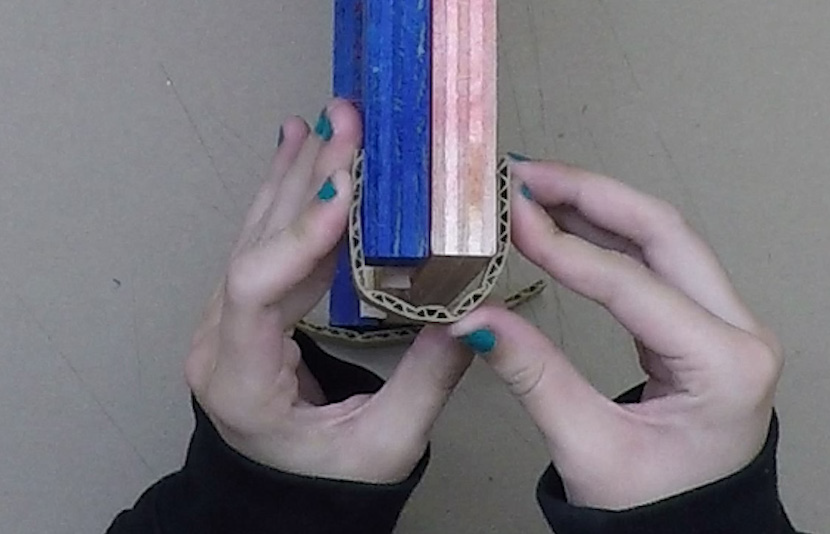
Glue these two loops onto each
bumper. Make sure to leave a small gap at
the bottom.
Slide the cardboard piece that you
measured in step 10 into the two loops. It
will act as a shelf to catch your marbles.
How else could you make a shelf?
STEP 8
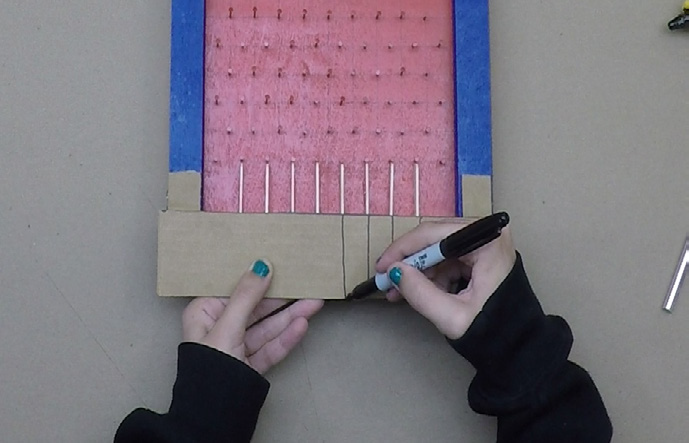
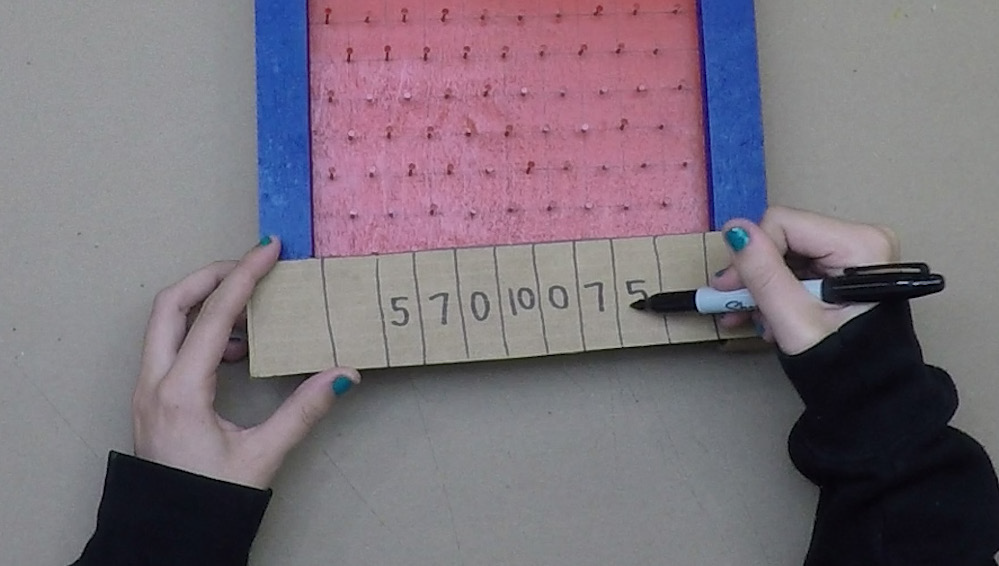
8
Cut a piece of cardboard to hide the
stick walls. Draw the wall lines on top of the
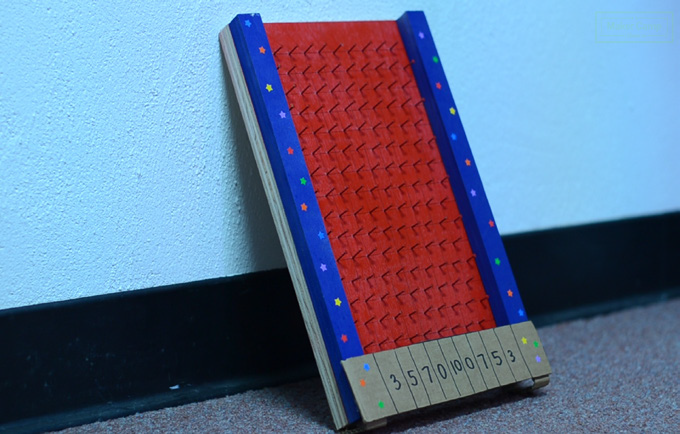
cardboard. Glue it to the bumpers.
Give each comlumn a point value. You
don't have to use our numbers! You could
write down a value to subtract such as "-3"
in order to make your game really exciting!

STEP 9
9
Test your new Marble Drop game! Play
with a friend and keep track of your scores.
What will your game rules be? First to 50
wins? Slide the bottom shelf out to retrieve
your marbles.
STEP 10
10
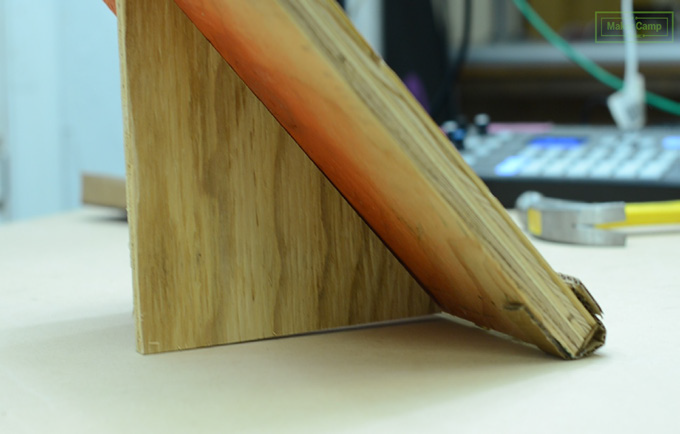
If you have extra wood, you can make a
stand for your game board by gluing a
triangular piece of wood to the back.
If you don't have extra wood to make a
stand, this game will work well propped up
against a wall or chair
Please Note
Your safety is your own responsibility, including proper use of equipment and safety gear, and determining whether you have adequate skill and experience. Power tools, electricity, and other resources used for these projects are dangerous, unless used properly and with adequate precautions, including safety gear and adult supervision. Some illustrative photos do not depict safety precautions or equipment, in order to show the project steps more clearly. Use of the instructions and suggestions found in Maker Camp is at your own risk. Maker Media, Inc., disclaims all responsibility for any resulting damage, injury, or expense.
