Lemon Battery

TIME TO COMPLETE
Less than 30 min.
WHAT WILL YOU MAKE?
You will learn to use coin, electrical compoenets and fruit to make a battery.
WHAT WILL YOU NEED?
- Electronics
- General Hand Tools
- LEDs
- Other Materials
- Tools
- Upcycled / Recycled materials
STEP 1
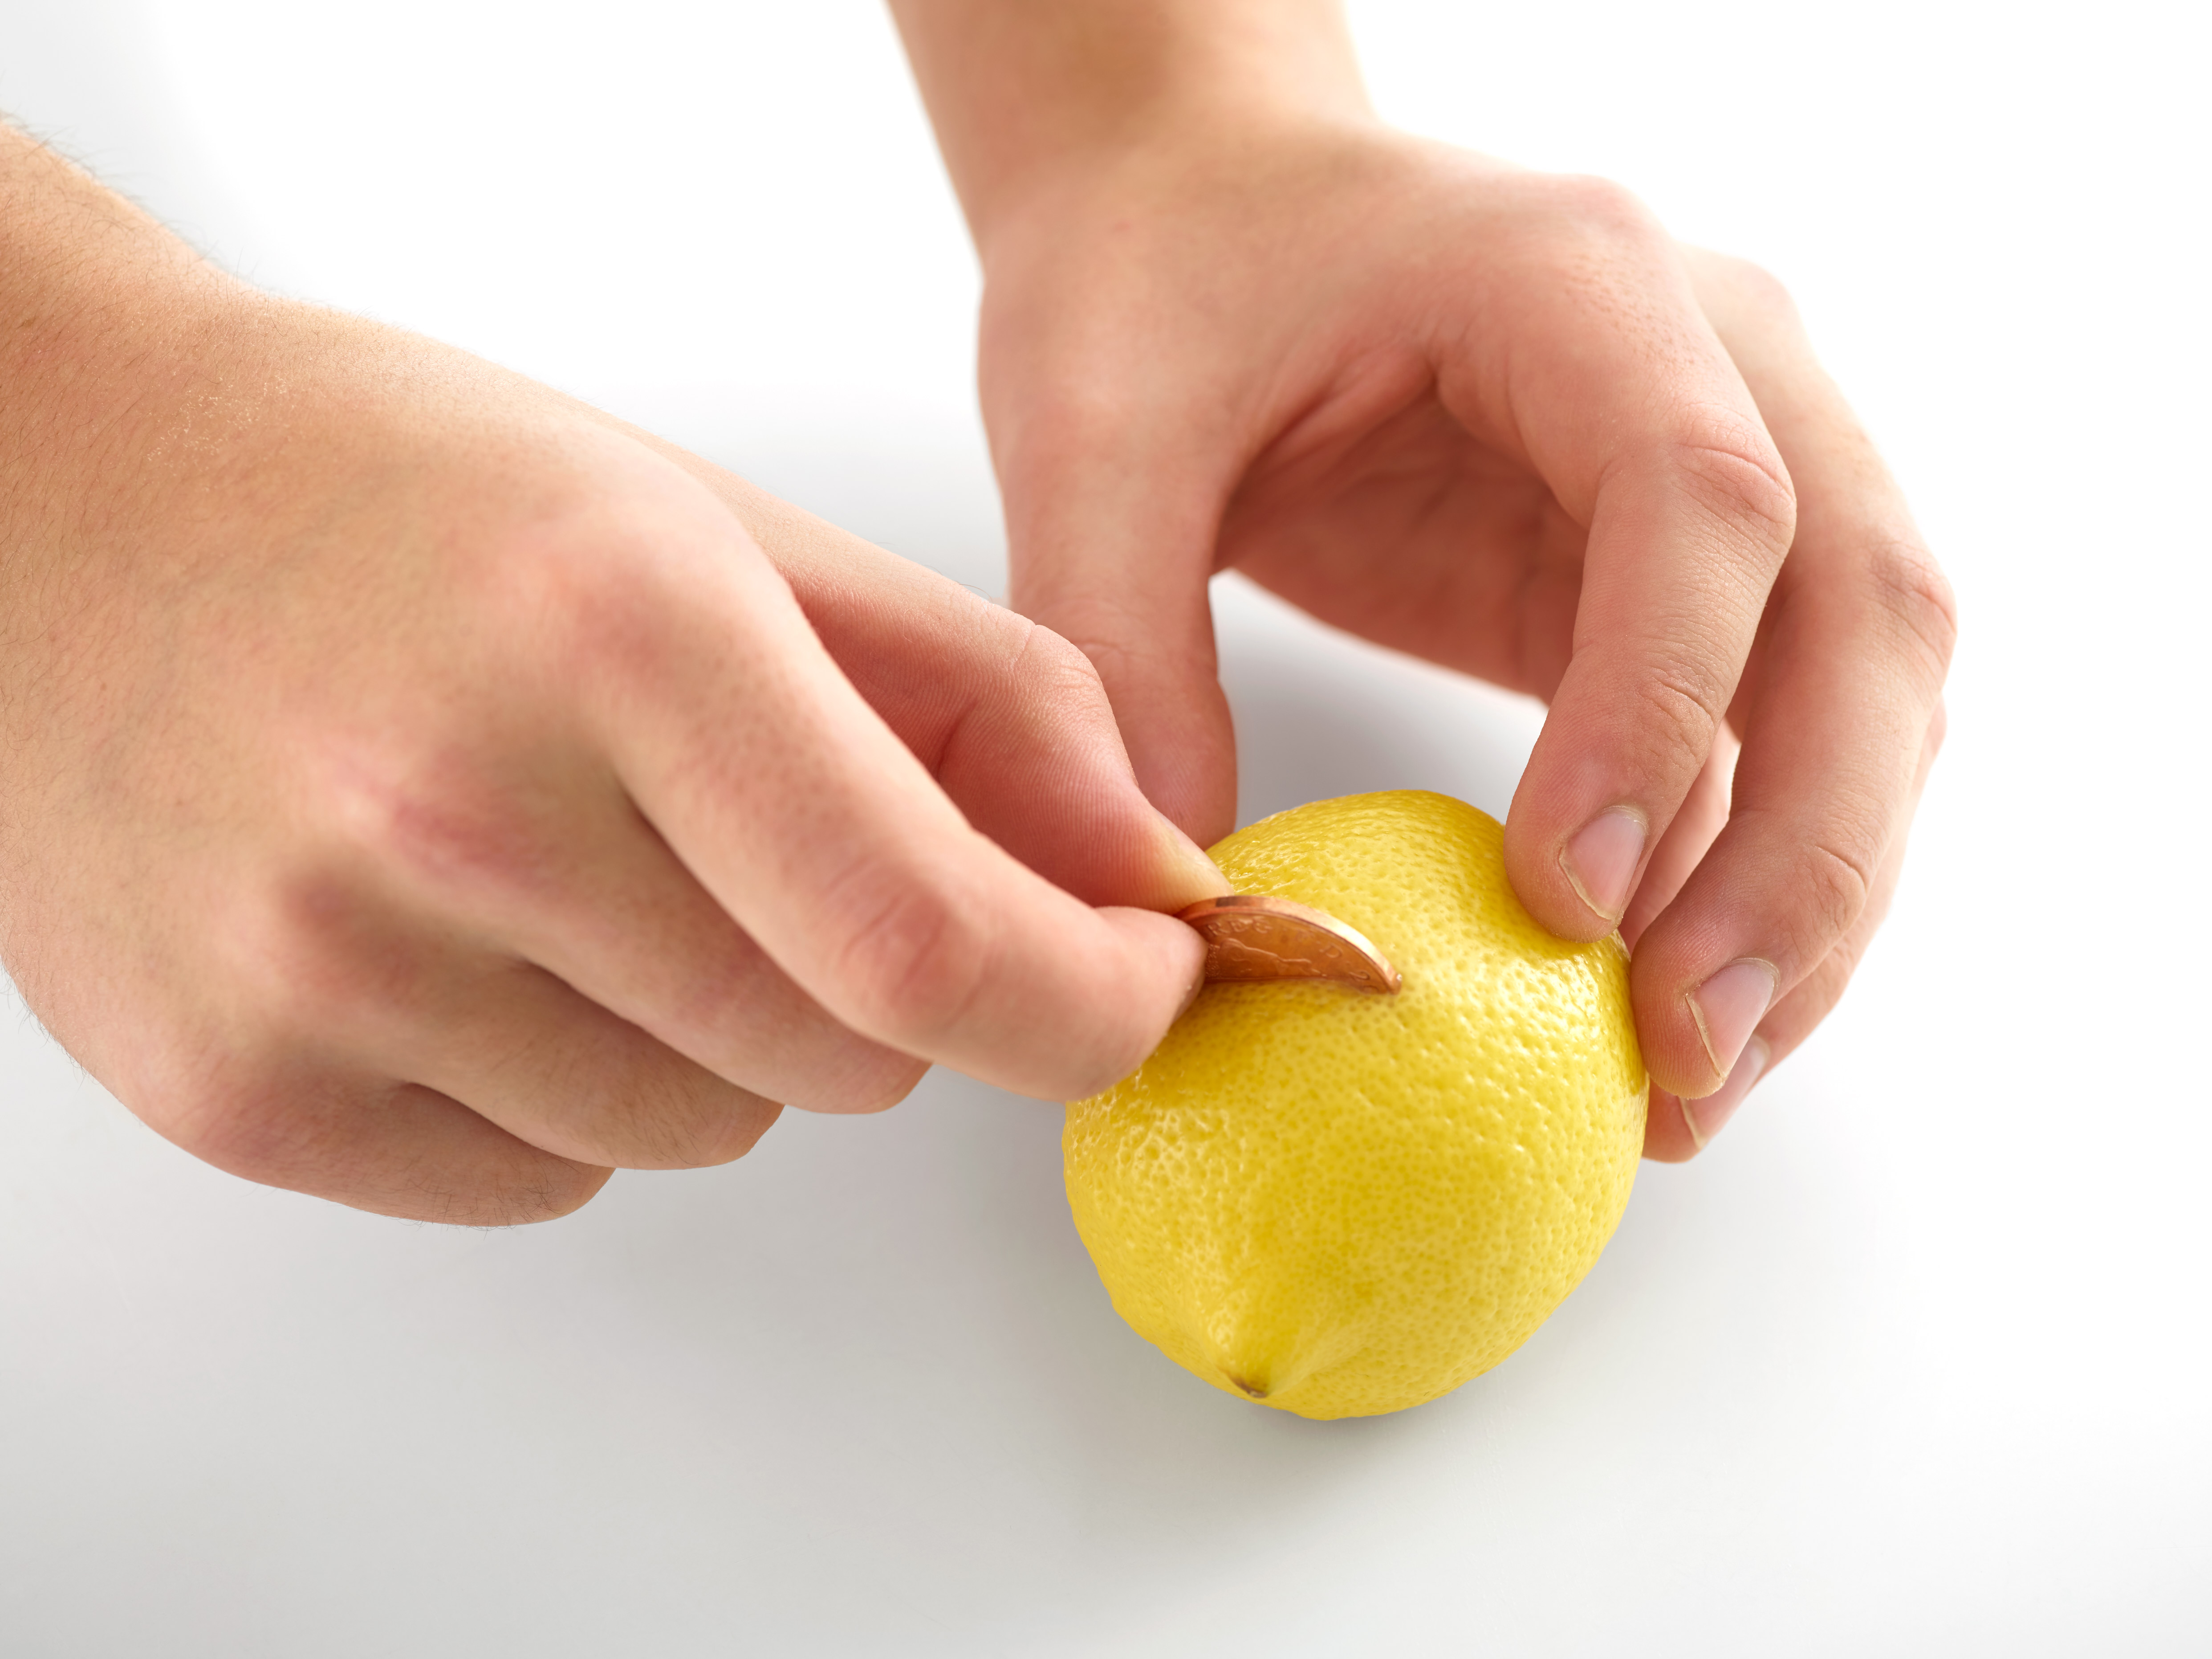
With an adult's help, use the knife to make a cut in a lemon, about 1/2in (1cm) from the center, and roughly 3/4in (2cm) deep. Now push a coin firmly into the slit you have created. Do the same with the other four lemons.
STEP 2
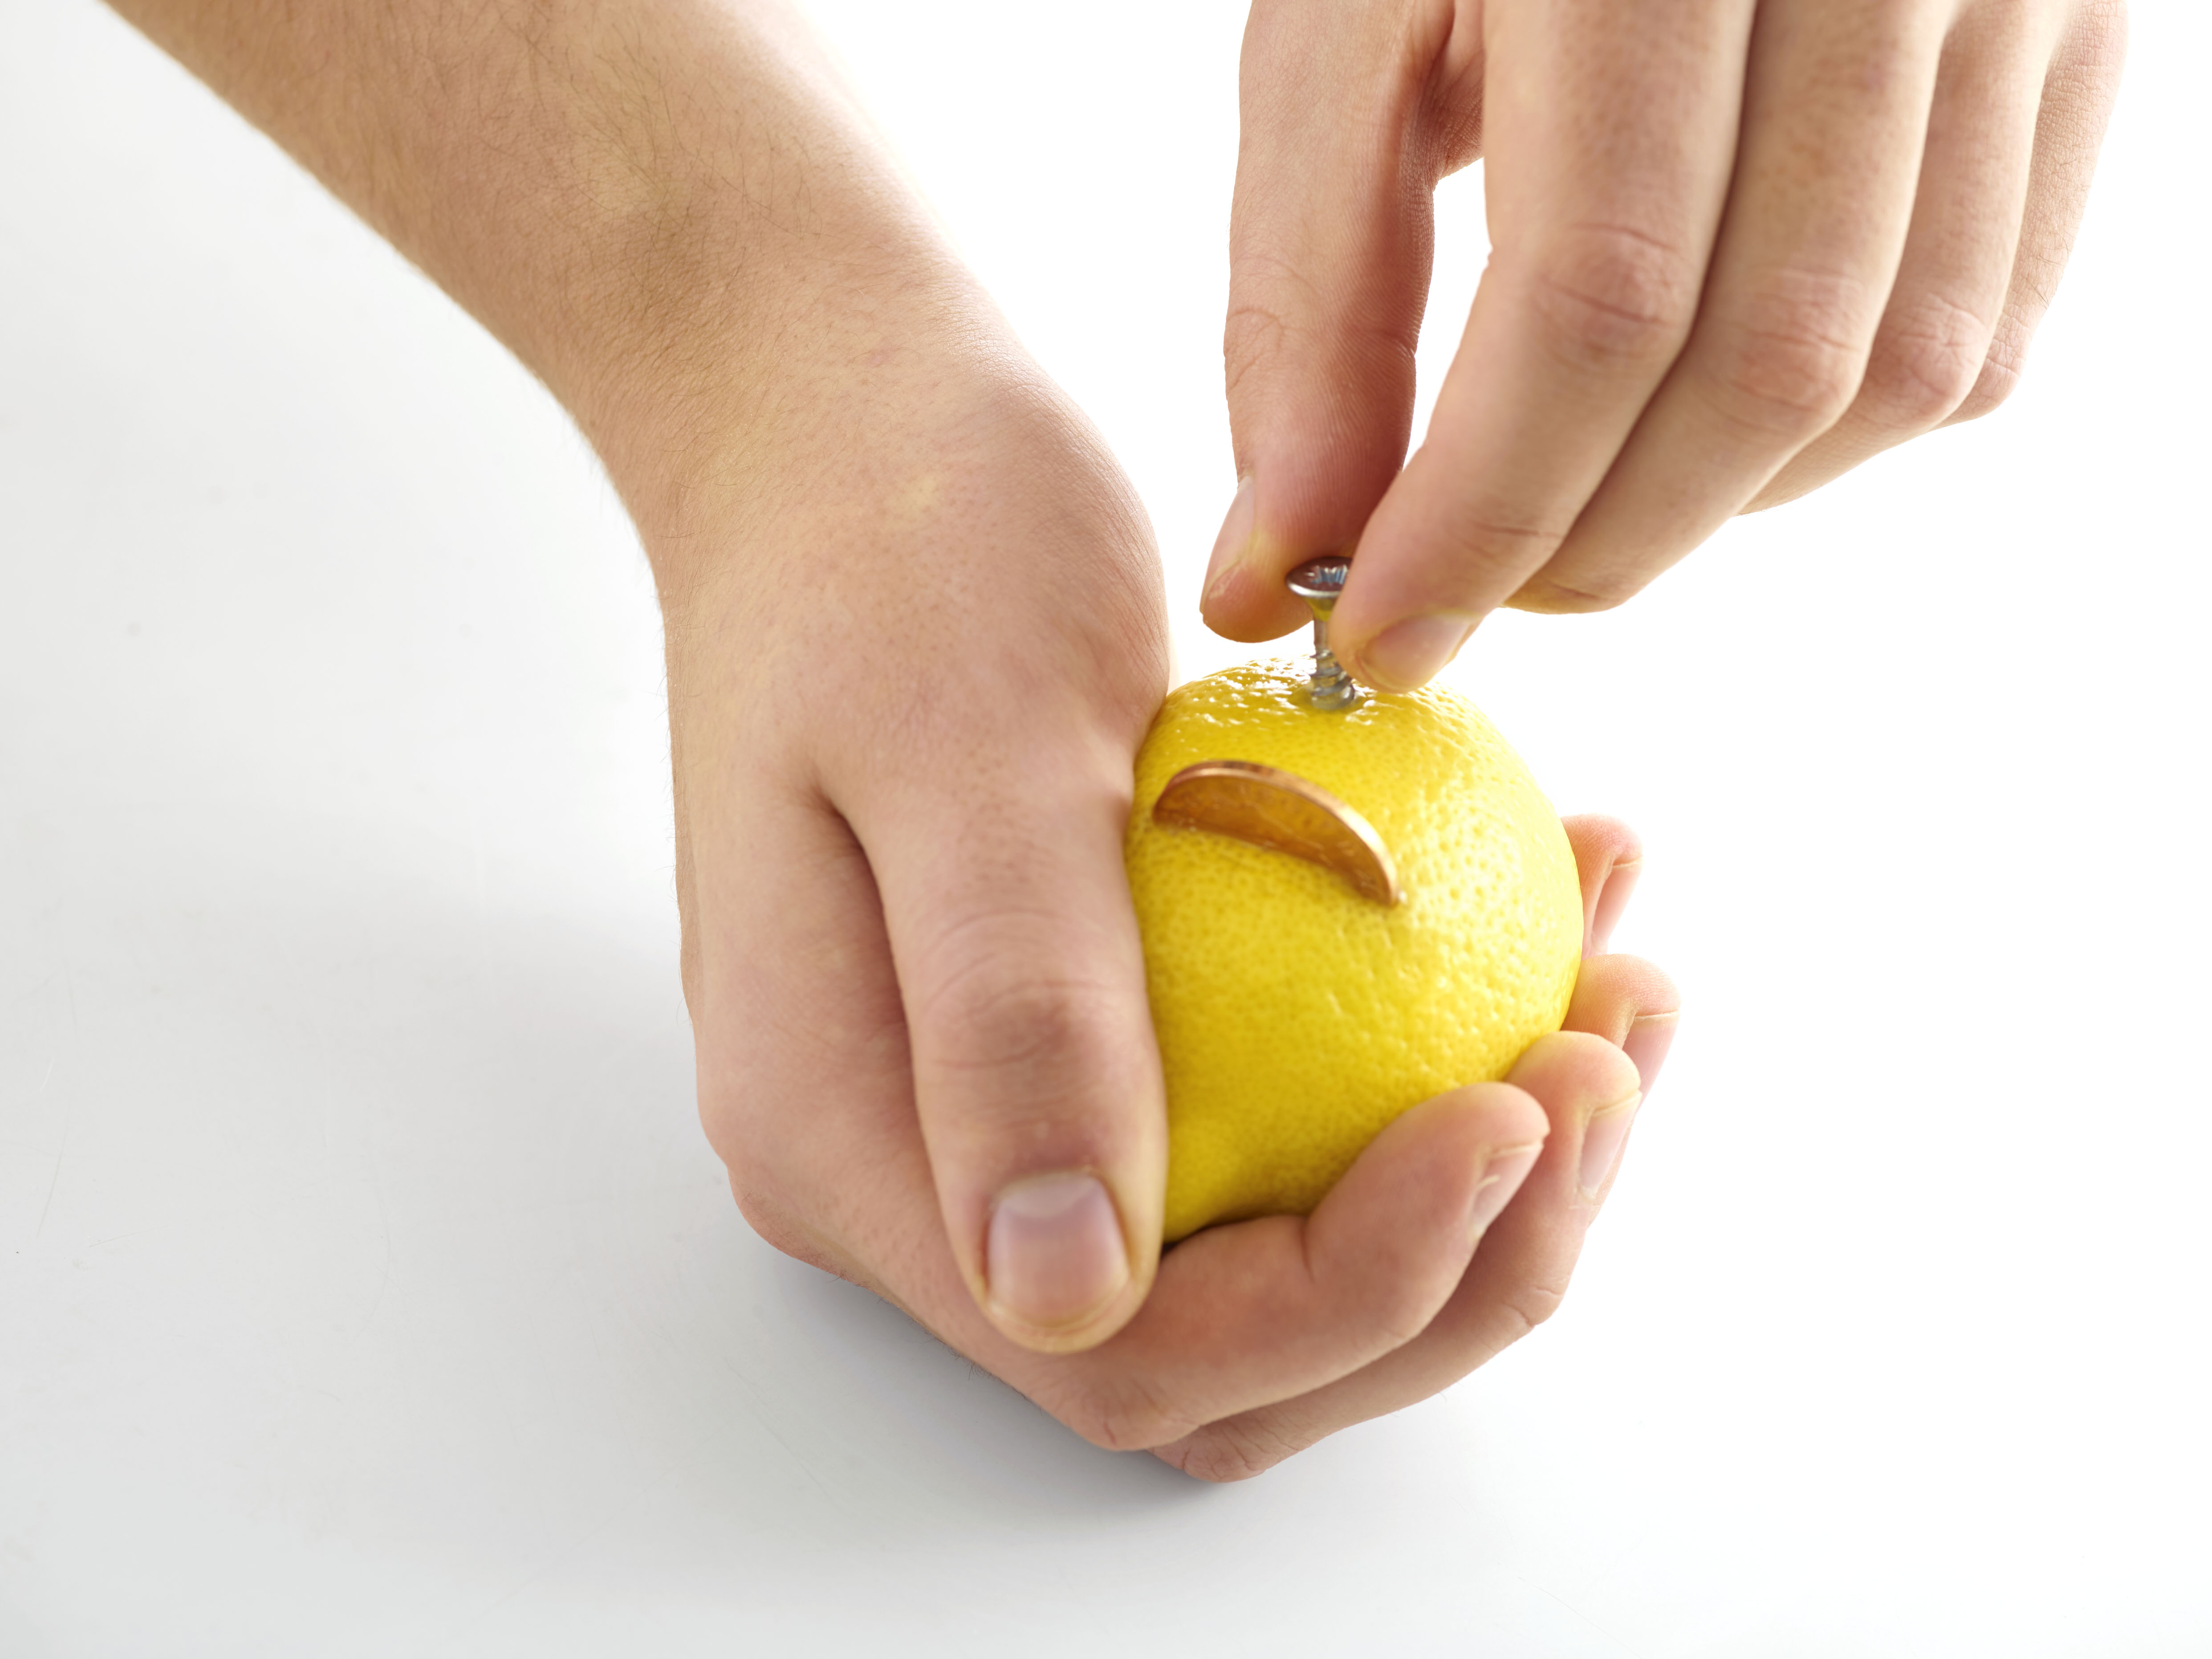
About 1/2 in (1 cm) from the center of the first lemon—on the other side to the coin—insert a galvanized screw. Twist it in, clockwise, to secure it in the lemon's flesh. Now repeat with the other four lemons, then arrange the lemons in a circle.
STEP 3
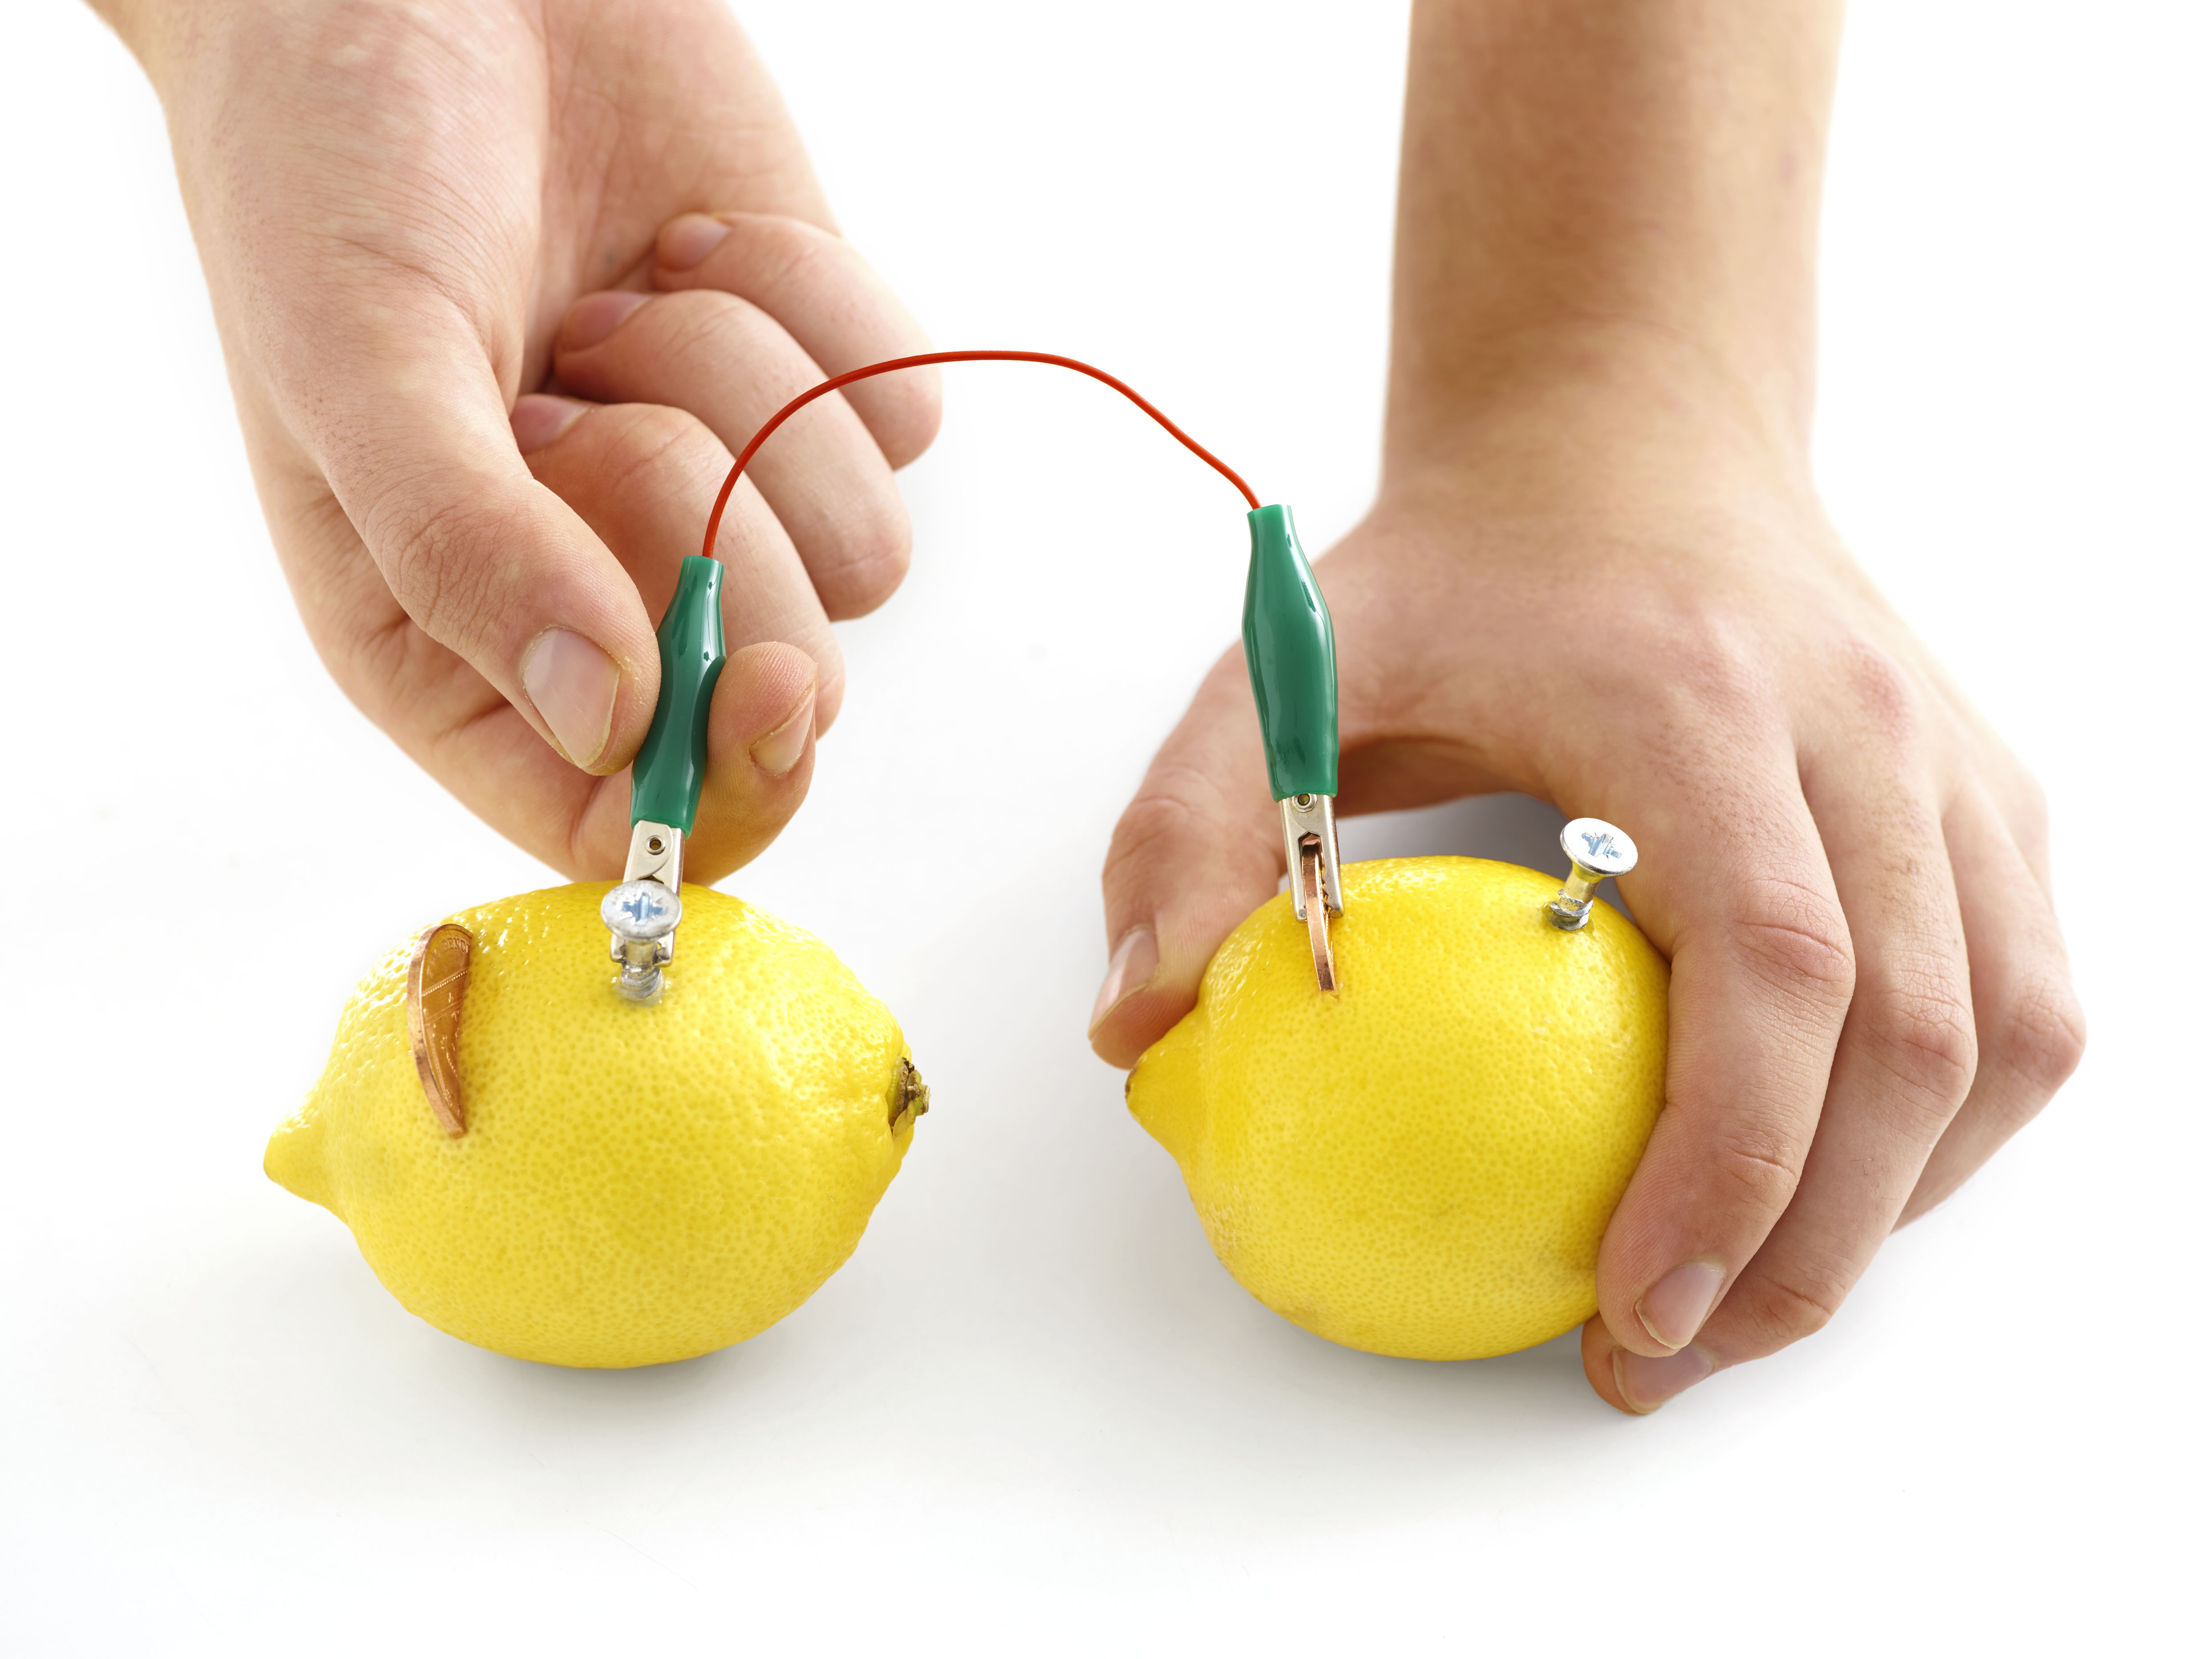
Squeeze the clip on one wire so that it opens, like a crocodile's jaws. Place it around the screw in one lemon, so it grips it. Connect the other clip to the coin in another lemon.
STEP 4
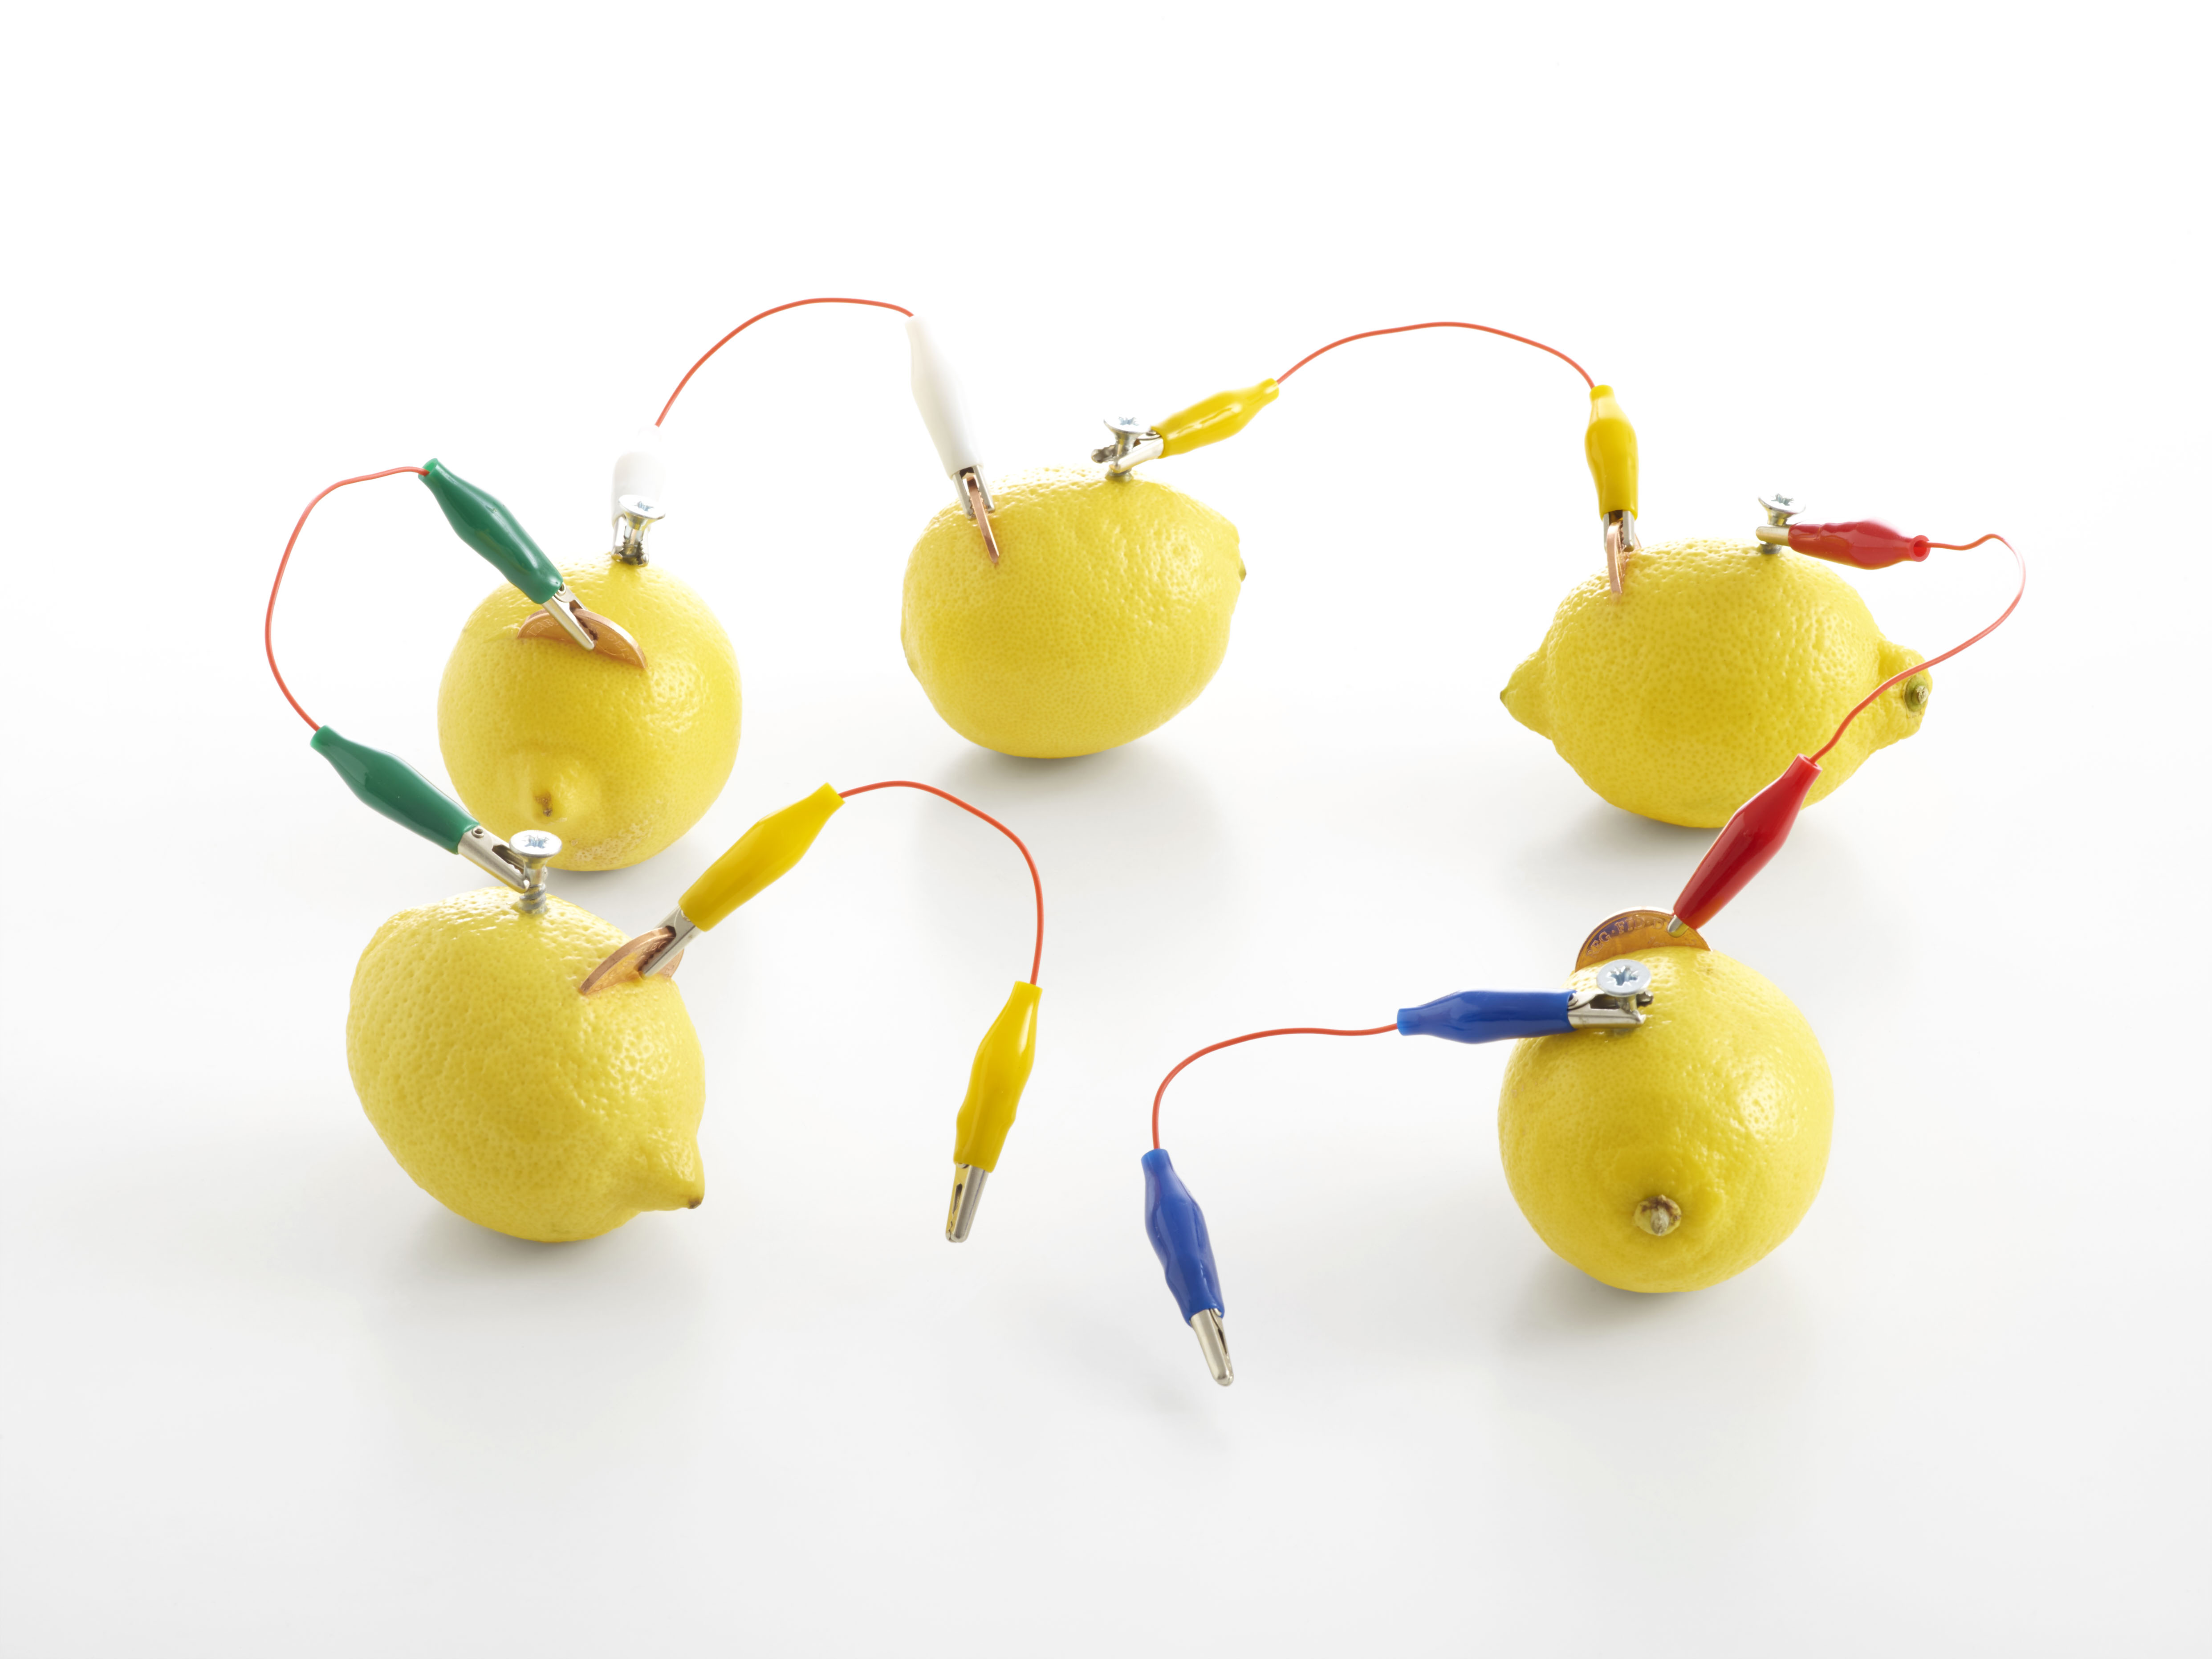
Connect all the lemons—coin to screw—as in step 3. For the last lemon, attach a wire to its coin, but don't connect it to the screw in your first lemon. Instead, attach another wire to that screw.
STEP 5
Each LED has two legs, which are slightly different lengths. With the free end of the wire that is attached to the coin, fix the clip to the slightly longer leg of the LED.
STEP 6
Now connect the clip of the other free wire that is connected to the screw to the other, shorter leg of the LED. This now completes the circuit to make the LED light up.
Please Note
Your safety is your own responsibility, including proper use of equipment and safety gear, and determining whether you have adequate skill and experience. Power tools, electricity, and other resources used for these projects are dangerous, unless used properly and with adequate precautions, including safety gear and adult supervision. Some illustrative photos do not depict safety precautions or equipment, in order to show the project steps more clearly. Use of the instructions and suggestions found in Maker Camp is at your own risk. Maker Media, Inc., disclaims all responsibility for any resulting damage, injury, or expense.
