Sewing Stuffed Creatures

TIME TO COMPLETE
About 3 hours
WHAT WILL YOU MAKE?
Do you have mismatched socks lying around? Don’t throw them out! Sew them into a stuffed creature of your very own. But how do you turn a square of fabric or an old sock into a cute stuffed animal? Using the design process! First, you’ll brainstorm ideas and sketch a plan. Next, you’ll create your design. Once you’ve made the first prototype, you’ll probably find things you want to modify. Iterate on your design to make it better!
In this maker activity, you will use the design process to design a stuffed creature that has the following criteria:
– Is made out of fabric
– Has a head and body with at least one appendage (like an arm, leg, tail, or wing)
– Is decorated to give it some personality
WHAT WILL YOU NEED?
- Crafting Materials
- Other Materials
- Textiles
- Upcycled / Recycled materials
- Yarn/string
STEP 1
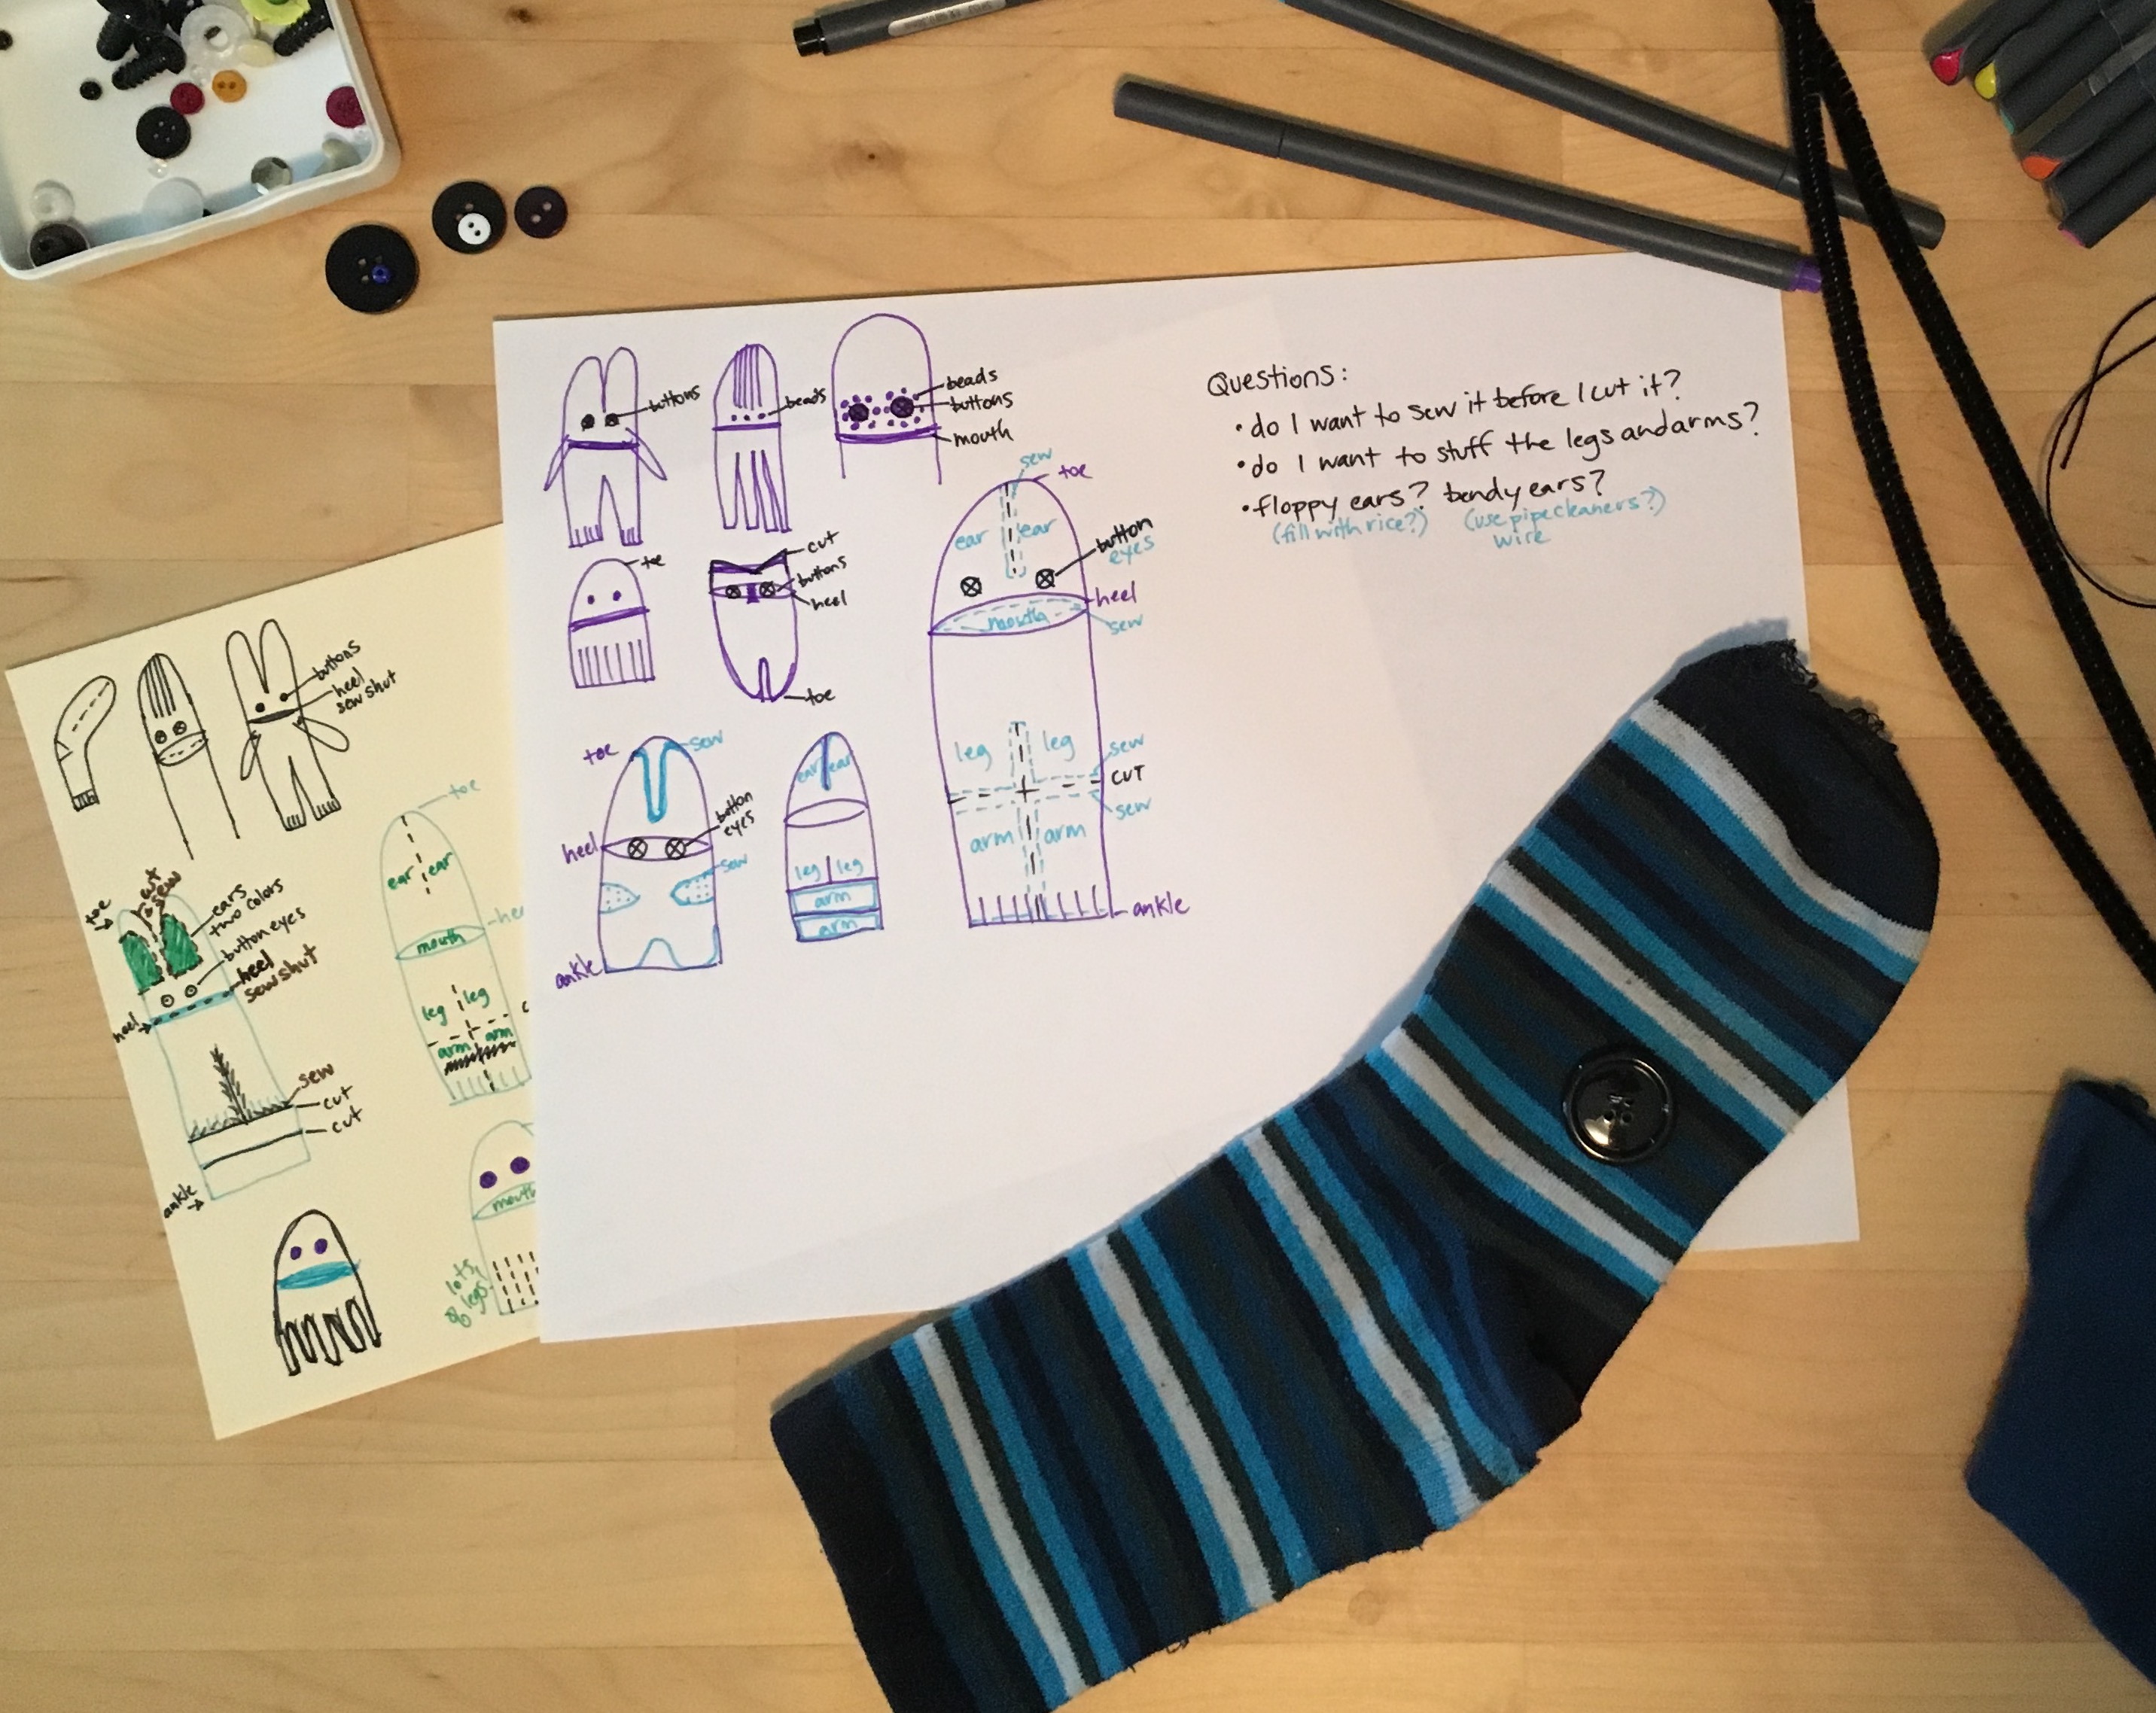
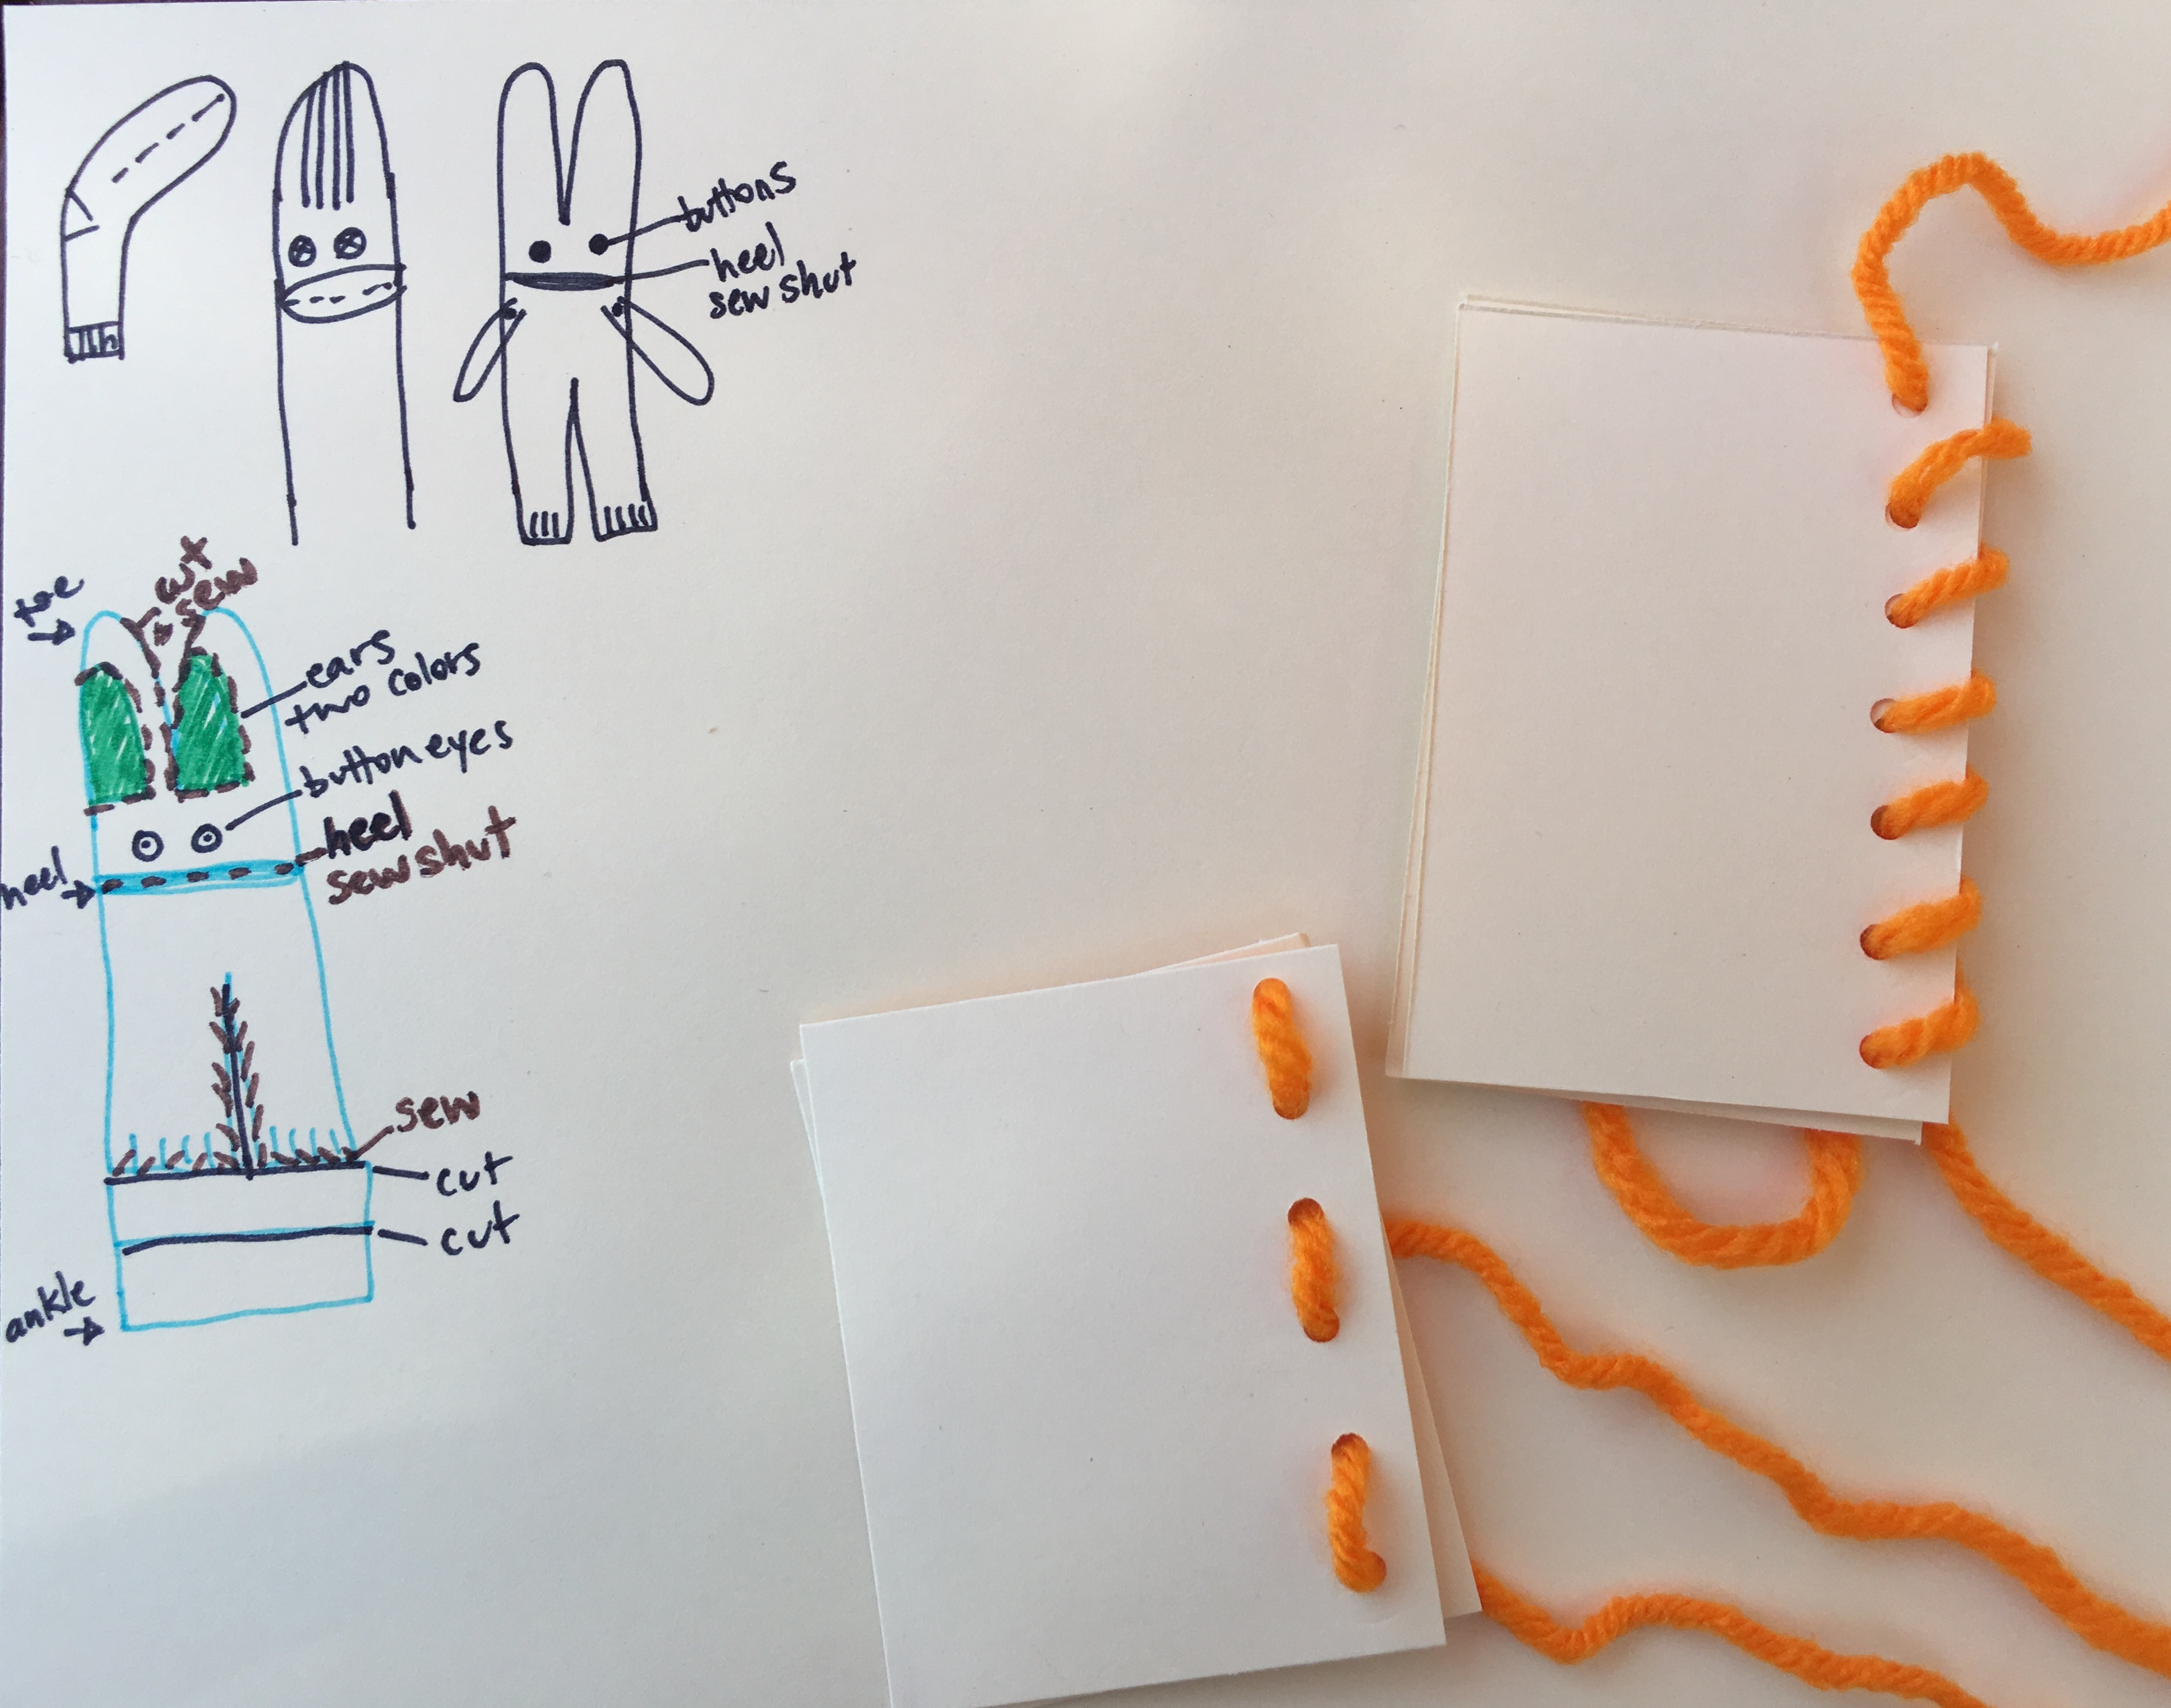
Step 1: BRAINSTORM & PLAN
STEP 2
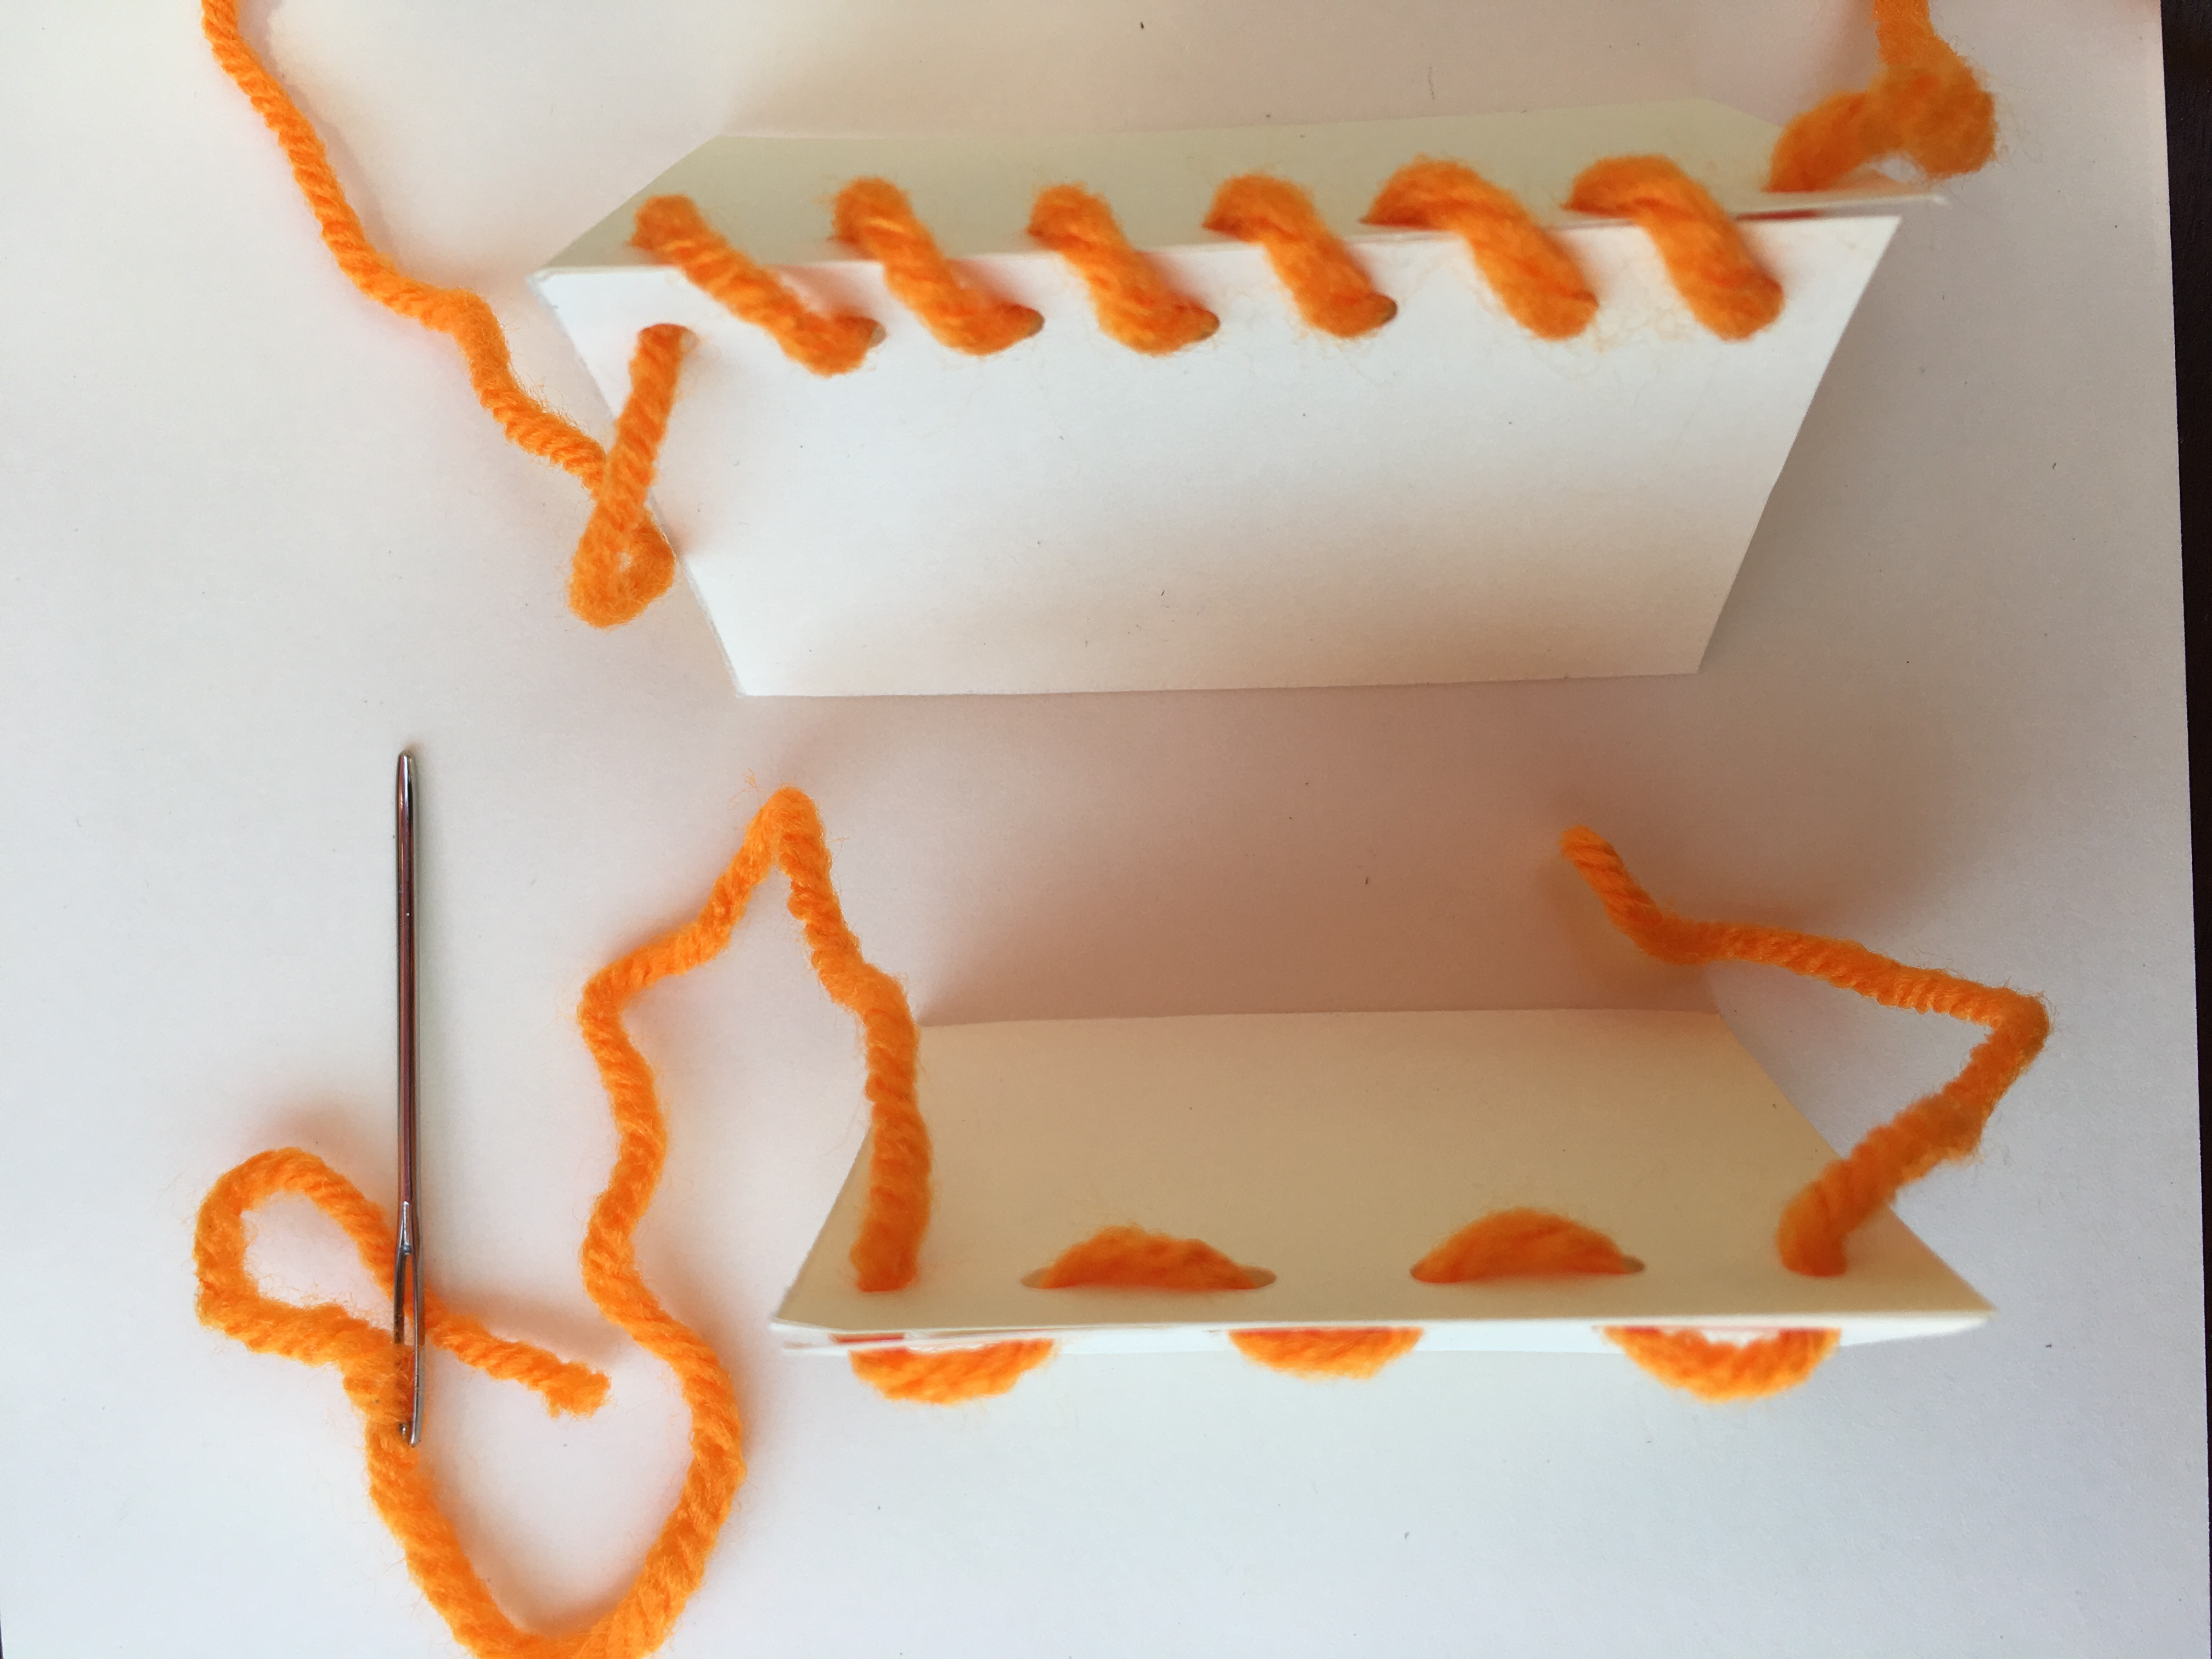
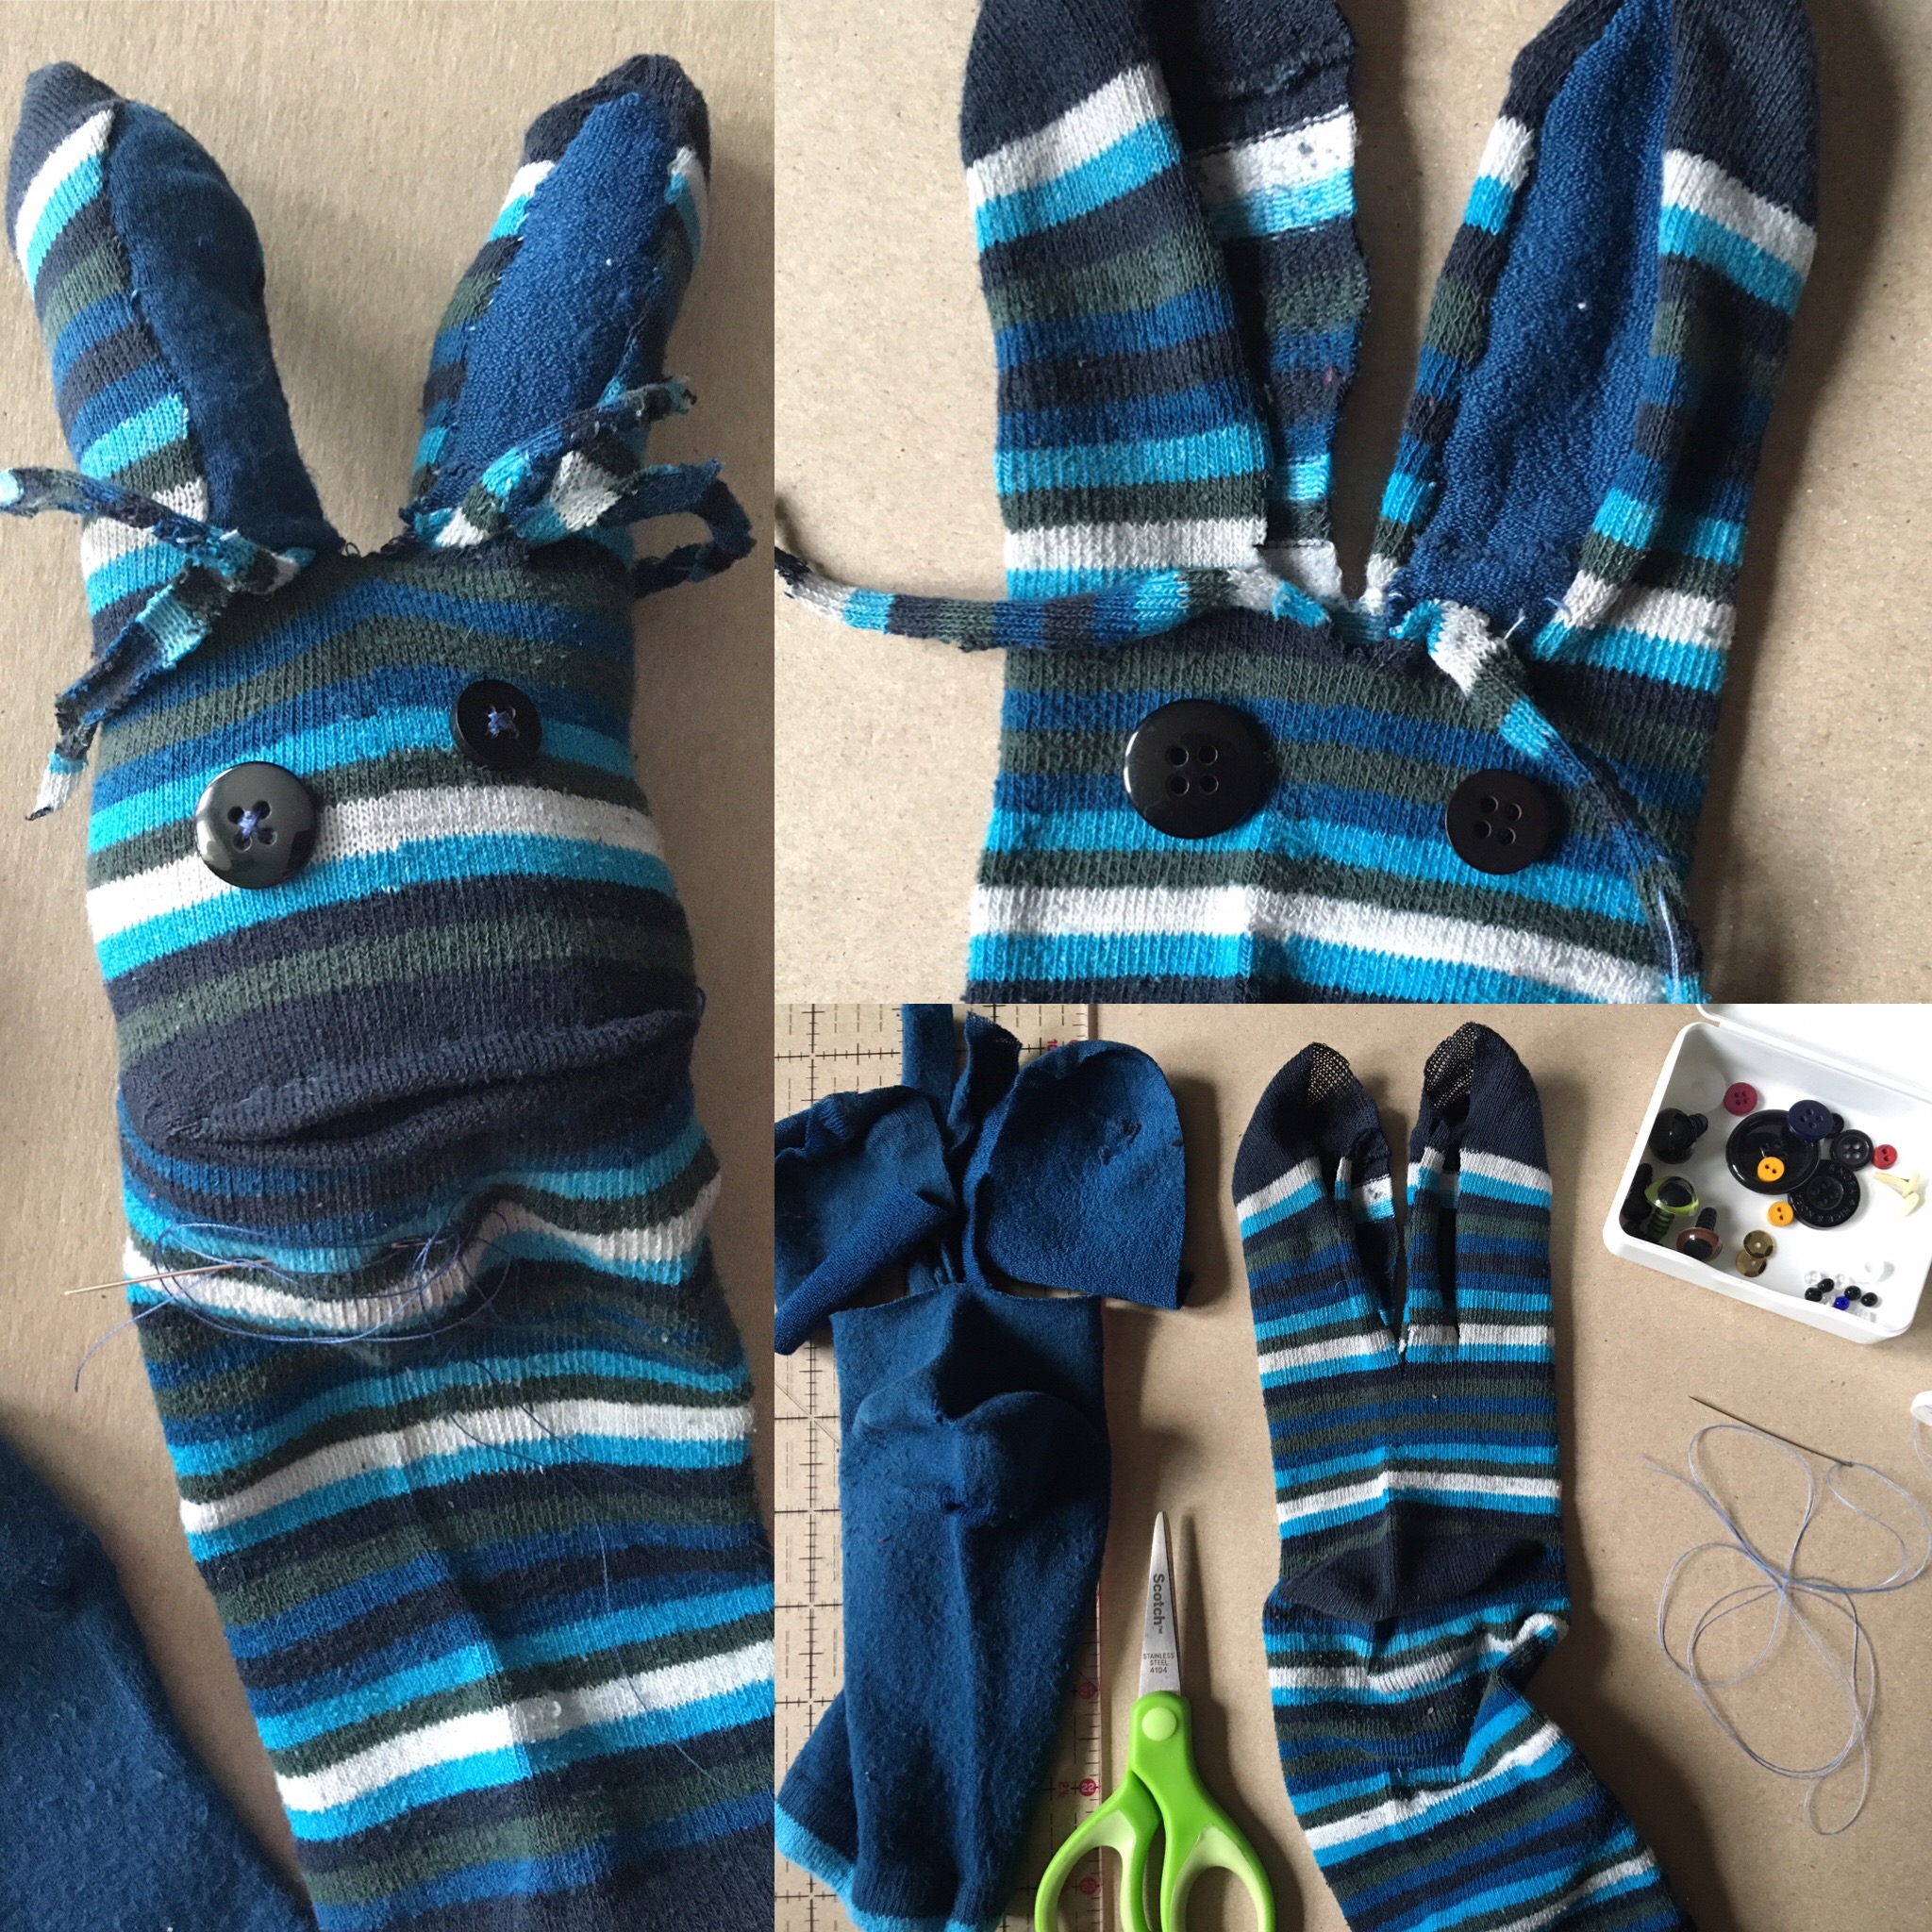
Step 2: PROTOTYPE
STEP 3
Step 3: TEST
STEP 4
Step 4: ITERATE
WHAT'S NEXT?
Reflect. After you complete the challenge, reflect on your experience:
– What problems did you have in your design and how did you use your creativity to solve them?
Please Note
Your safety is your own responsibility, including proper use of equipment and safety gear, and determining whether you have adequate skill and experience. Power tools, electricity, and other resources used for these projects are dangerous, unless used properly and with adequate precautions, including safety gear and adult supervision. Some illustrative photos do not depict safety precautions or equipment, in order to show the project steps more clearly. Use of the instructions and suggestions found in Maker Camp is at your own risk. Maker Media, Inc., disclaims all responsibility for any resulting damage, injury, or expense.
