Wrist Bag

TIME TO COMPLETE
30 min. to an hour
WHAT WILL YOU MAKE?
Make a wrist bag that’s perfect for taking outside to carry explorer gear, art supplies or go on a treasure hunt. There are a few ways to make this bag, some with more sewing and some with less, making it a great project for multiple ages & abilities. This is also a great way to reuse an old shirt that you’ve outgrown but still love.
WHAT WILL YOU NEED?
- Crafting Materials
- Textiles
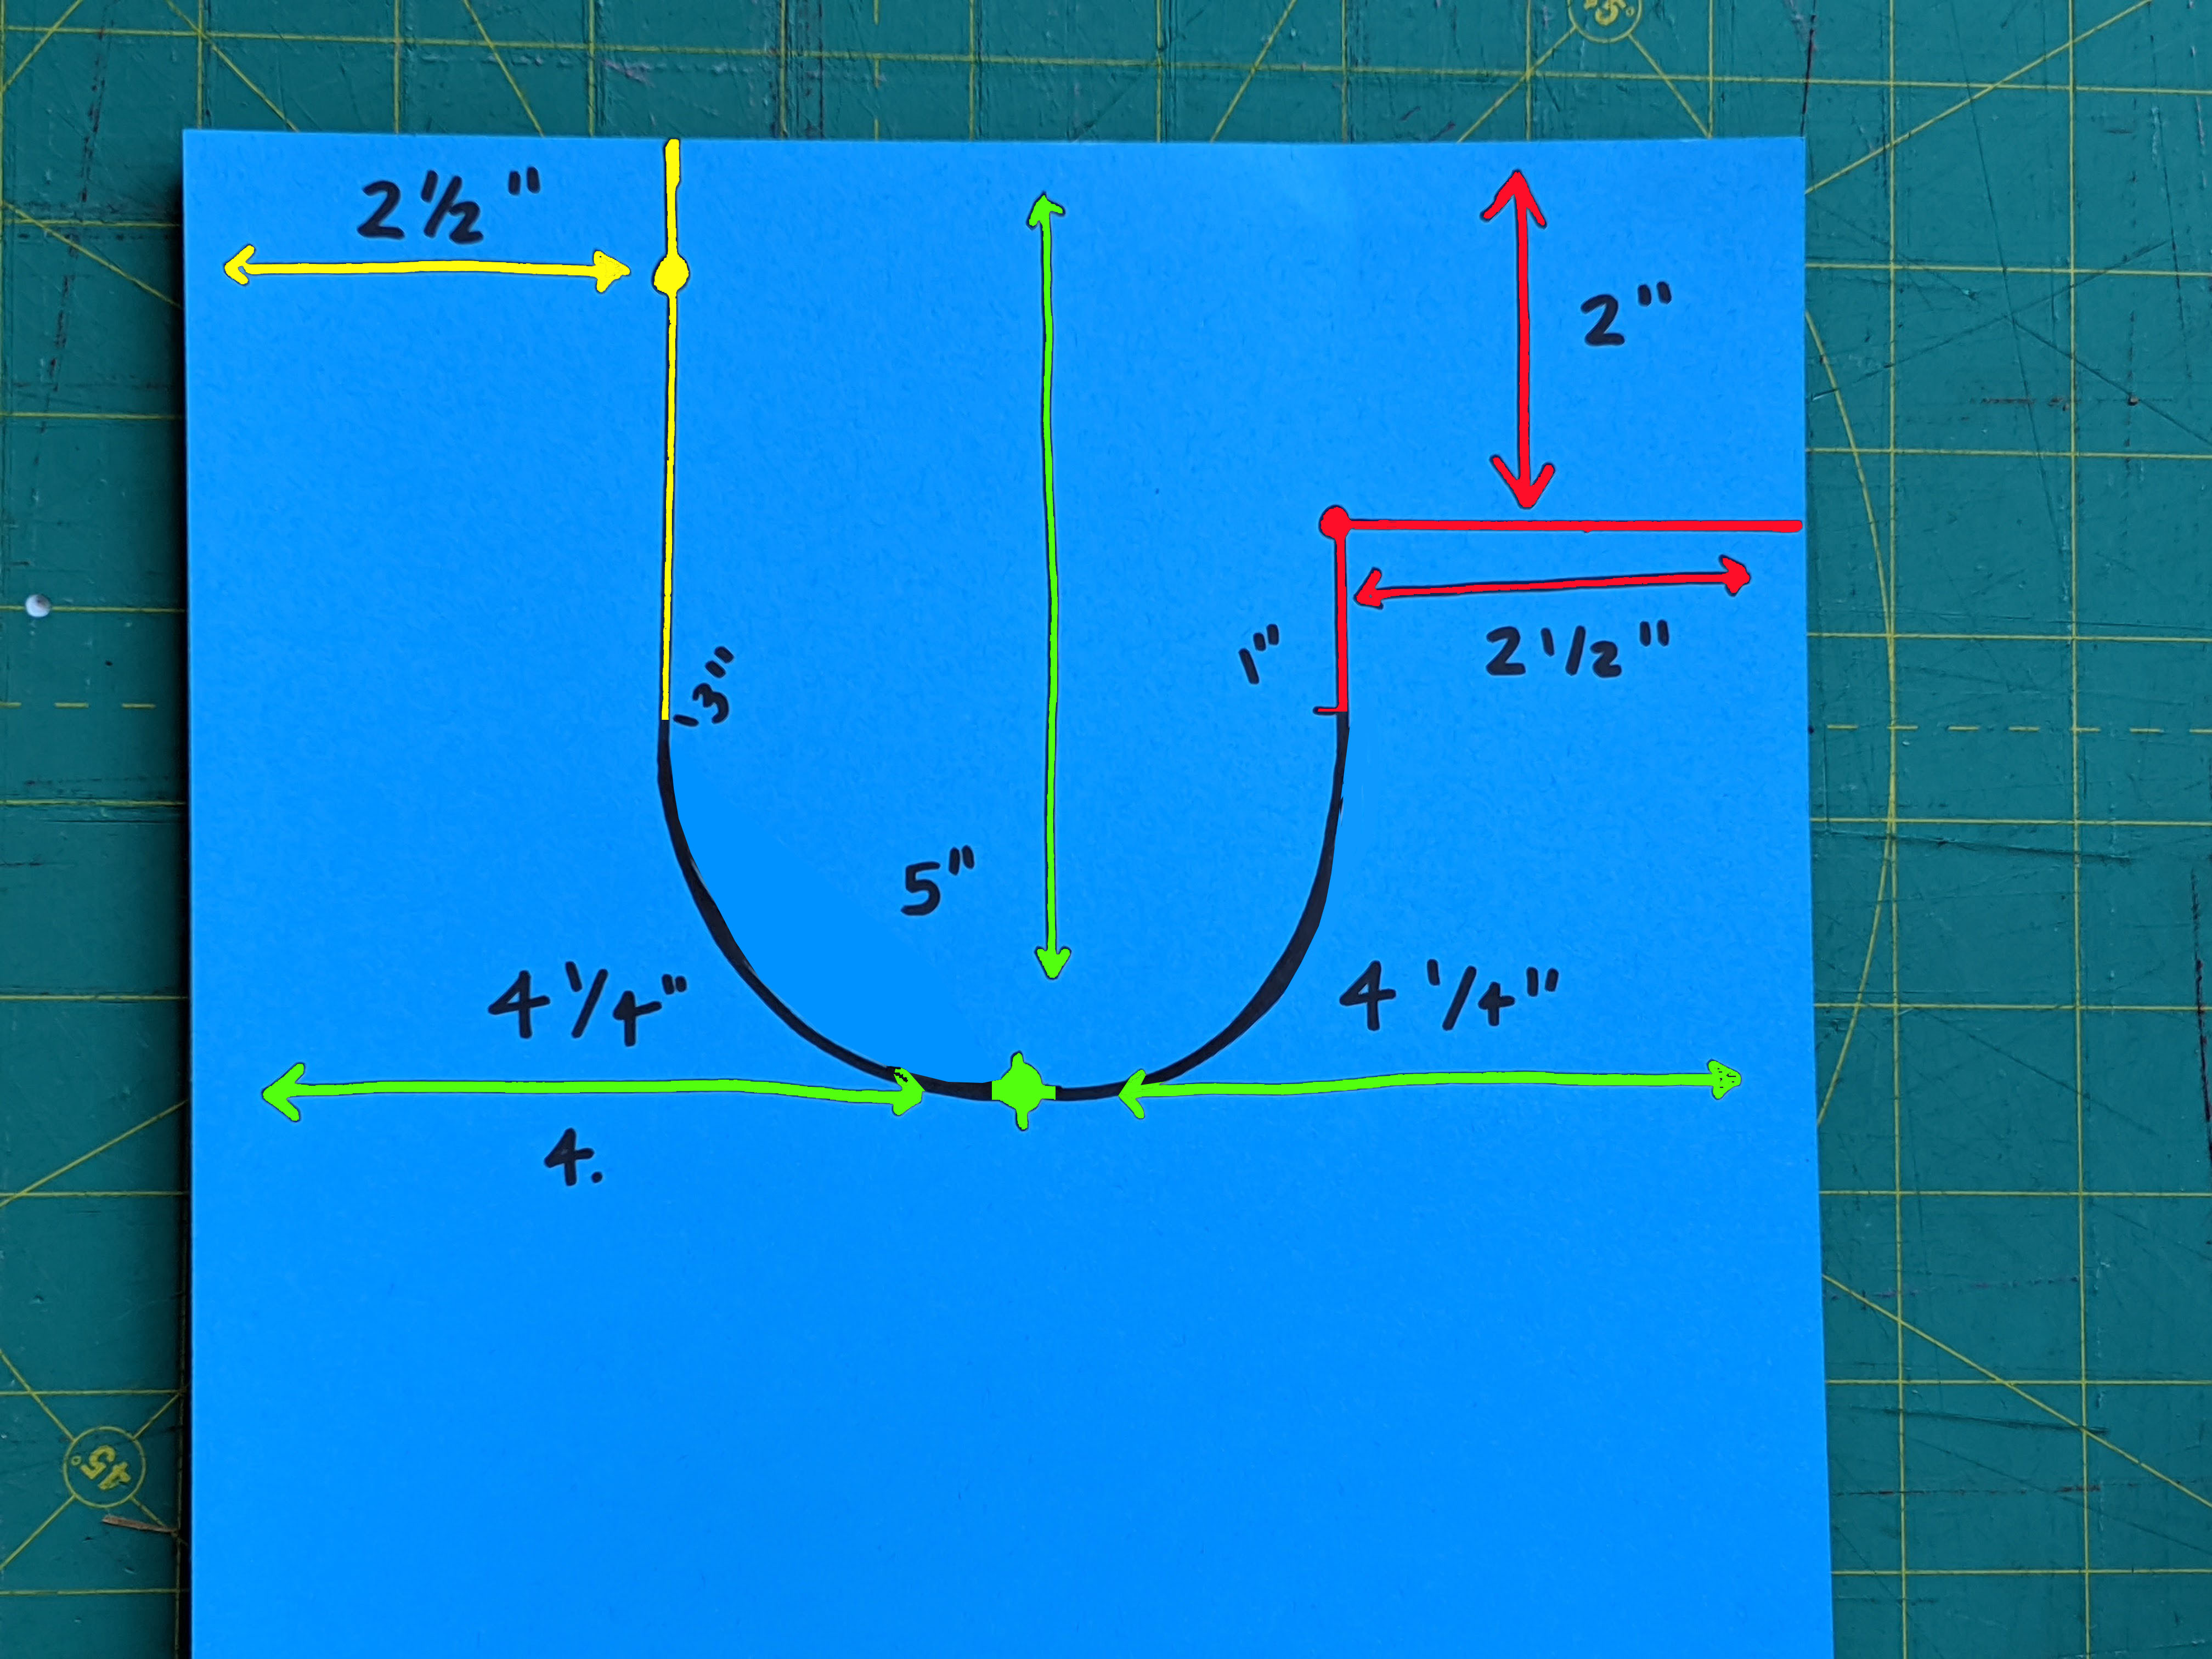
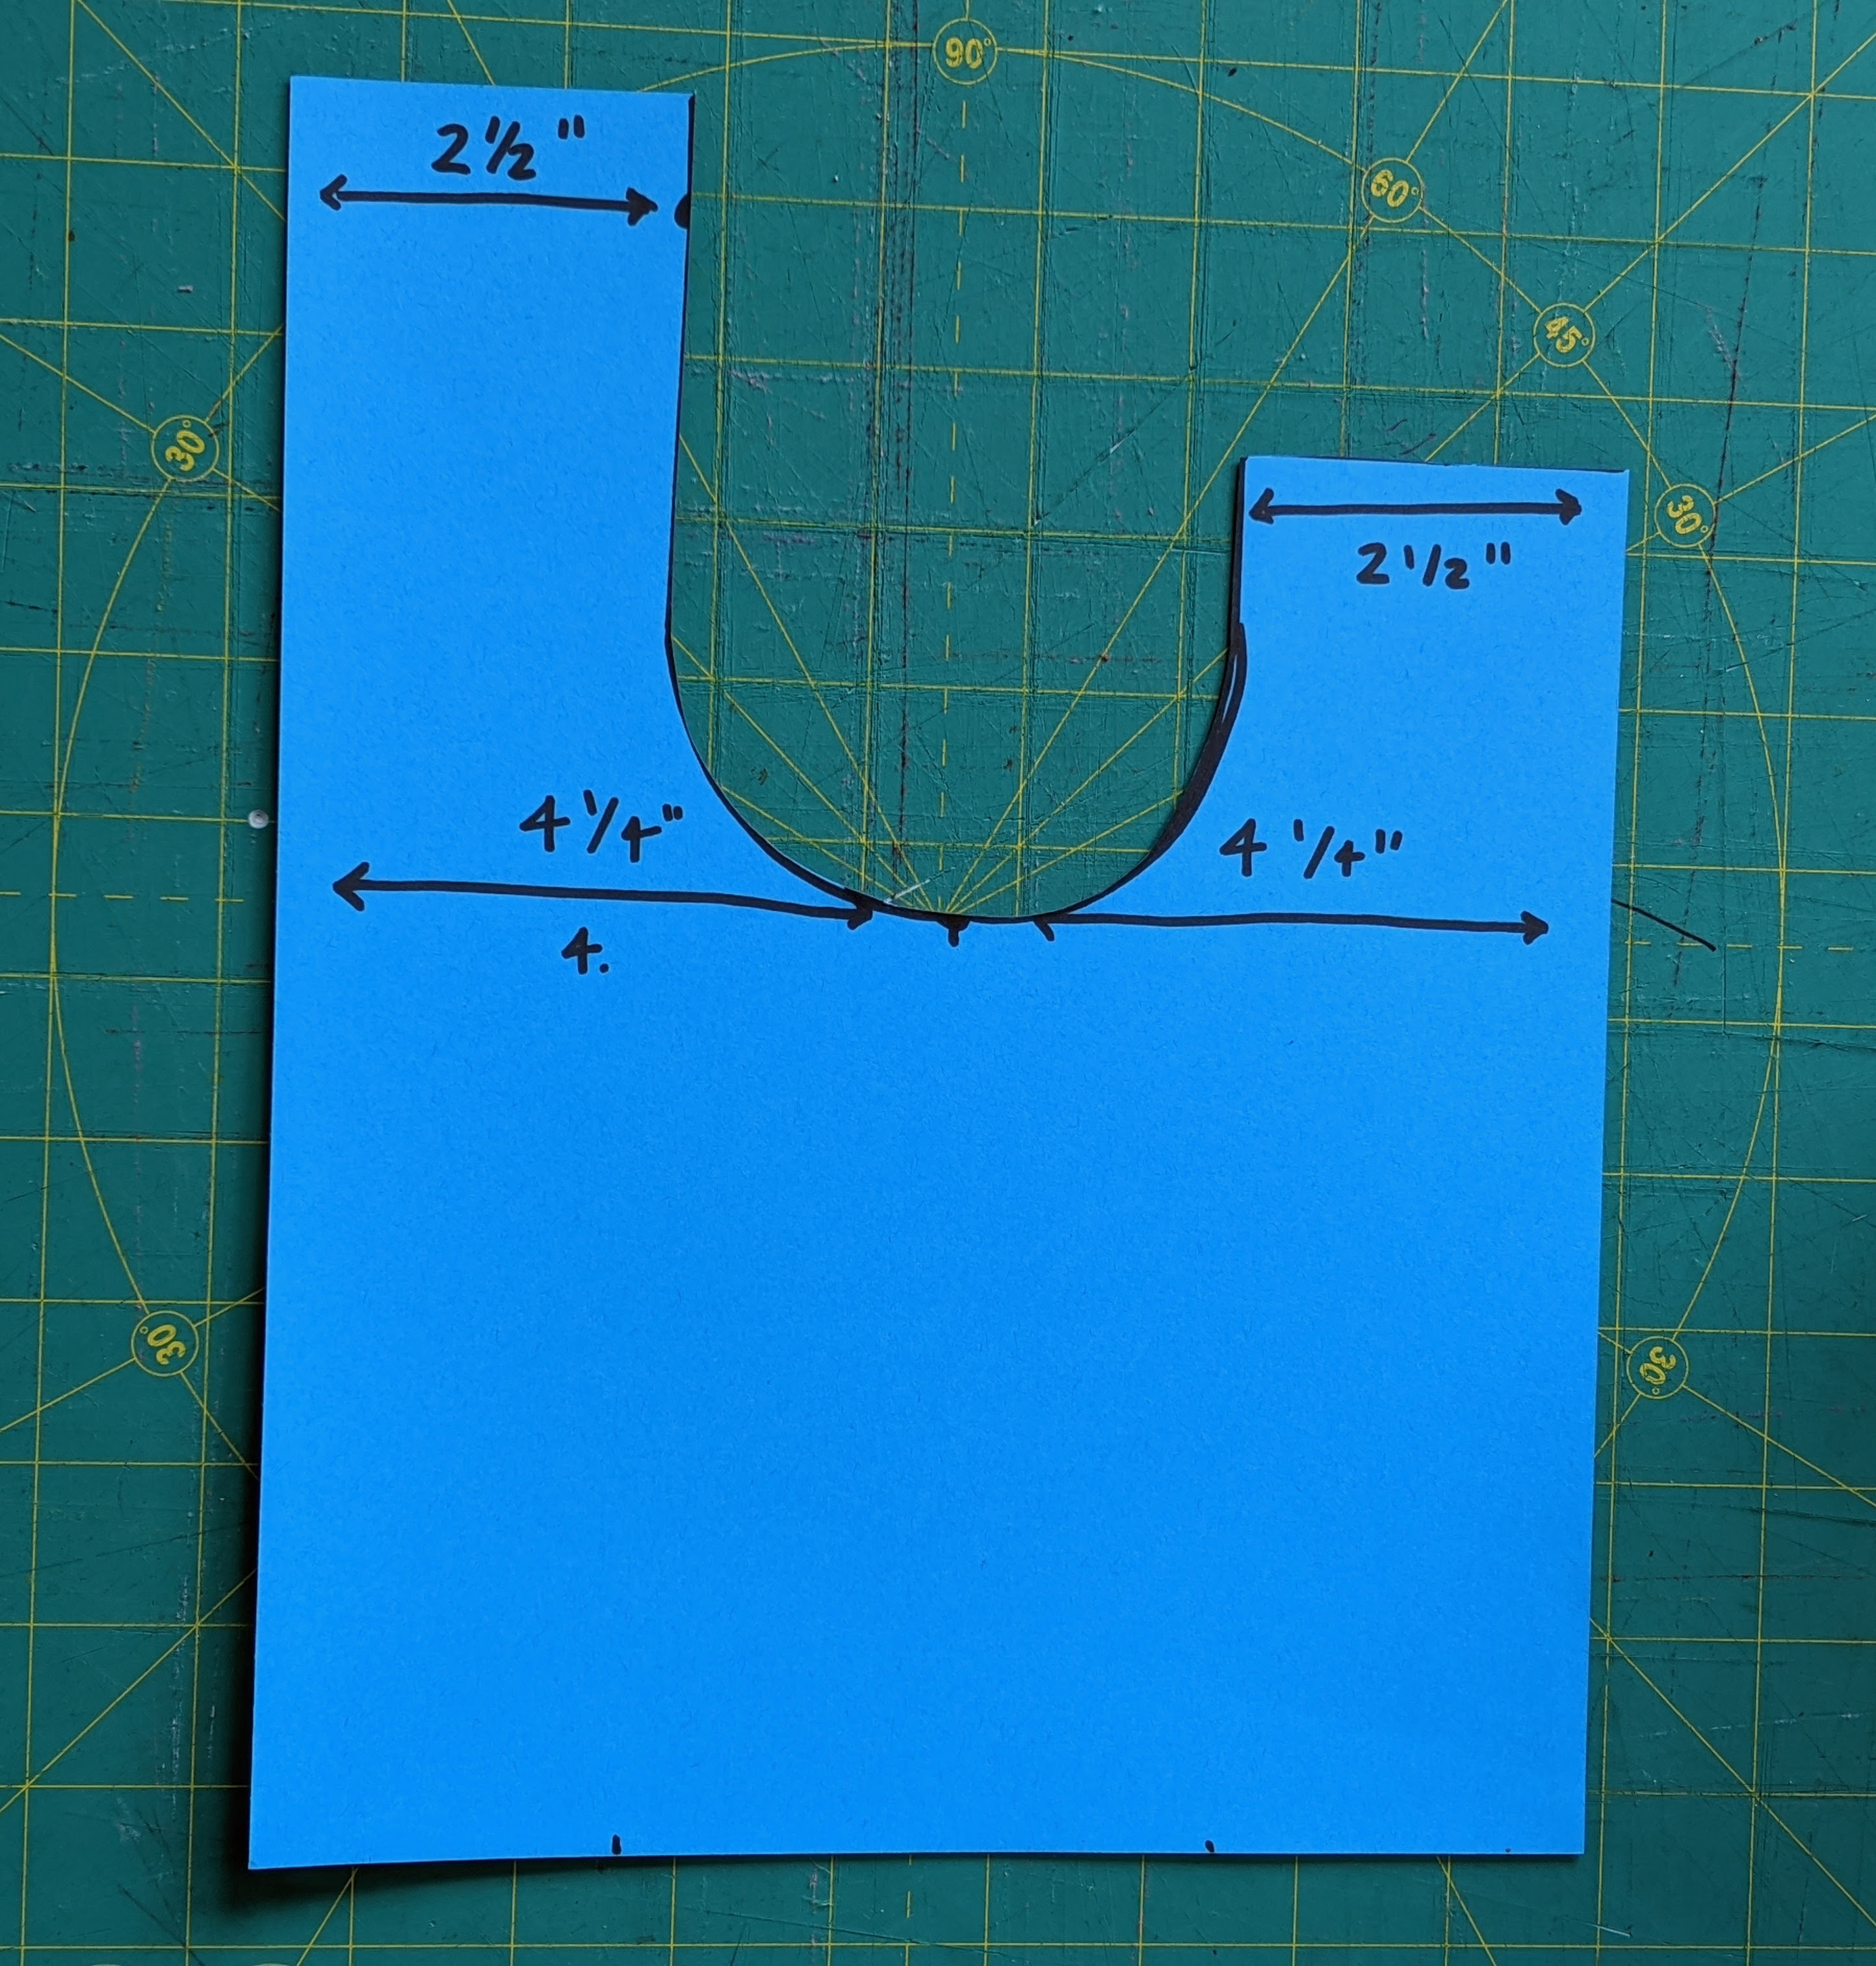
STEP 1
Make the Template
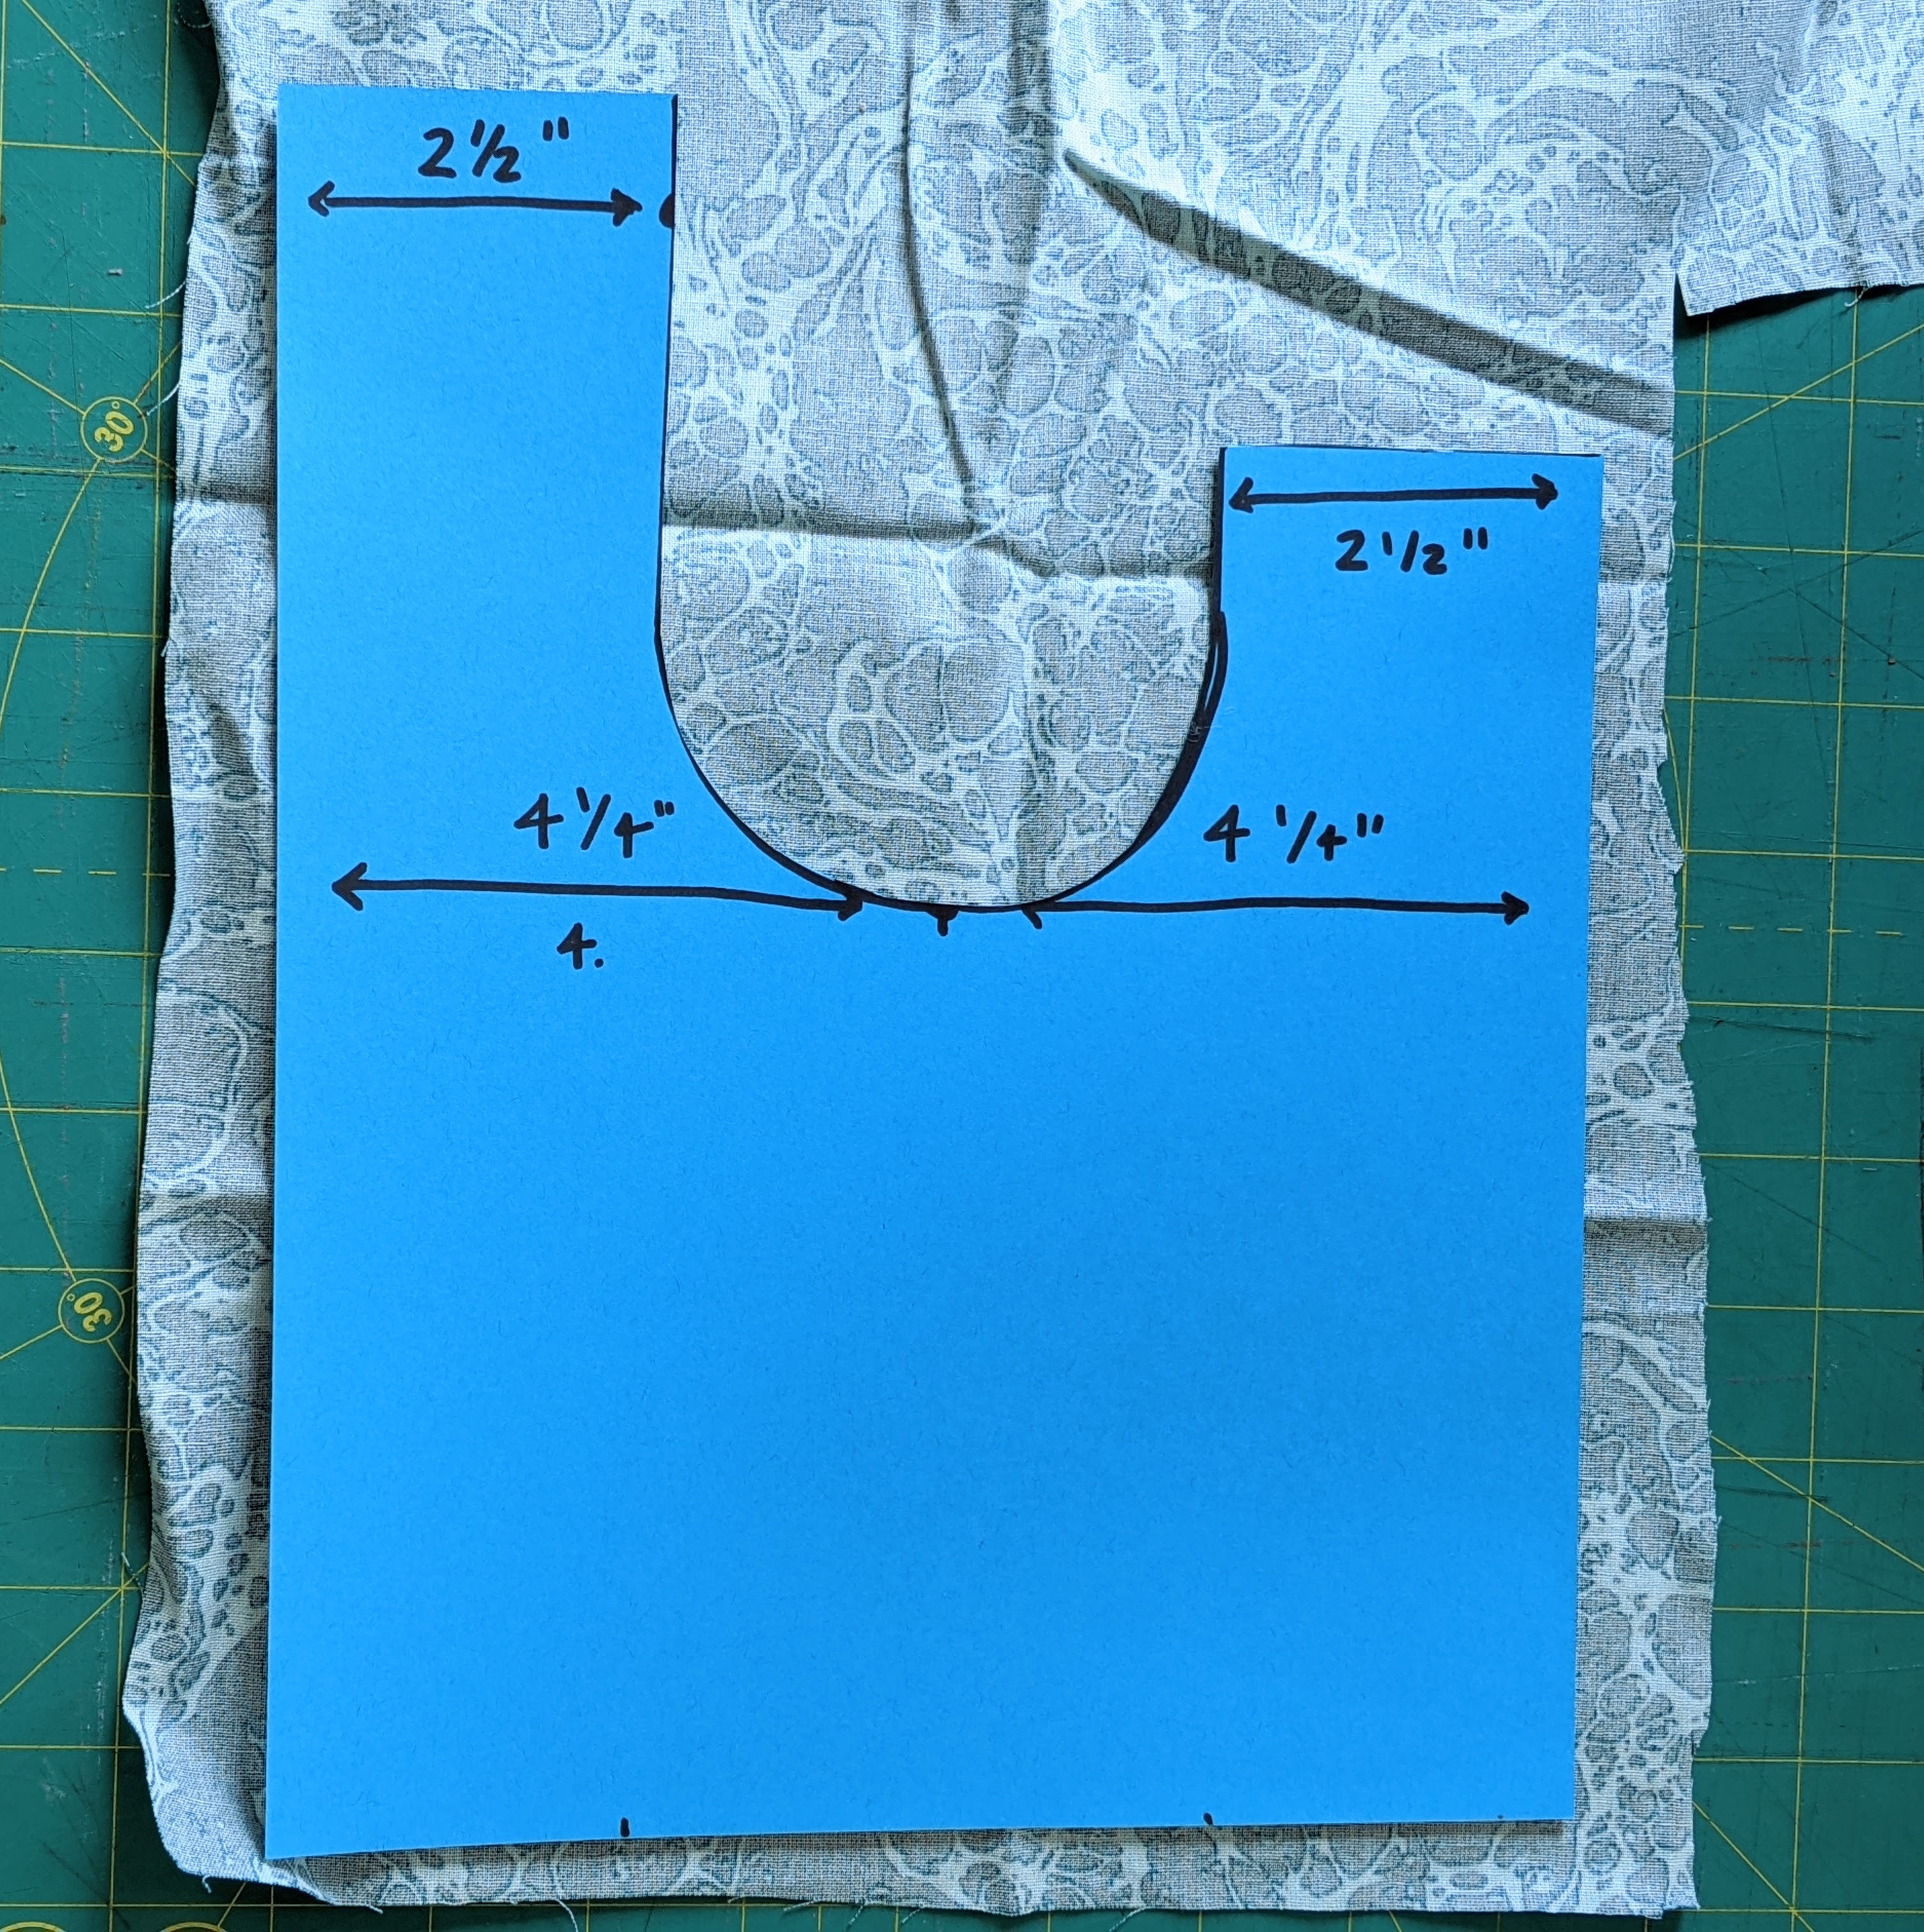
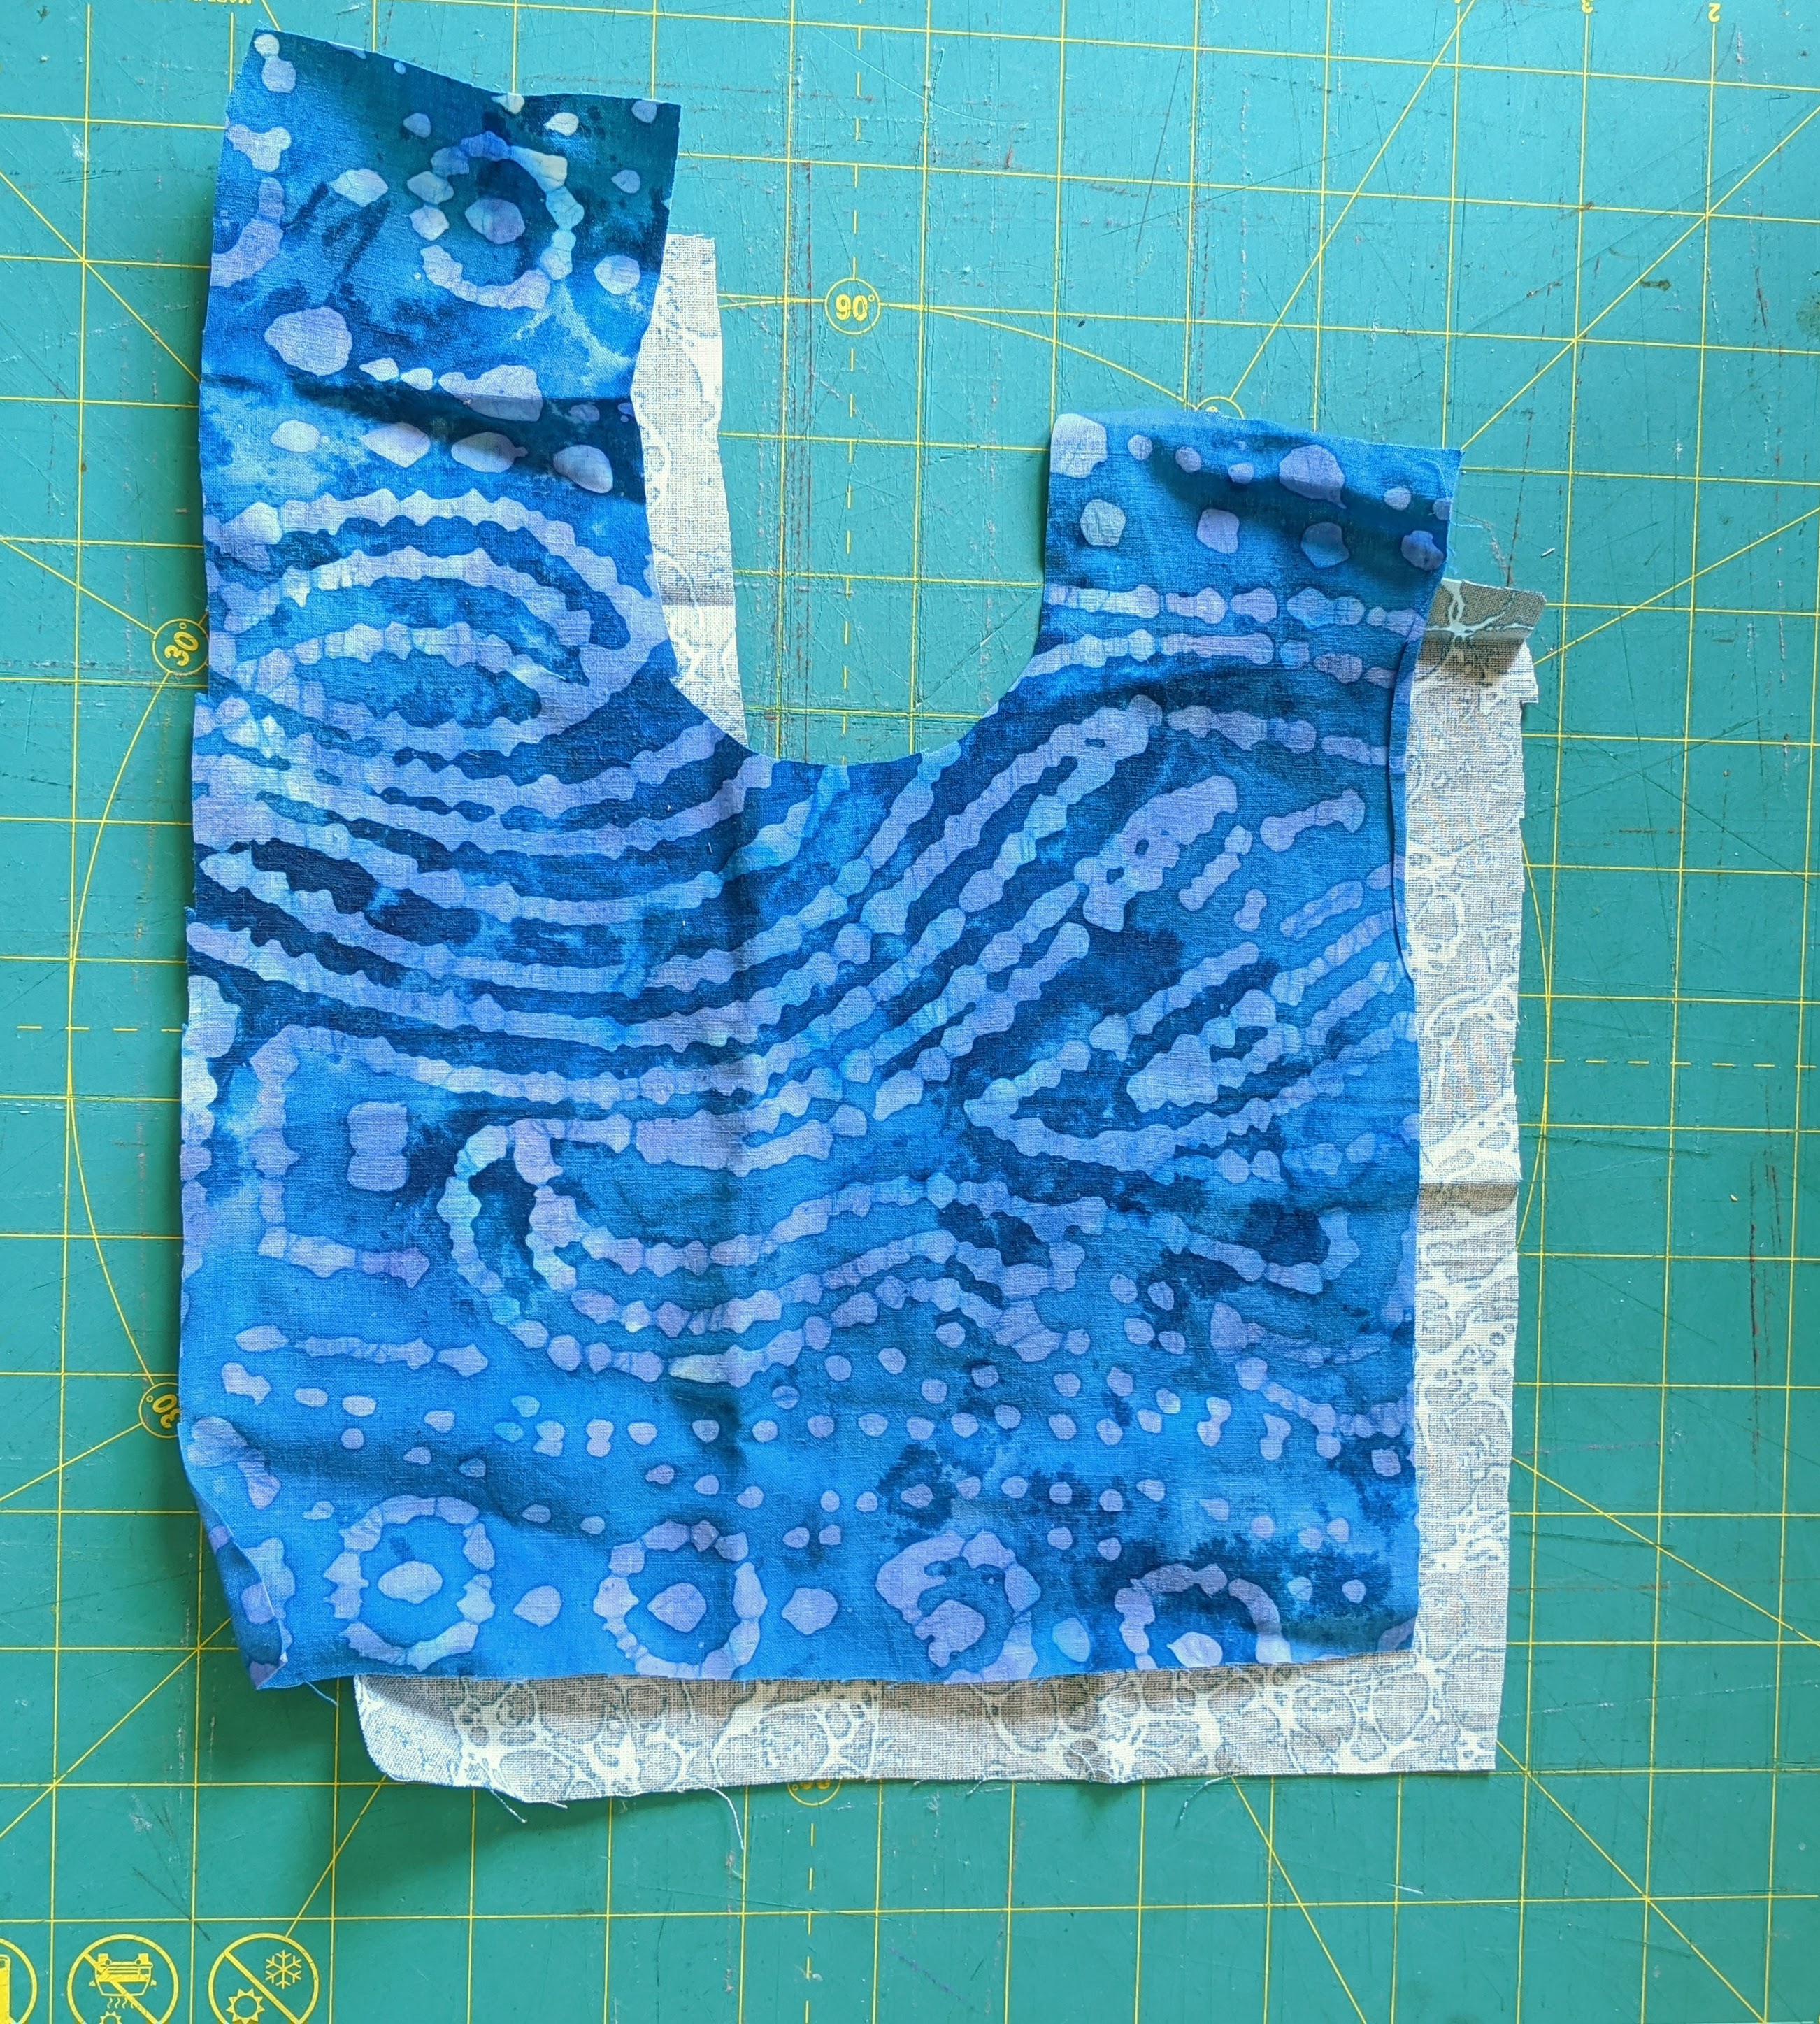
STEP 2
Cut Out the Fabric
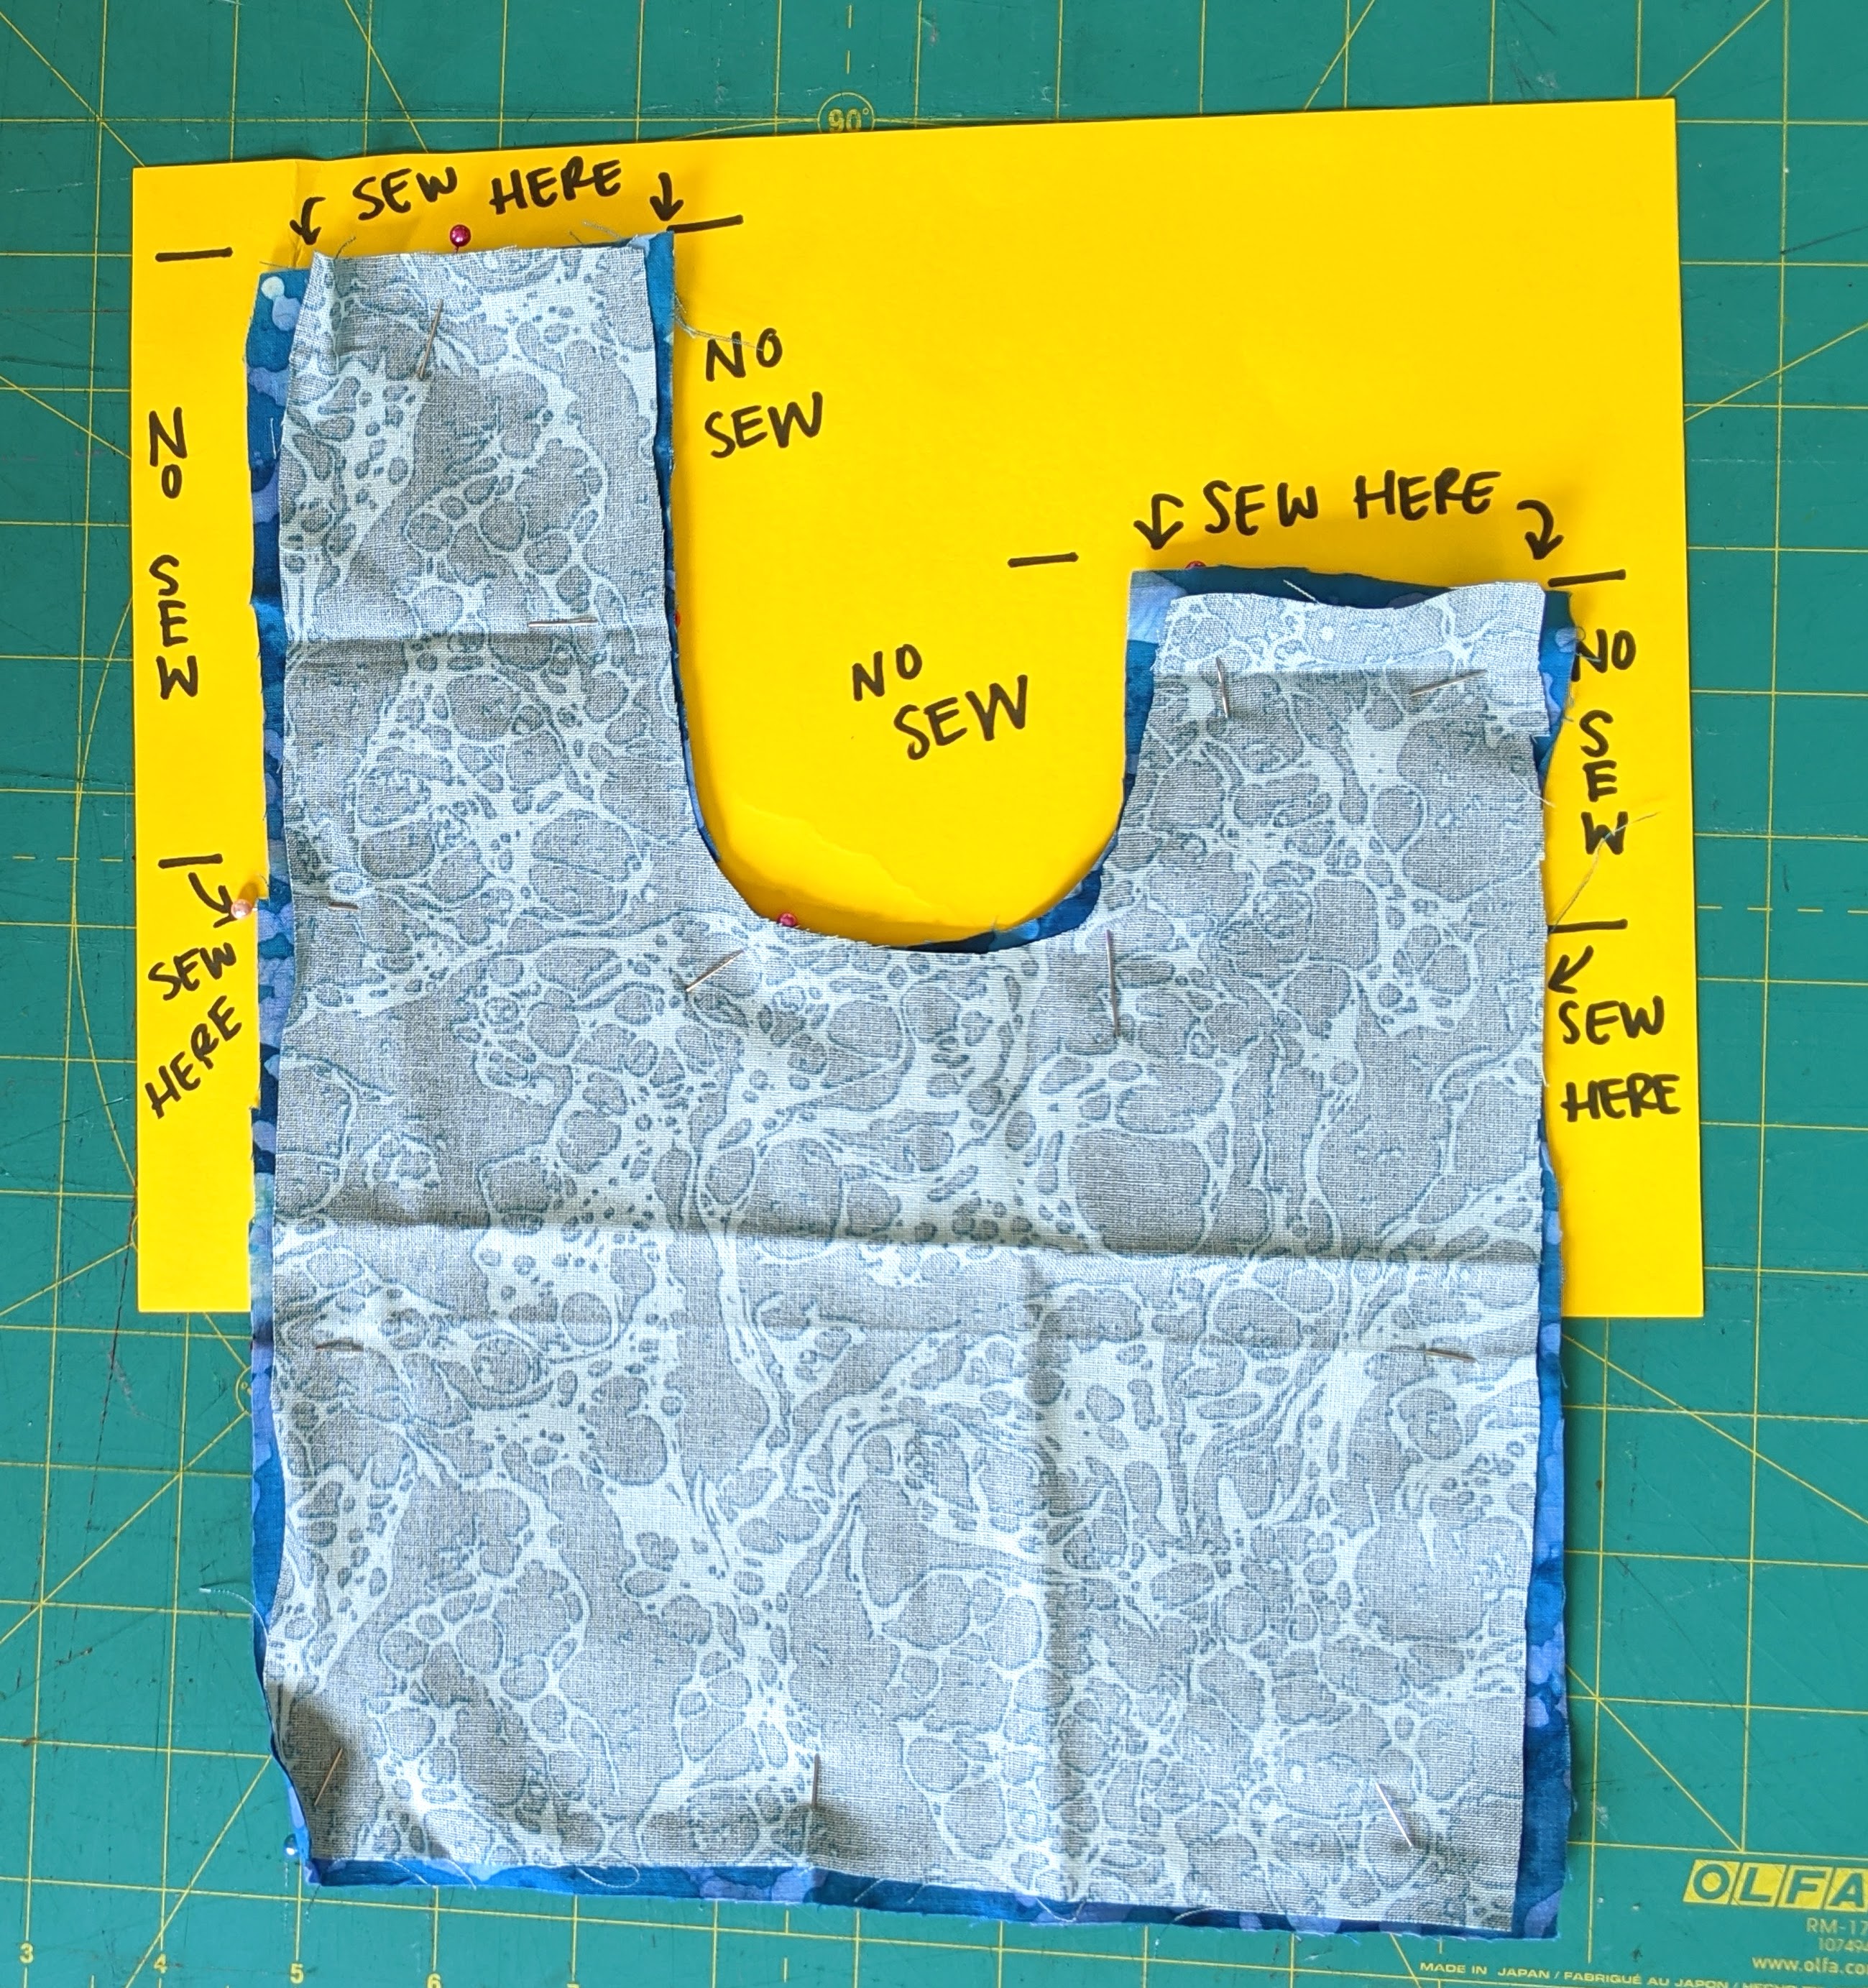
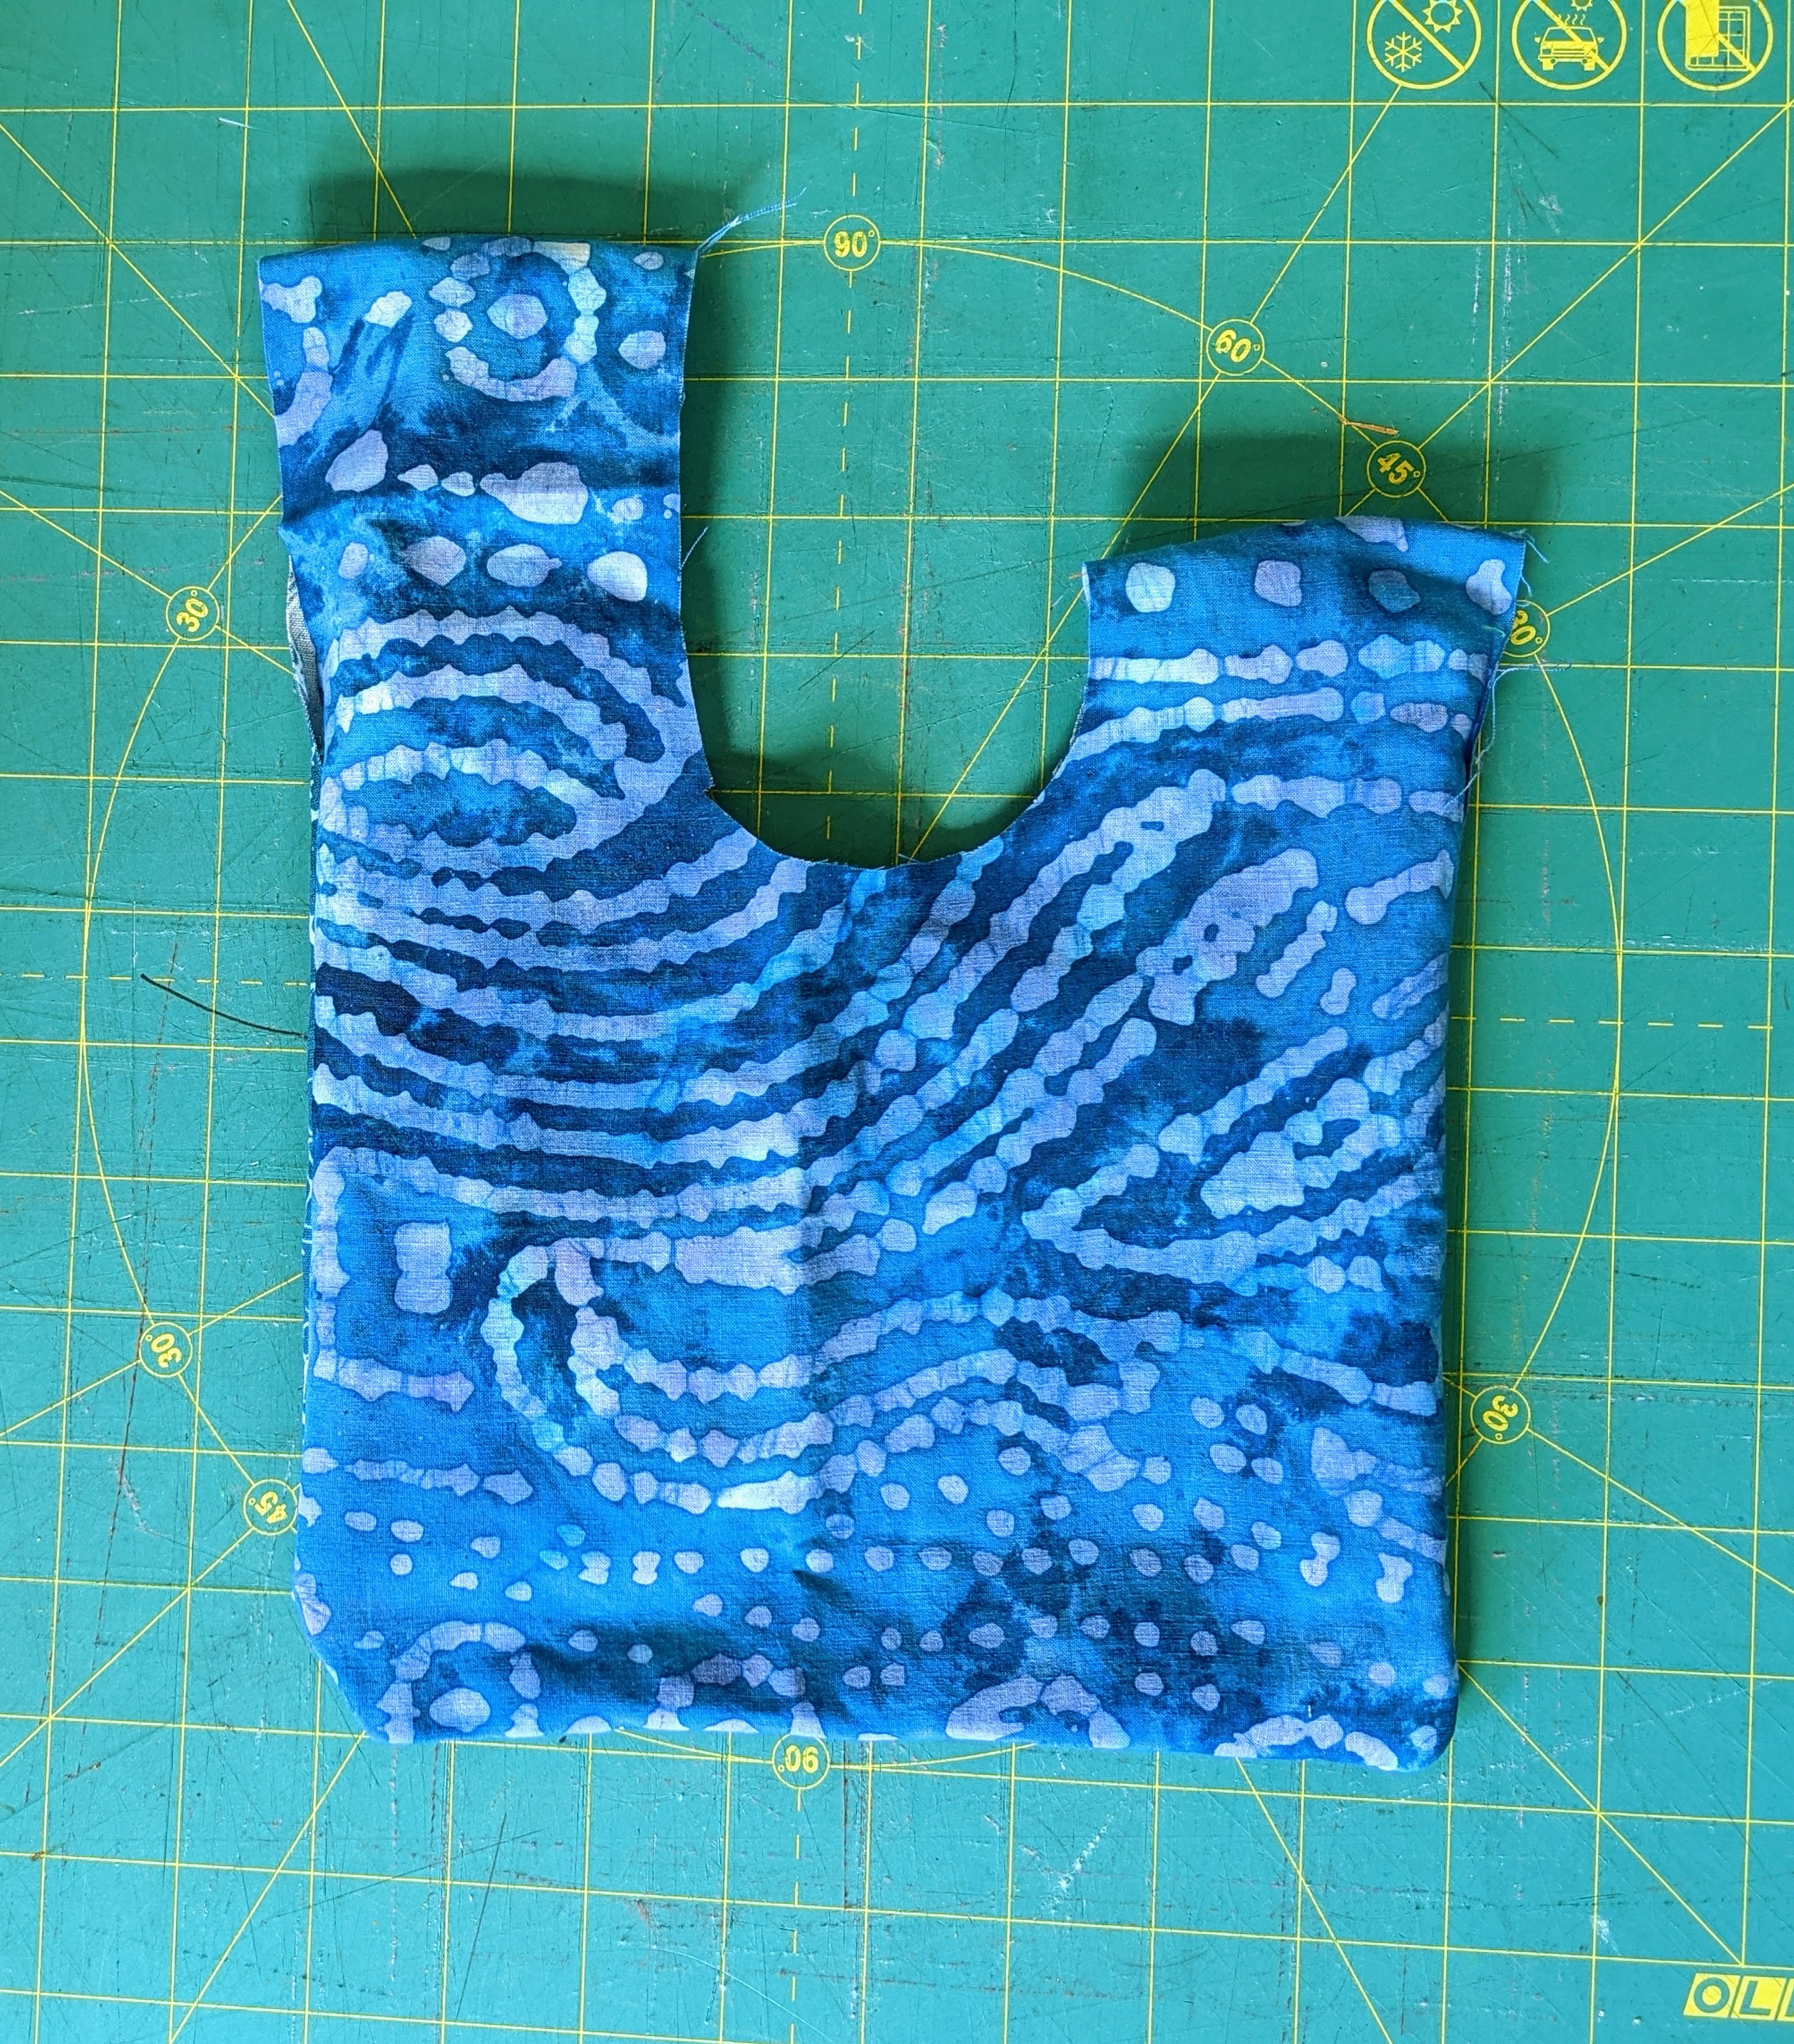
STEP 3
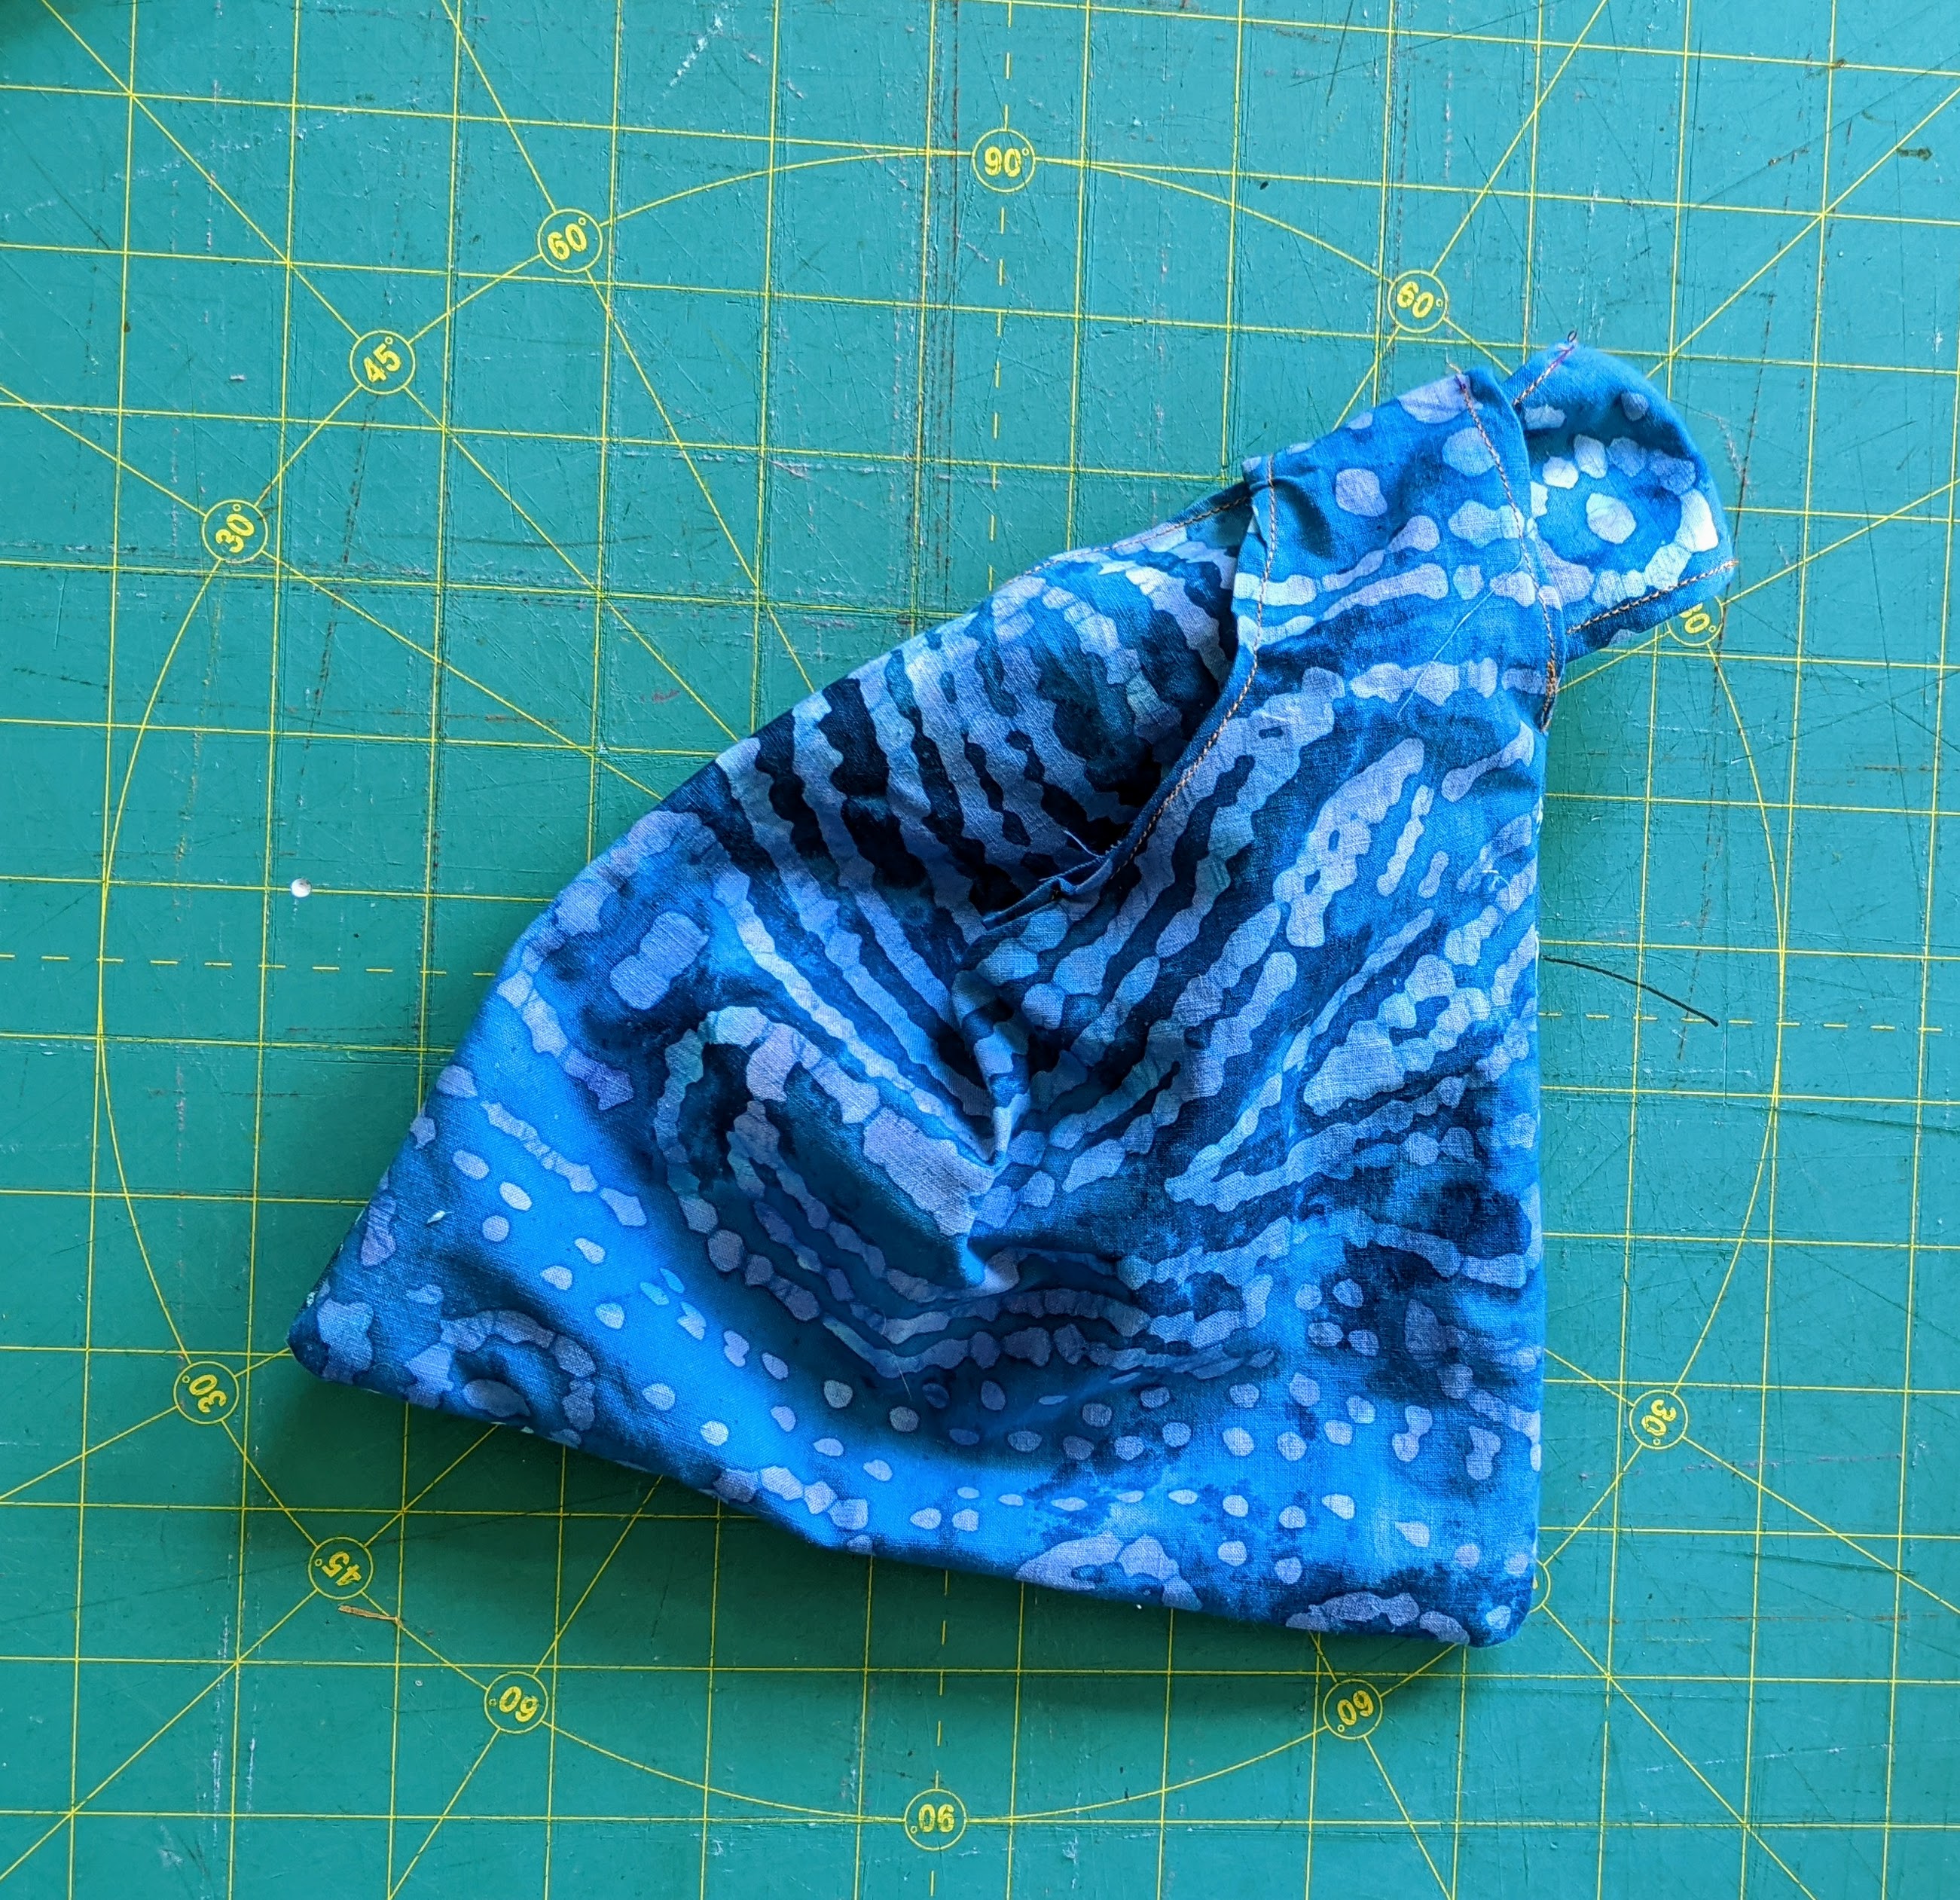
Sew the Pouch
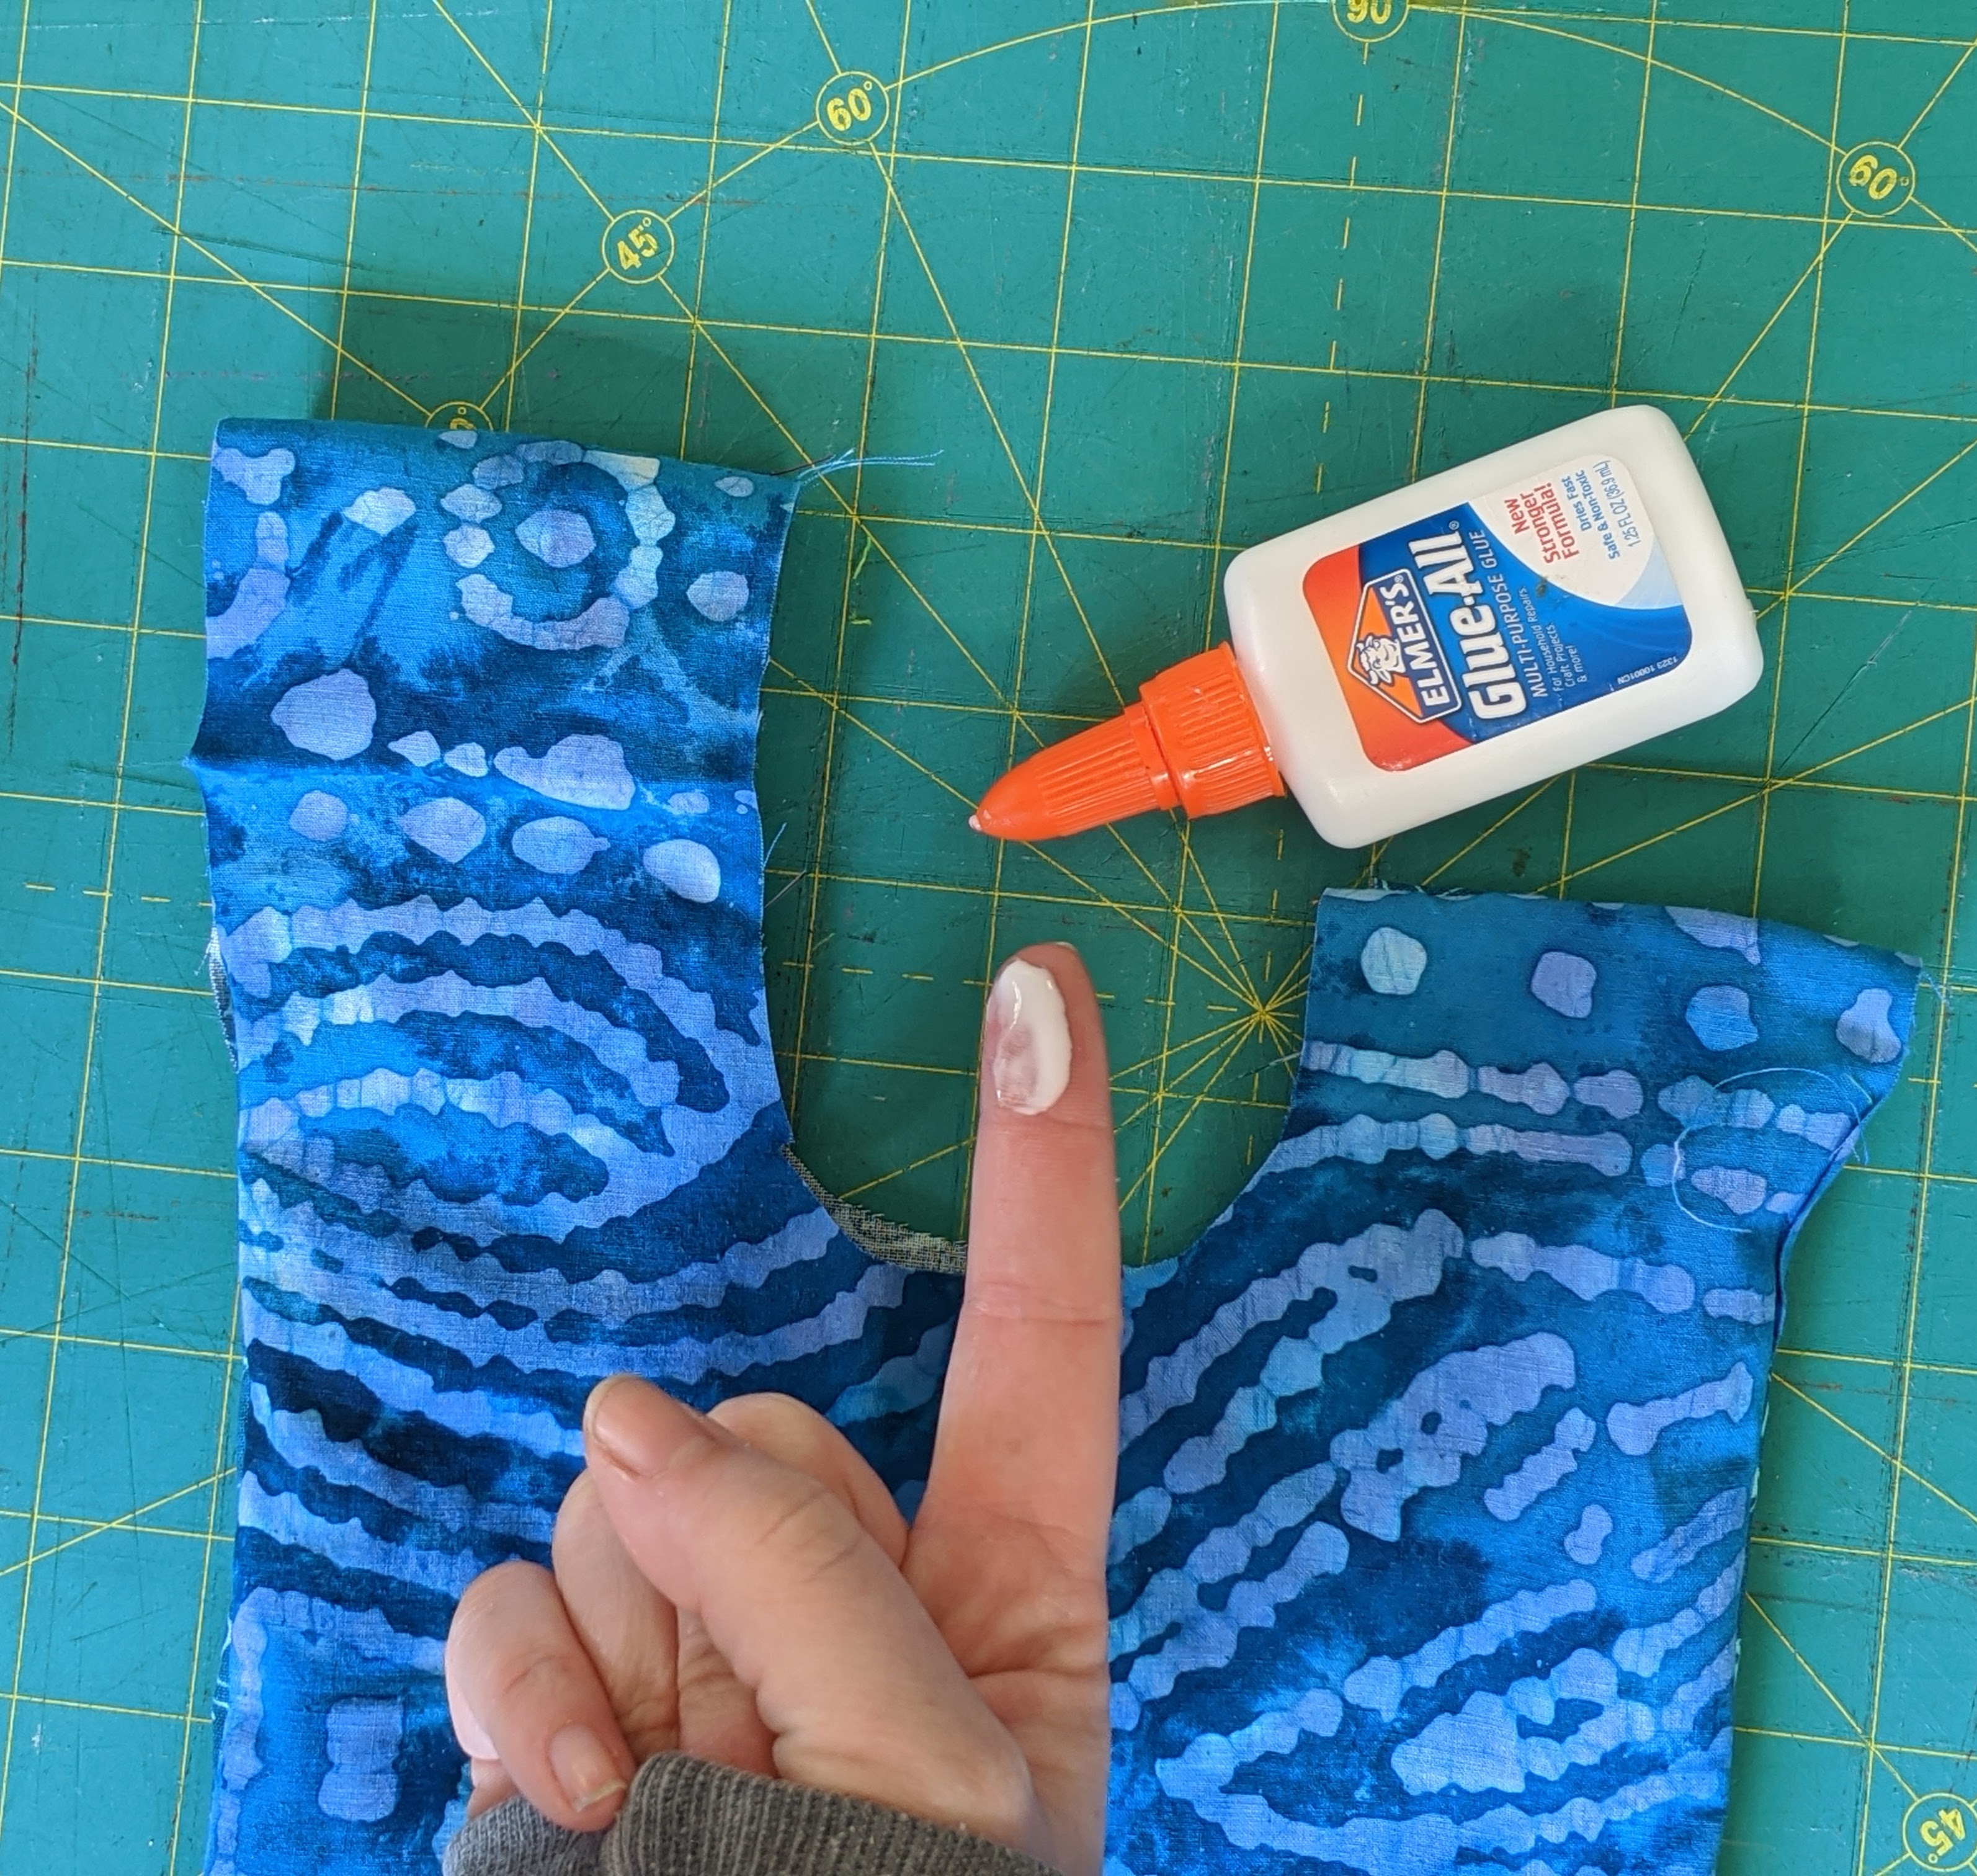
STEP 4
Finish Edges (Fraying Fabric)
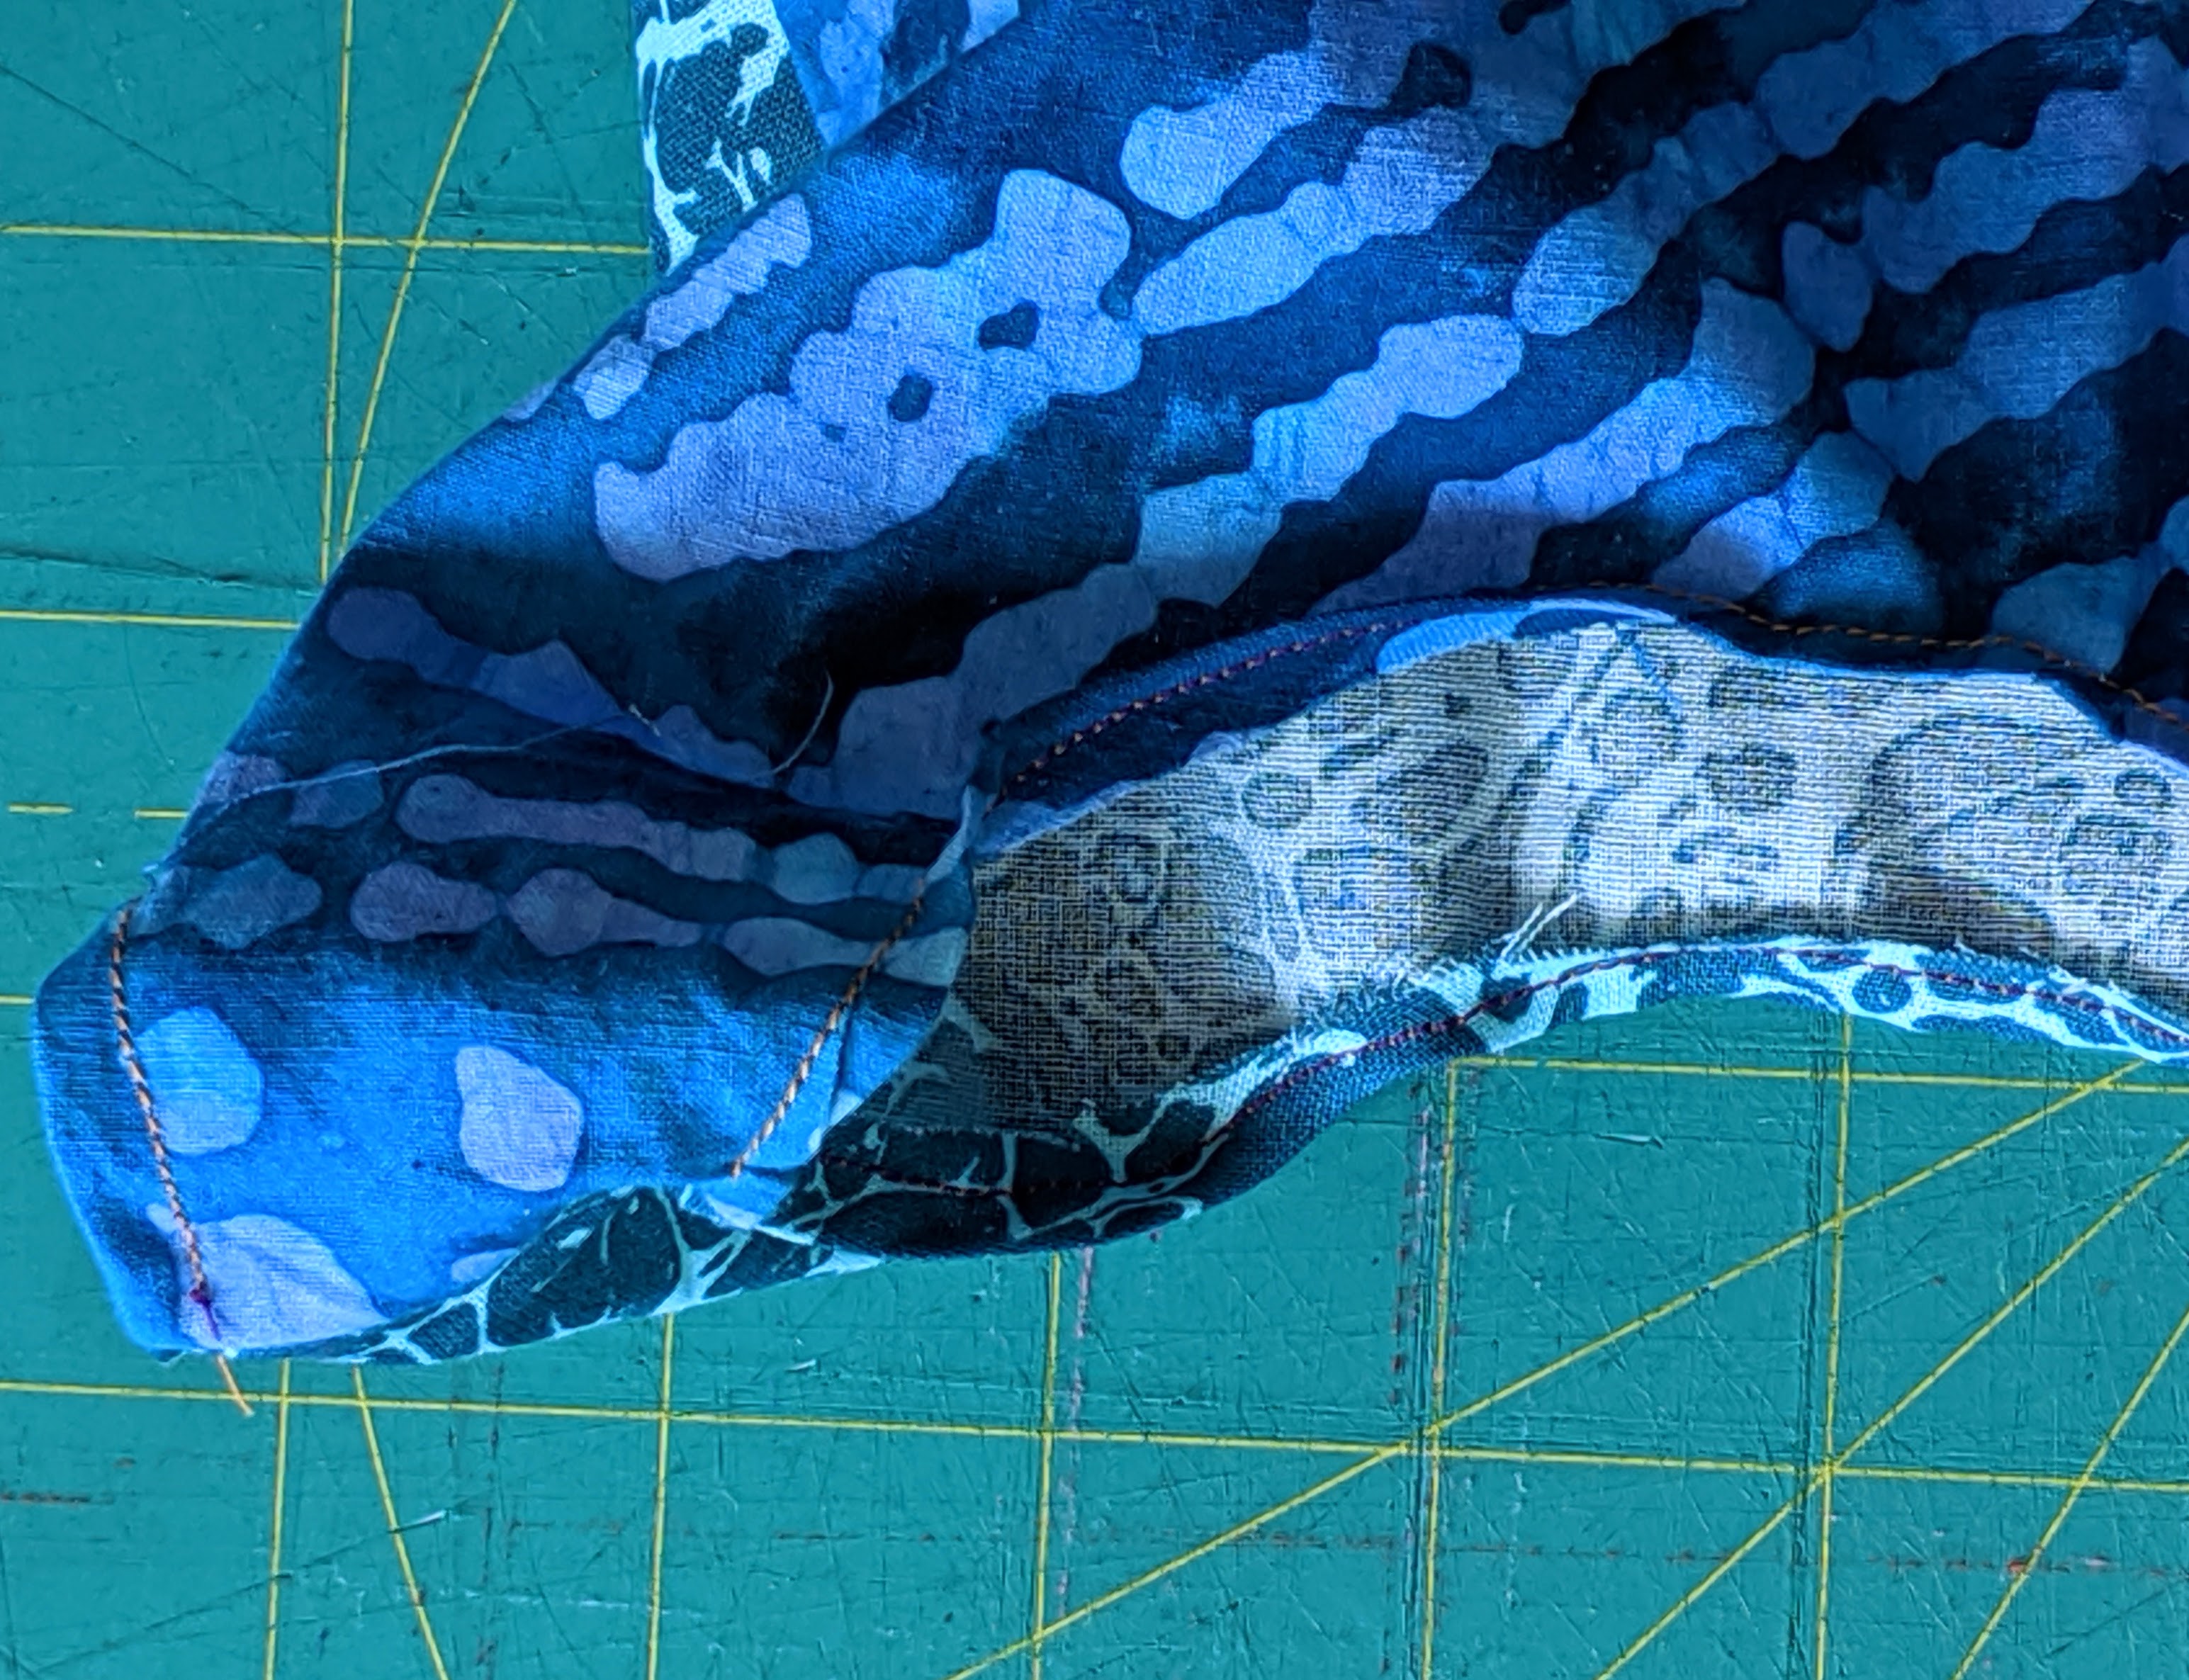
STEP 5
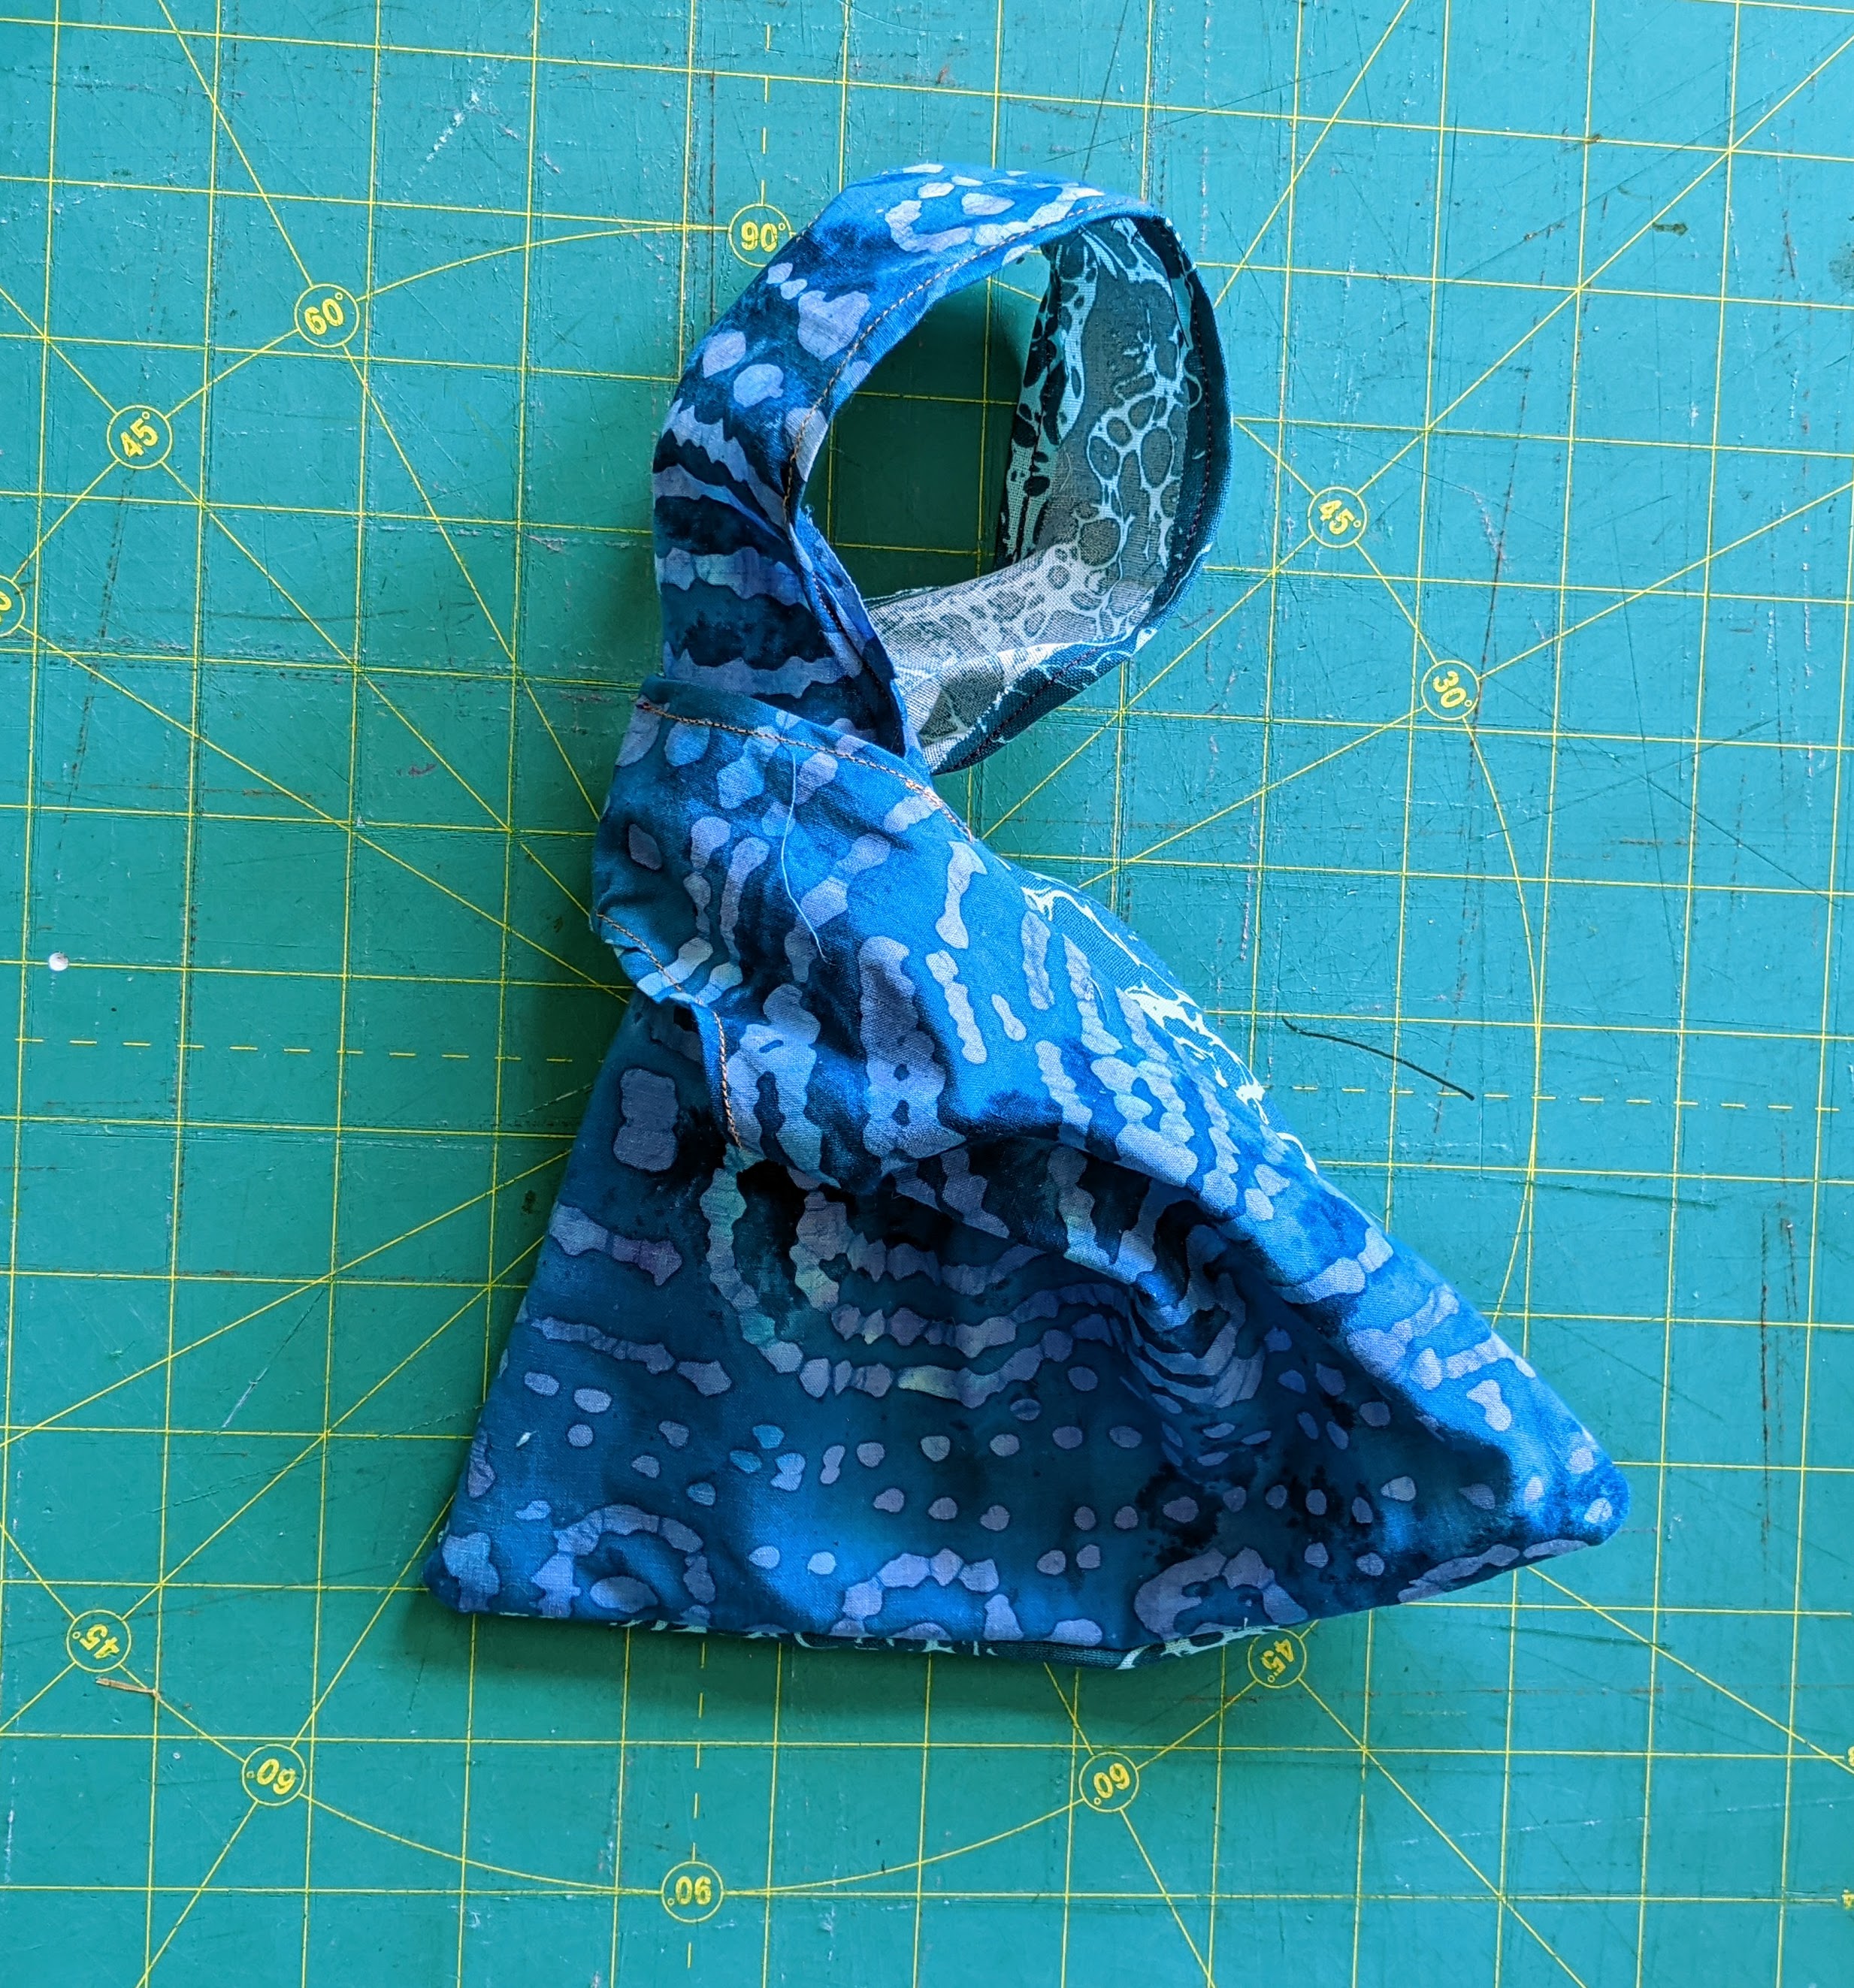
Close your Bag
WHAT'S NEXT?
Check out more projects from the Maker Studio on our blog: https://themakerstudio.tumblr.com/
Please Note
Your safety is your own responsibility, including proper use of equipment and safety gear, and determining whether you have adequate skill and experience. Power tools, electricity, and other resources used for these projects are dangerous, unless used properly and with adequate precautions, including safety gear and adult supervision. Some illustrative photos do not depict safety precautions or equipment, in order to show the project steps more clearly. Use of the instructions and suggestions found in Maker Camp is at your own risk. Maker Media, Inc., disclaims all responsibility for any resulting damage, injury, or expense.
